Setup and ConfigurationBrowsers
GoLogin
This guide will help you configure a Geonode proxy in the GoLogin browser.
Prerequisites: Get Proxy Credentials from Geonode
Before setting up a proxy, first, retrieve your proxy credentials from the Geonode dashboard.
Follow this guide:
How to Obtain Proxy Server Information
Setting Up a Proxy in GoLogin
Install GoLogin
- Go to the GoLogin Download Page.
- Download the version for your operating system.
- Install the software and create an account.
Create a New Profile
-
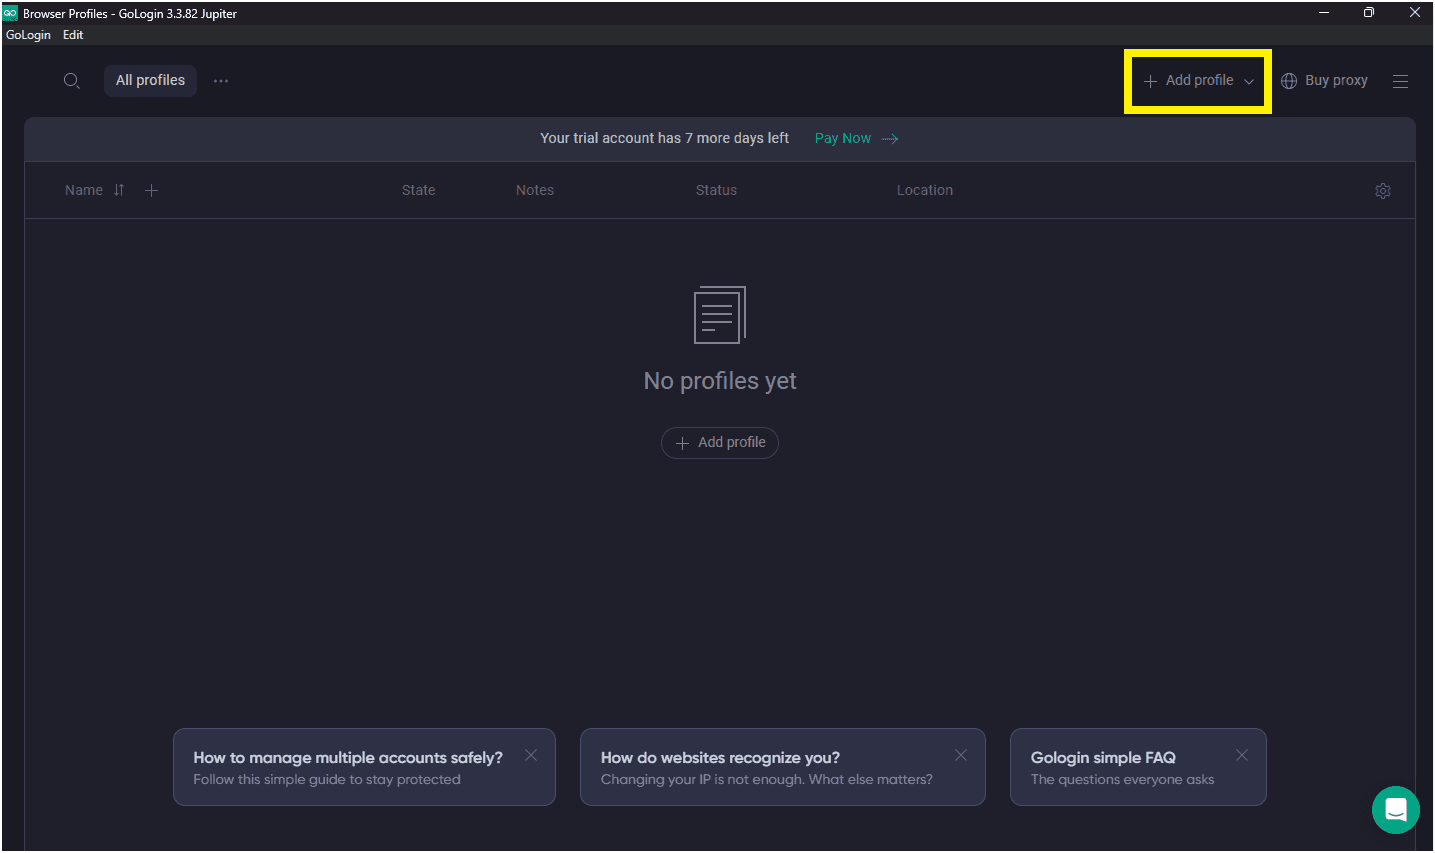
Open GoLogin and click Add Profile.
-
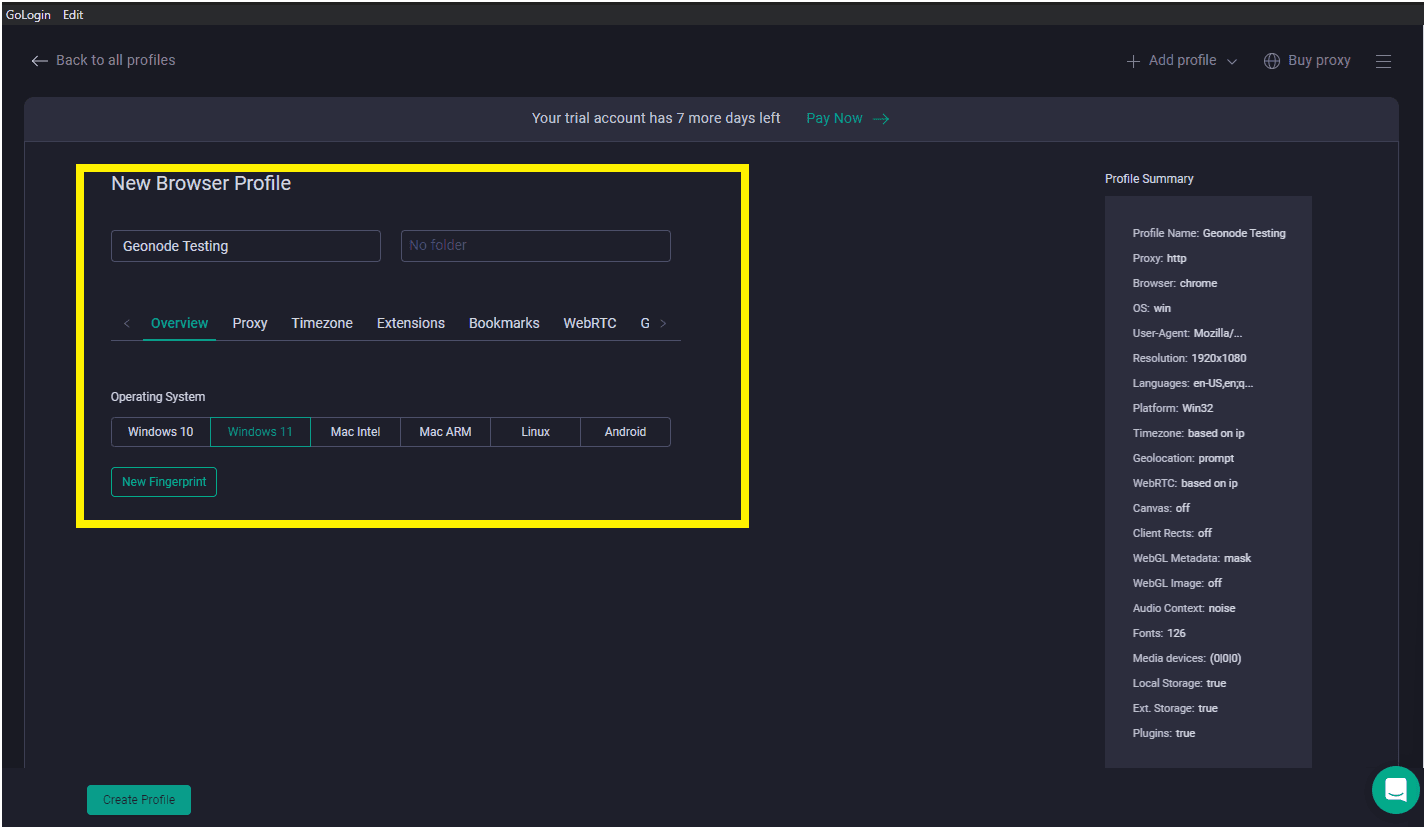
Enter the required details:
- Profile name
- Operating system
-
(Optional) Randomize the fingerprint for extra security.
-
Review your browser details on the right.
Add Proxy Details
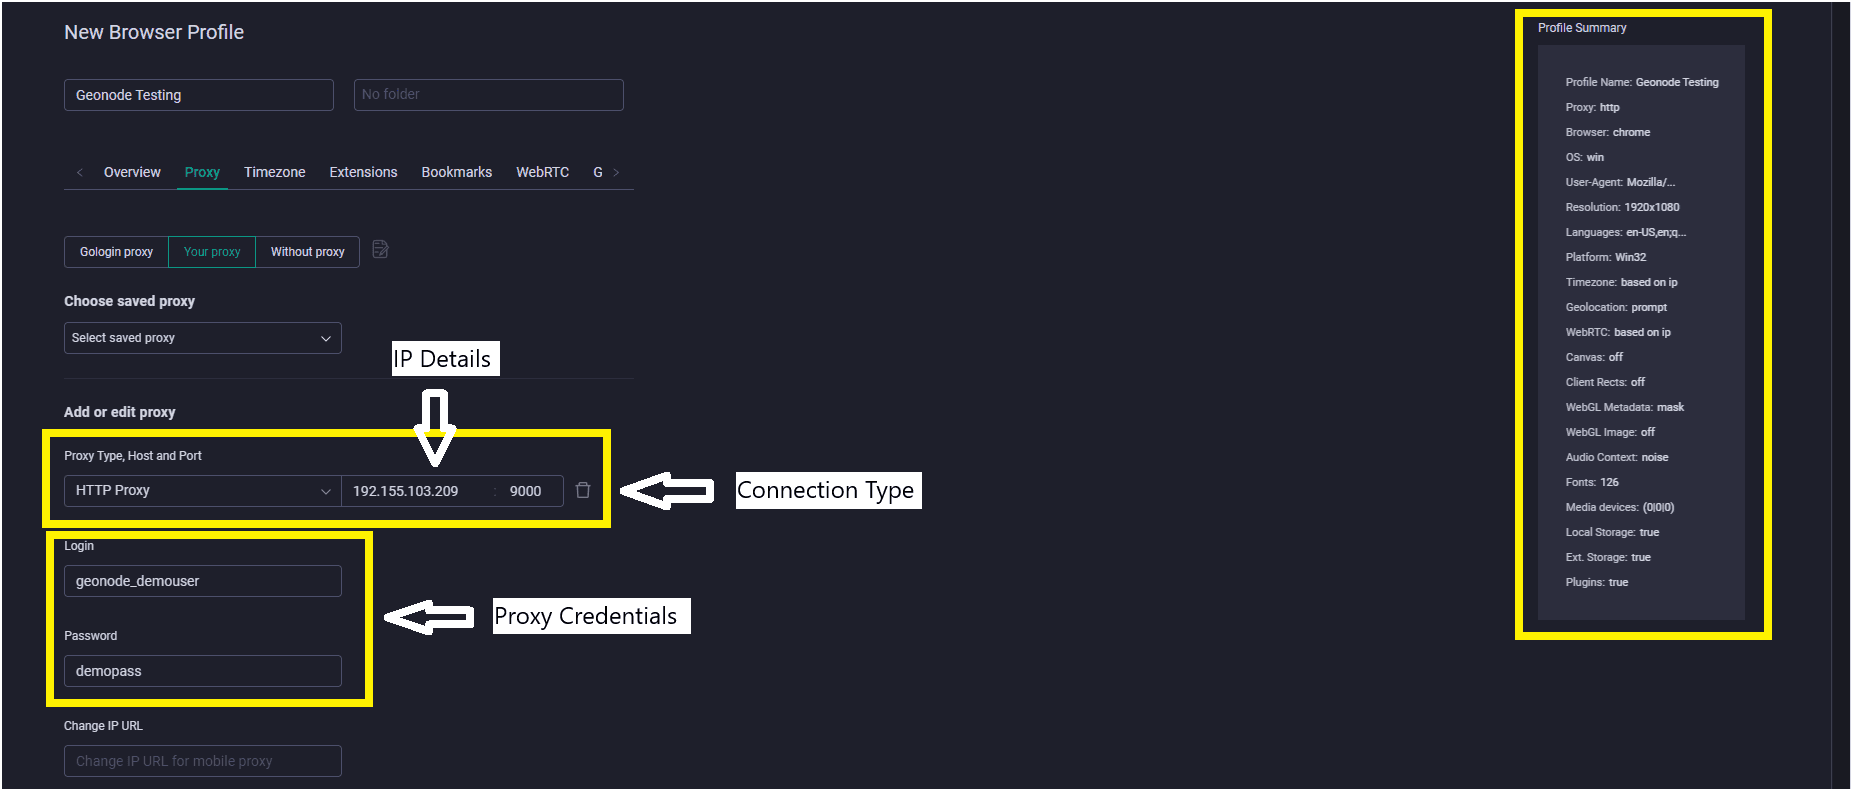
- Go to the Proxy tab.
- Choose the connection type. For this guide, select HTTP.
- Enter your proxy credentials:
- Proxy (IP:Port)
- Username
- Password
- Click Create Profile to save the settings.
Test the Proxy Connection
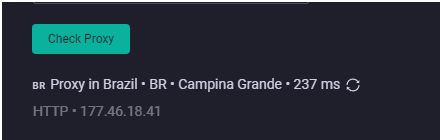
- Click Check Proxy to verify the connection.
- If successful, the proxy will show as active.
Launch the Profile
-
Once created, the profile will appear in your list.
- If the proxy displays a location, it means it’s active.
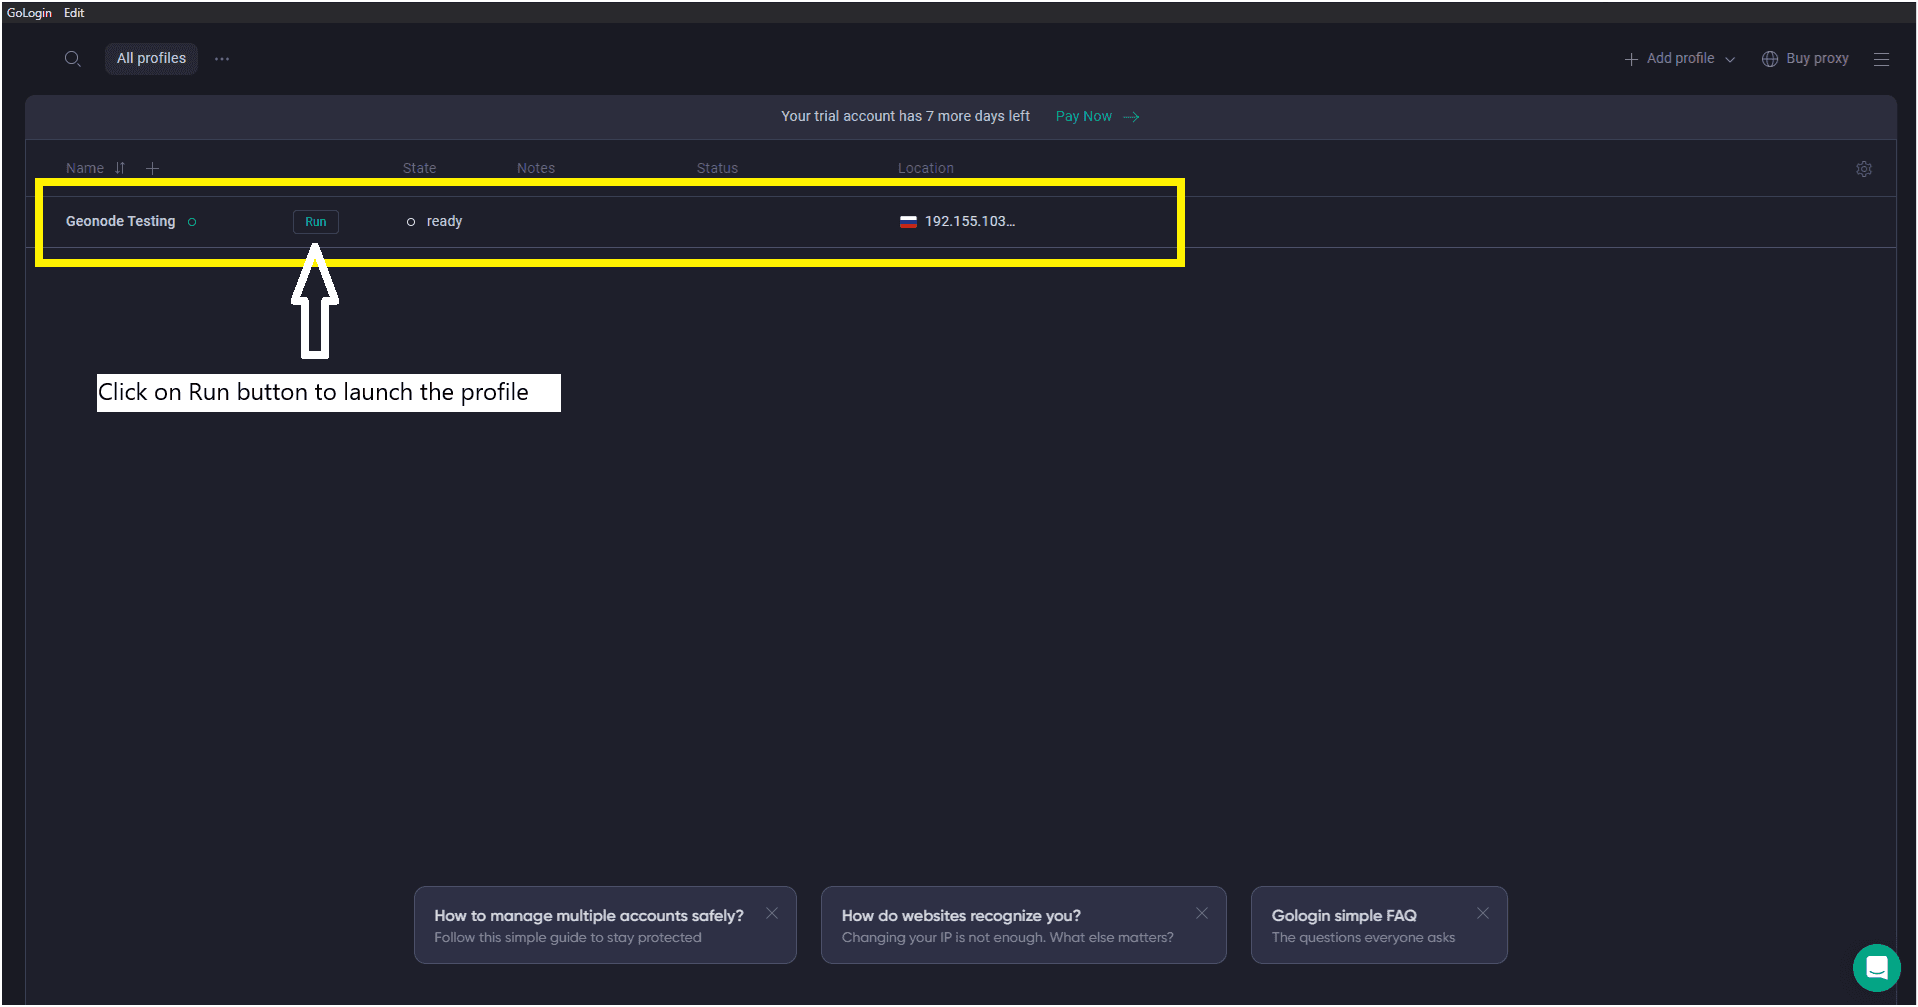
- If the proxy displays a location, it means it’s active.
-
Click Start to launch the browser with your configured proxy.
-
Visit
http://ip-api.com/jsonto verify your IP and proxy location.
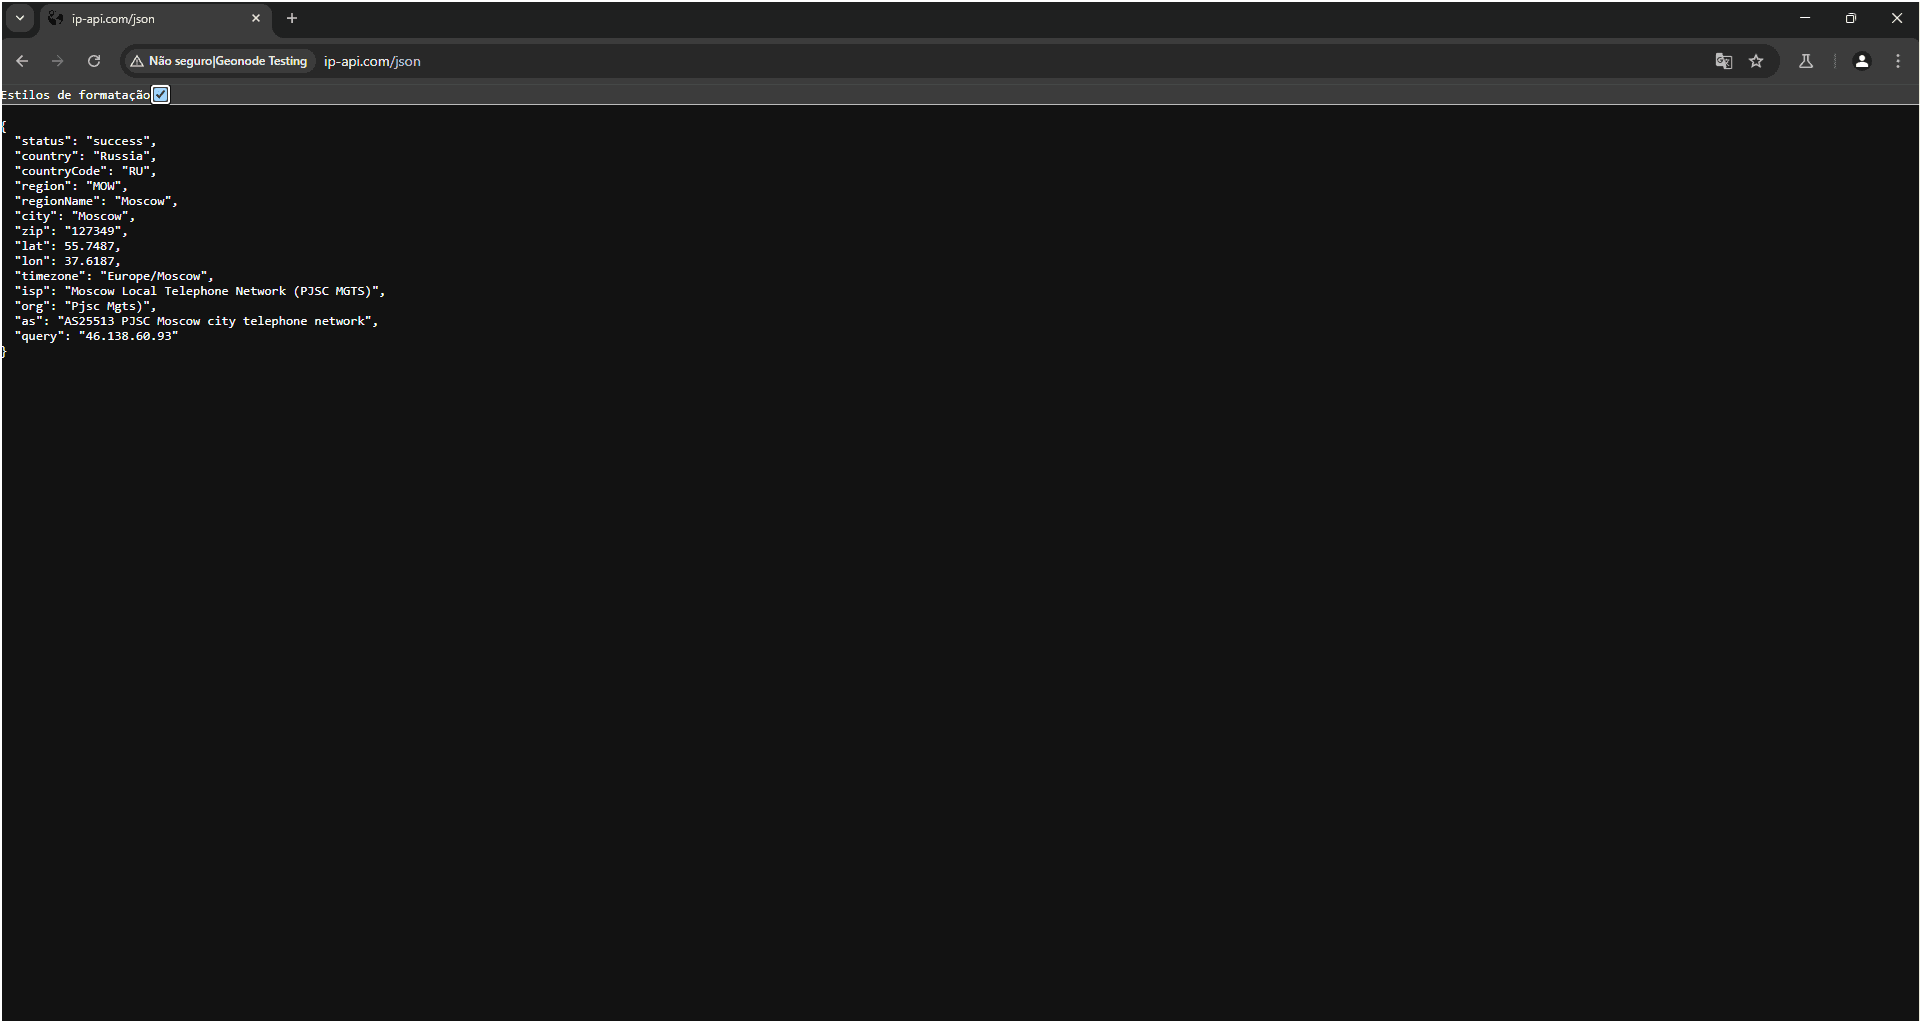
Your Geonode proxy is now successfully configured in GoLogin.
If you encounter any issues, refer to the troubleshooting section or Geonode support.
FAQs
Was this page helpful?