This guide will walk you through the steps to create a new sticky session with Geonode.
What are Sticky Proxies?
Sticky proxies are a powerful feature that allows you to maintain the same IP address over a longer period, making them ideal for tasks requiring a stable connection, such as managing social media accounts, web scraping, or conducting long-term data collection. ➡️ Follow this guide to learn more about Sticky Session Proxies: What are Sticky Session Proxies?Geonode’s Sticky Proxies Range
Geonode provides specific port ranges for sticky sessions to ensure a stable IP address over time, via both HTTP and SOCKS5 protocols. The following ports are used for sticky sessions:- HTTP: Ports 10000-10900
- SOCKS5: Ports 12000-12010
How to Create a Sticky Session with Geonode API
Before you can create a sticky session, you need to configure your proxy settings in the Geonode dashboard.1. Configure Your Proxy Settings
- Log in to the Geonode Dashboard.
- Navigate to the Proxies section on the left panel.
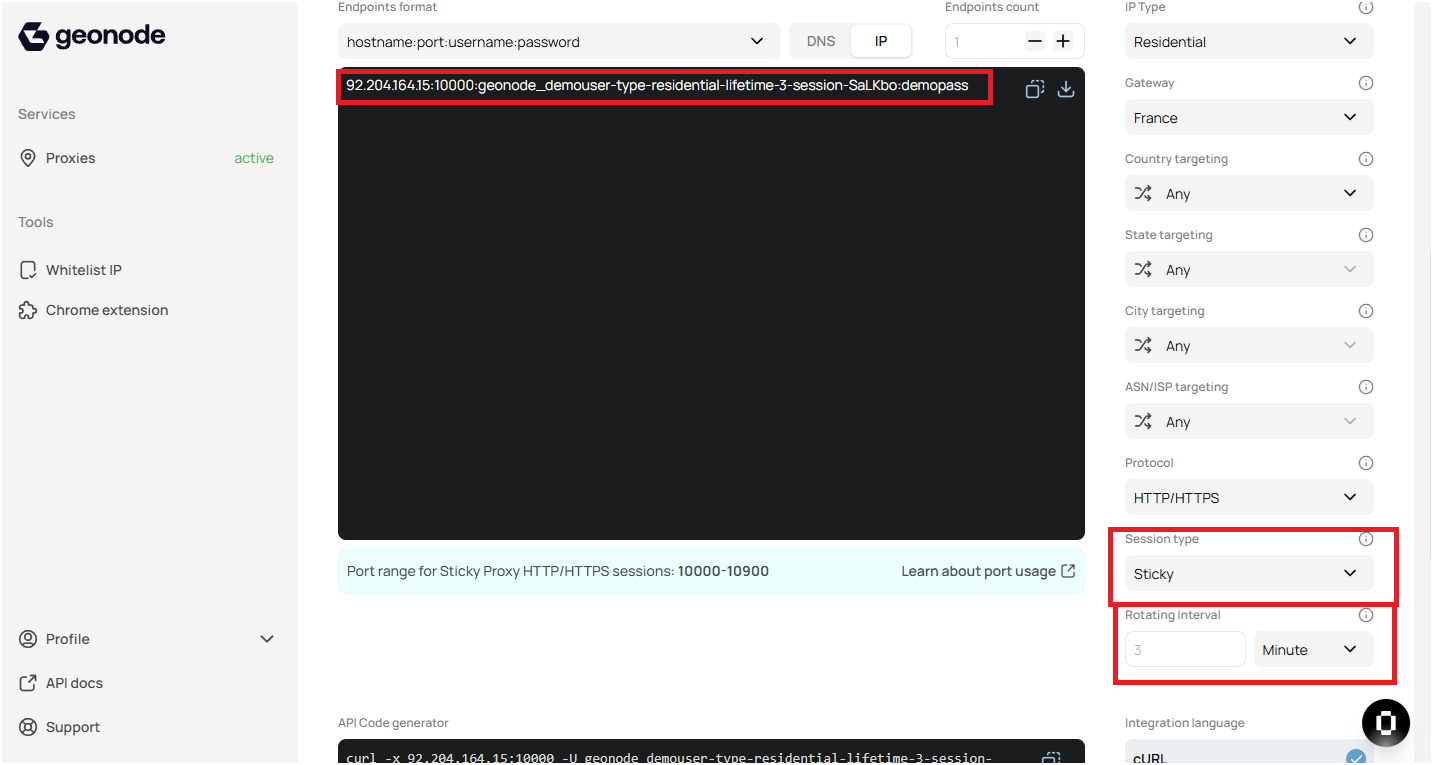
- Select the Session Type as Sticky.
- Choose the rotating time (minimum of 3 minutes for the minute interval and 1 hour for the hourly interval).
-
Leave all other options as default if you have no specific preferences.
Your configuration should look something like this:
- IP Type: Residential
- Gateway: France
- Port Range: HTTP 10000-10900
- Session Type: Sticky Session
-
Once your proxy configuration is ready, copy the proxy endpoint, which will look something like this:
- IP:
92.204.164.15 - Port:
10000 - Username:
geonode_demouser-type-residential-lifetime-3-RAOnwR - Password:
demopass
You will use this configuration to connect to Geonode’s API or any other proxy management tools like Chrome extensions, etc.
2. Calling the Geonode API to Create a Sticky Session
To create a sticky session using Geonode’s API, you need to make a request to the endpoint<ip>:<port> and add the username you created by configuring the proxy from the dashboard.
You can do this using a cURL request like this:
Monitor Proxy Usage
Geonode also provides monitoring tools to track the usage of your proxies. You can check for errors, usage statistics, and ensure that the proxies are working as expected. ➡️ Follow this guide to learn in-depth: How to Check Proxy UsageVerify Proxy Connection
To ensure the proxy is working, check your IP address using an online tool or follow this guide:If you encounter any issues, refer to the troubleshooting section or Geonode support.
FAQs
What is the difference between sticky sessions and rotating proxies?
What is the difference between sticky sessions and rotating proxies?
Sticky sessions maintain the same IP for a longer duration, while rotating proxies assign a new IP with each request.
How long does a sticky session last?
How long does a sticky session last?
The duration of a sticky session depends on the settings you configure, such as the session lifetime (in minutes). You can specify a session length when creating the session.
Can I change the session parameters after creating the sticky session?
Can I change the session parameters after creating the sticky session?
Once a sticky session is created, the parameters like IP address and session type cannot be changed. However, you can release the session and create a new one with different parameters.