This guide will help you understand how to configure session lifetime to control how long each proxy session remains active.
What is Session Lifetime?
Session lifetime defines how long a proxy connection remains active before resetting. Setting the right session duration helps in:- Maintaining session consistency for account management.
- Optimizing proxy usage for scraping, automation, and security.
- Preventing detection by avoiding frequent IP changes.
Ways to Configure Session Lifetime
There are two methods to set session lifetime in Geonode:- Using the Dashboard (covered in this guide).
- Using an API request → Set Session Lifetime via API.
Step 1: Select a Service or Product
Ensure you have an*active Residential Proxies plan in your Geonode account.- From the side navigation menu, click on Proxy Configuration to begin configuring your proxies.
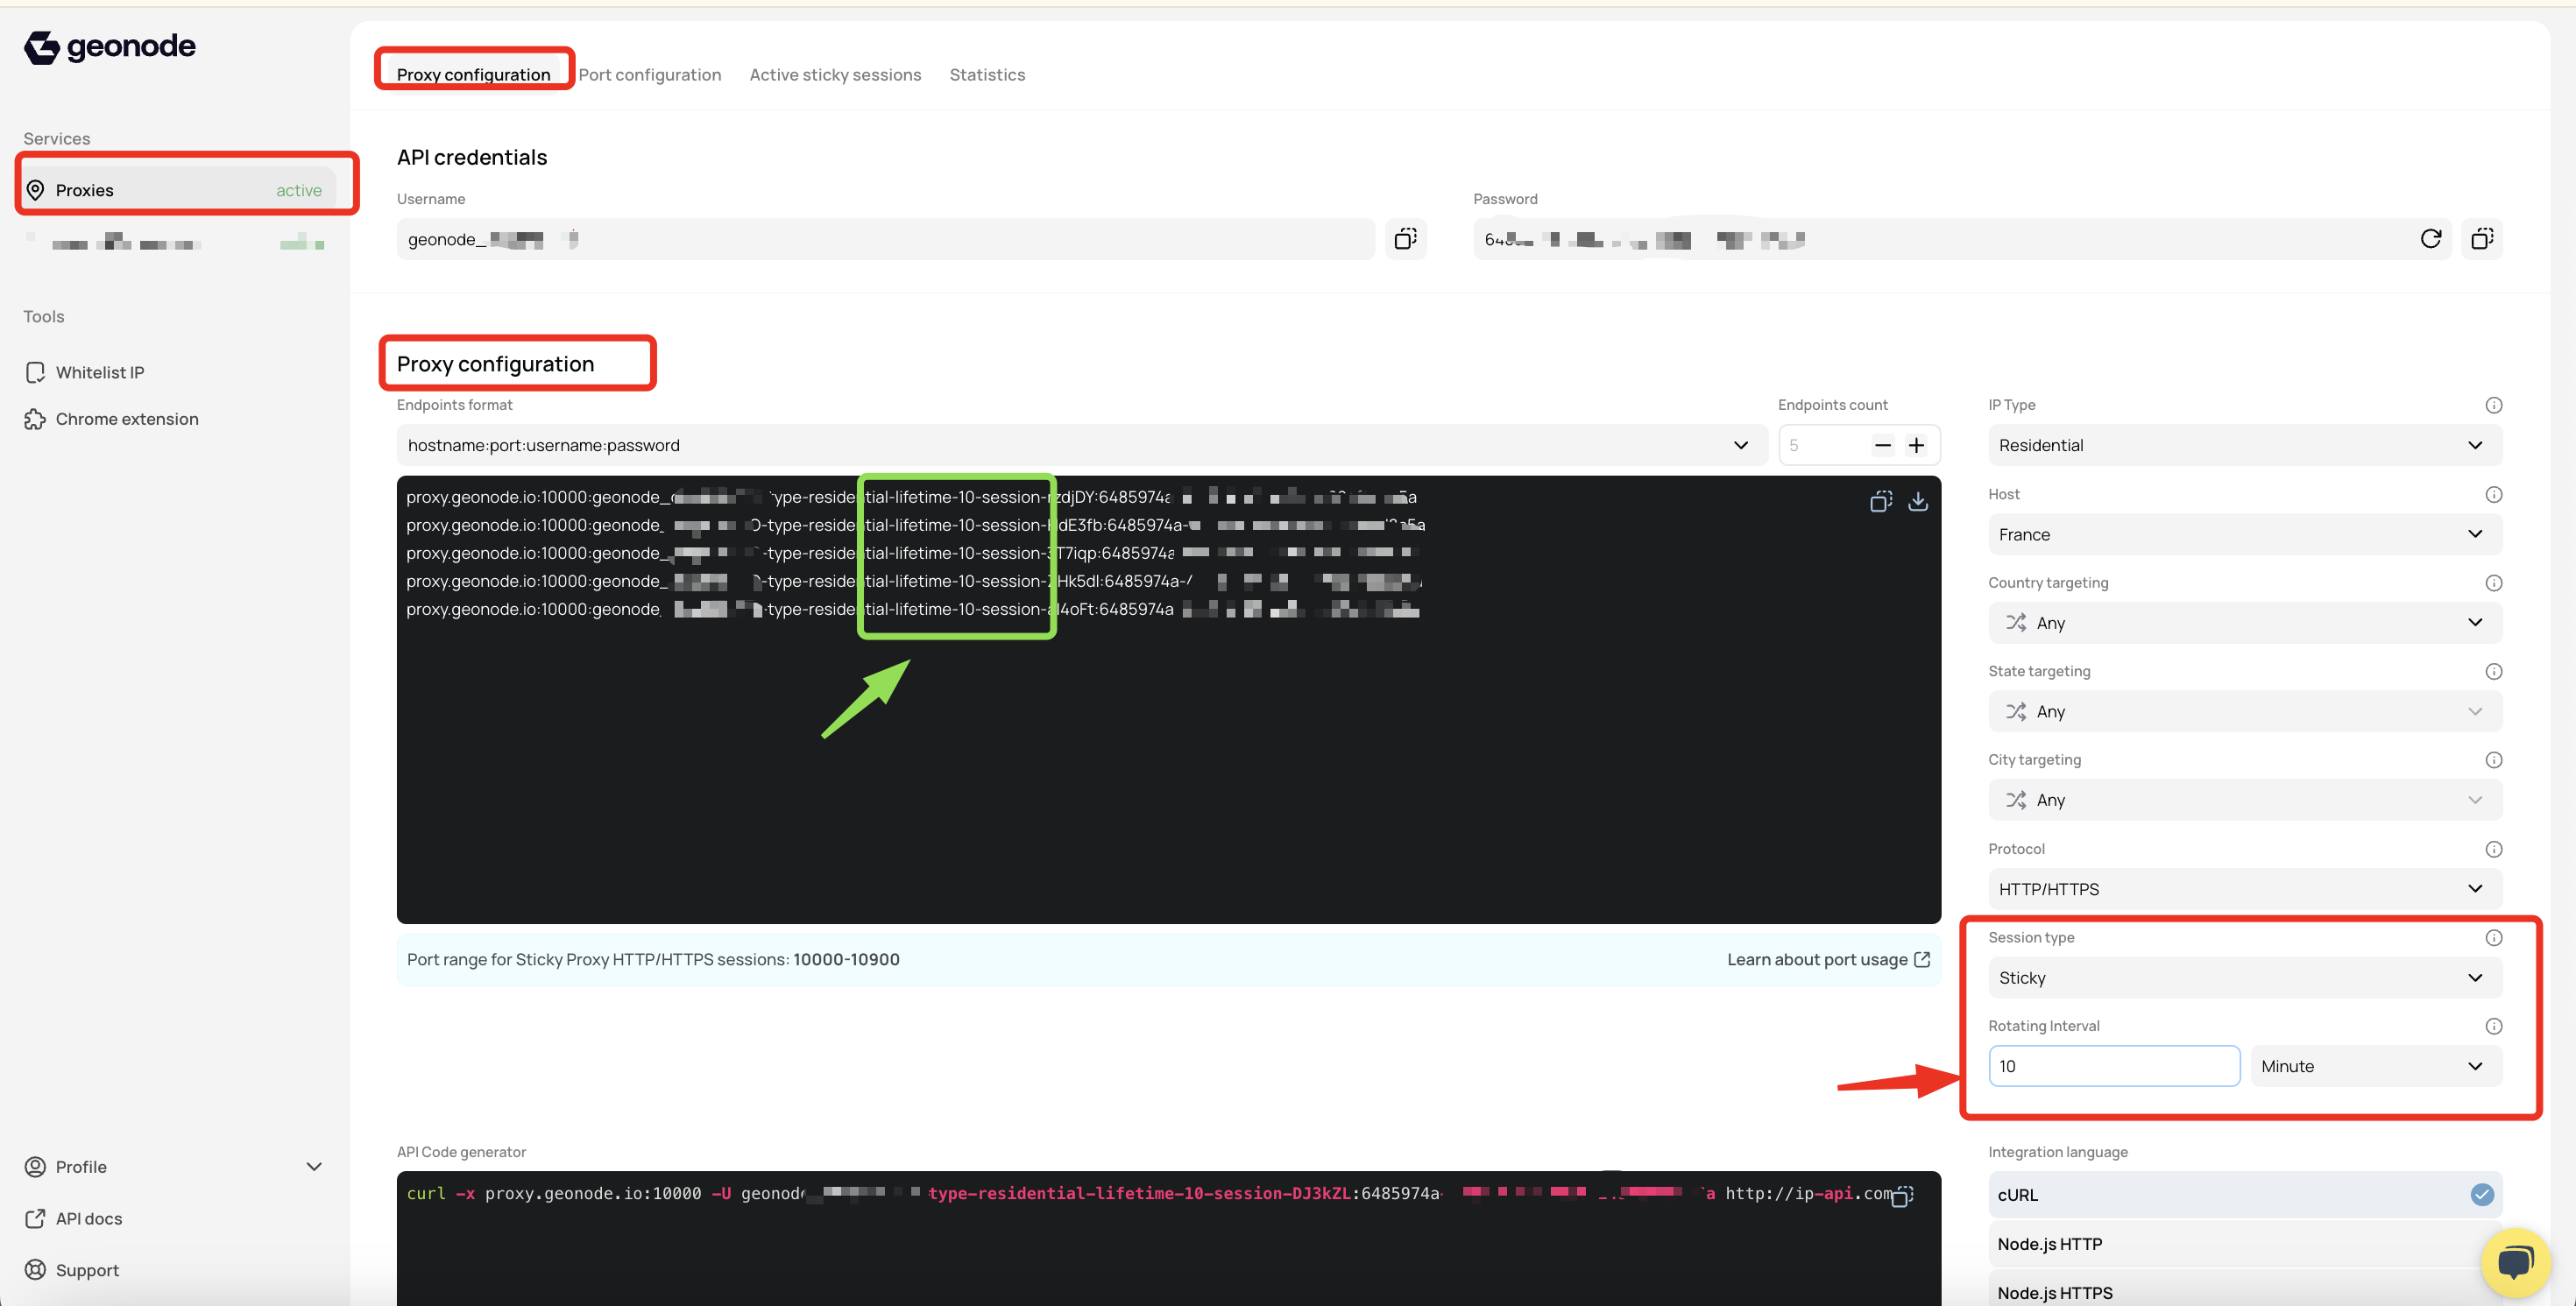
Step 2: Configure Your Proxy
- Under Proxy Configuration, select the Sticky proxy type.
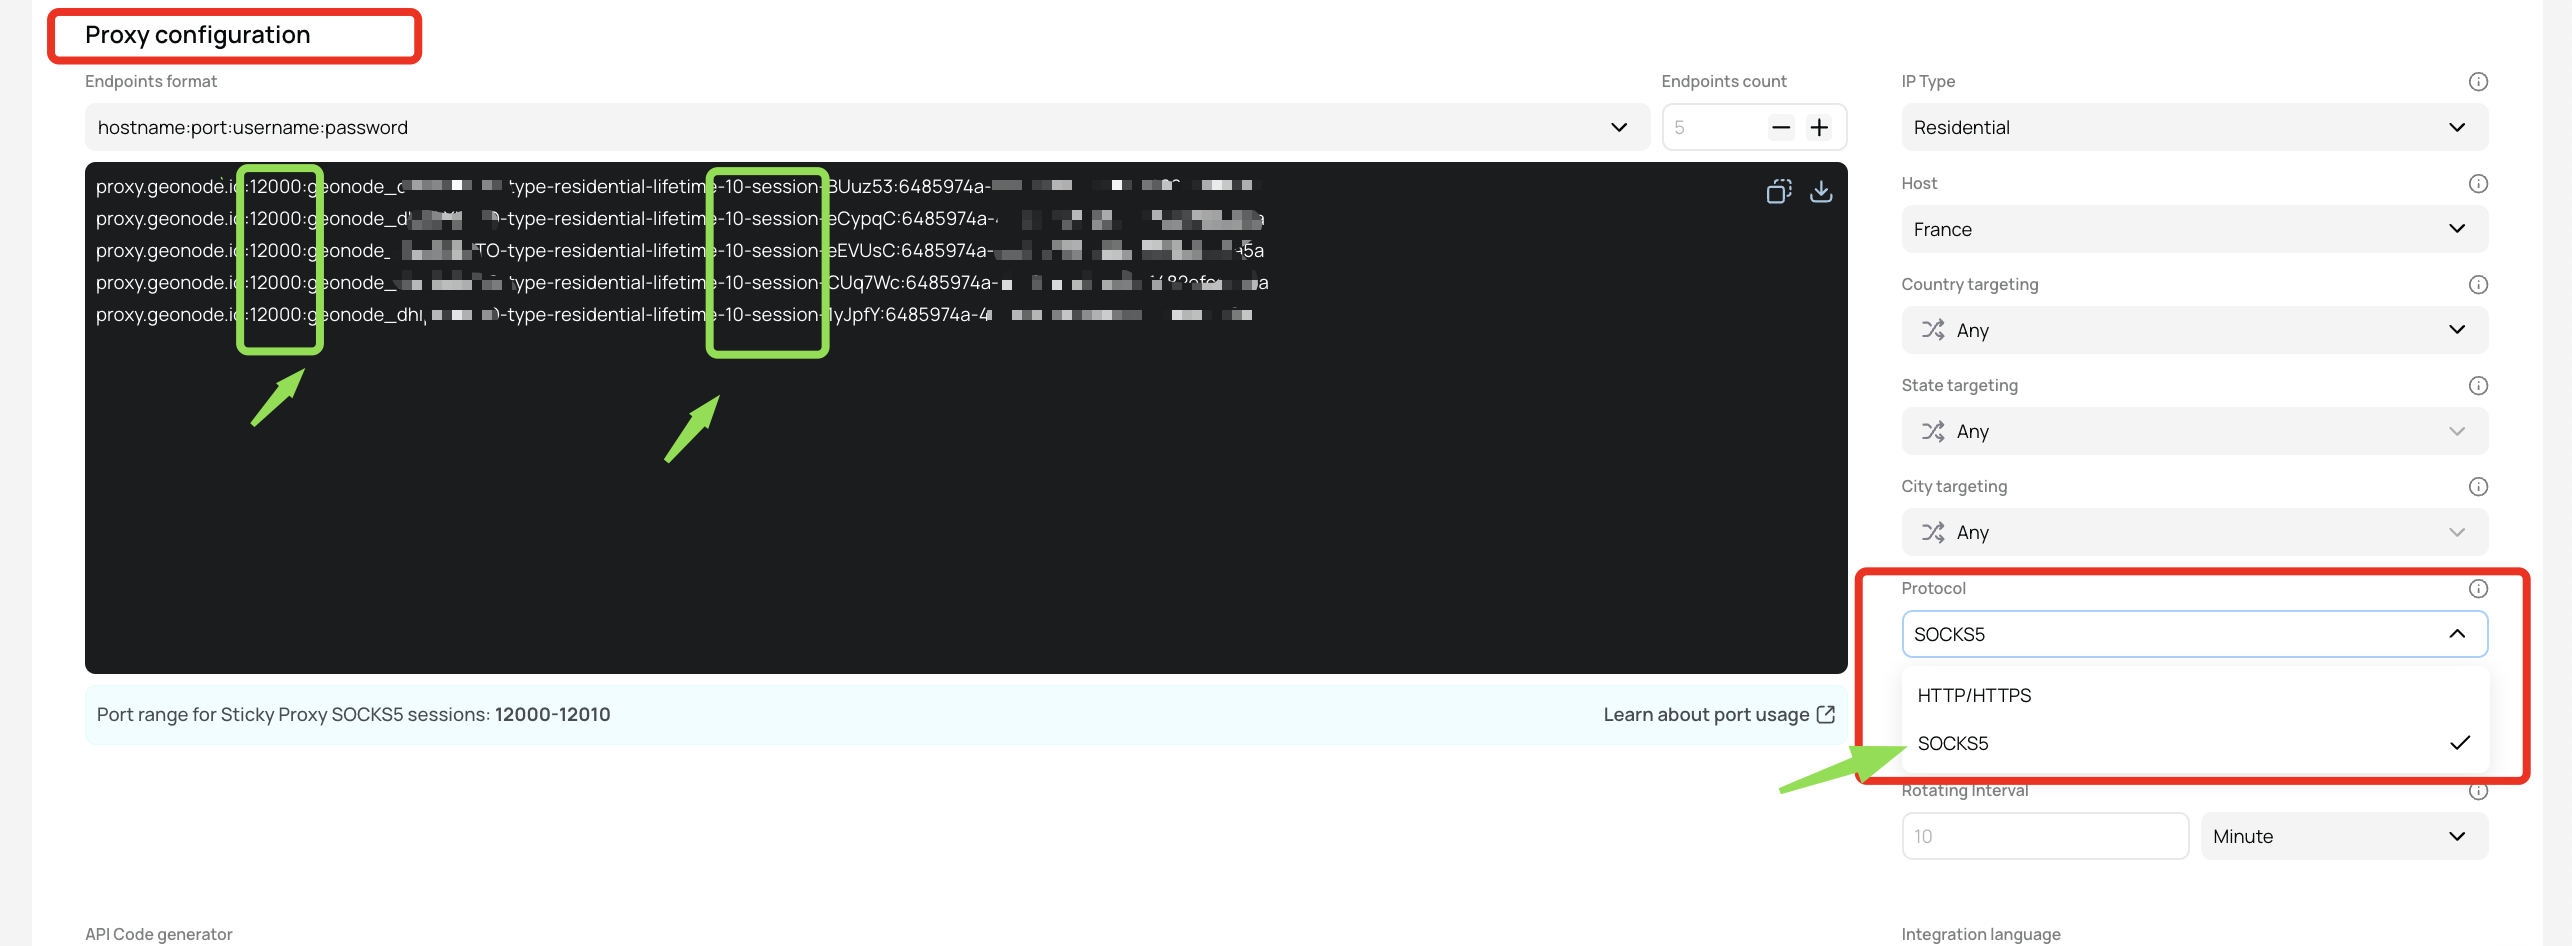
- Choose a proxy protocol: HTTP/HTTPS or SOCKS5.
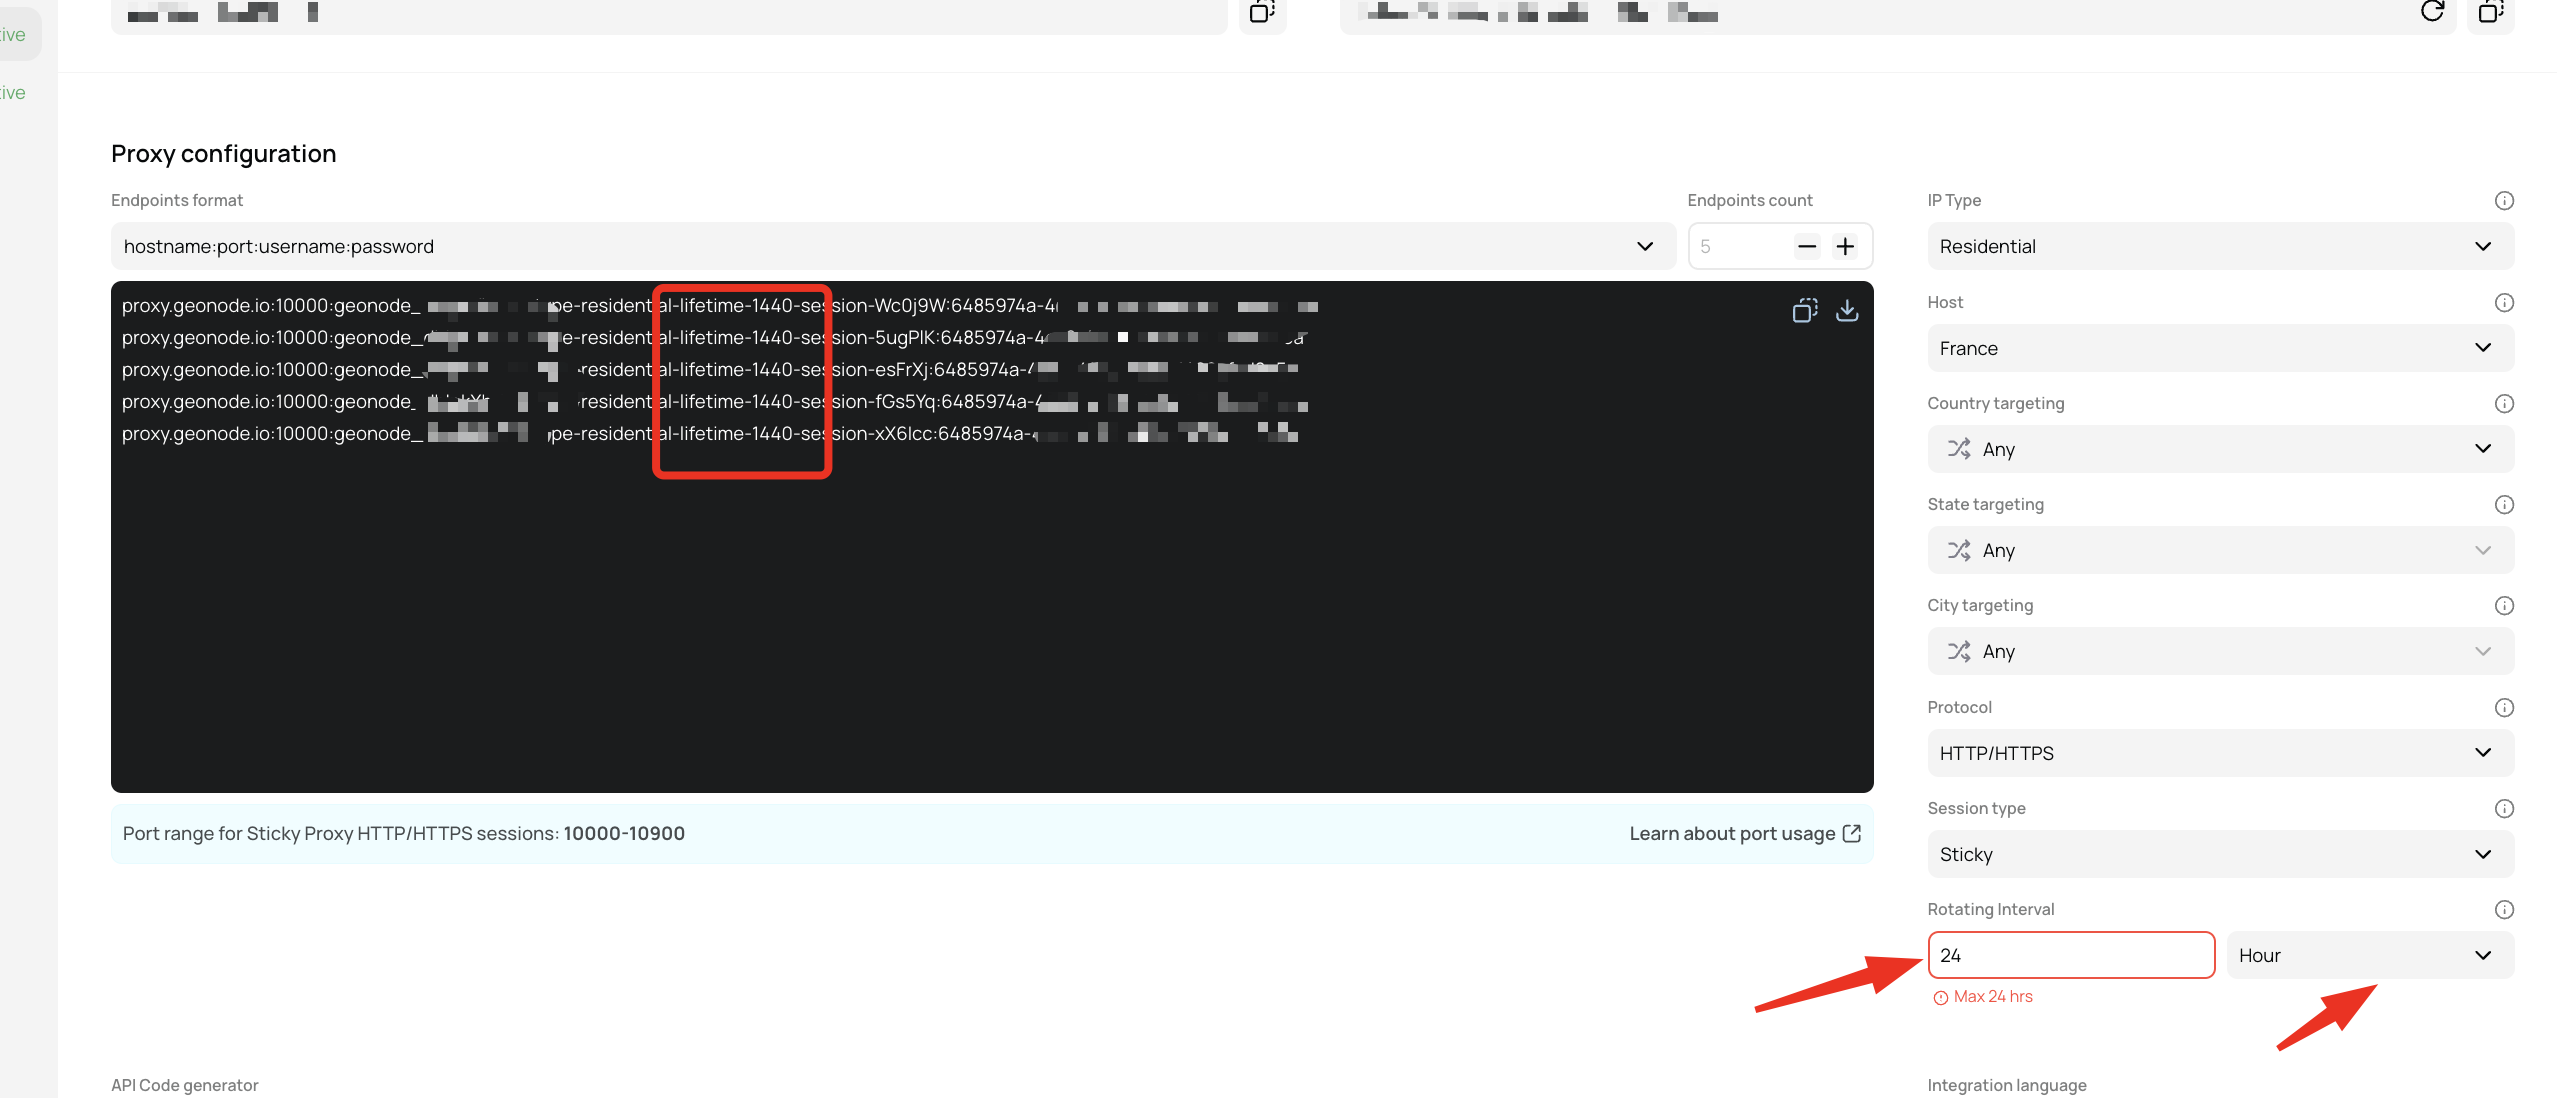
- Changing session lifetime automatically updates the generated proxy list.
- The modified session duration will apply to all selected sessions.
Step 3: Set the Session Lifetime
By default, the session lifetime is 10 minutes, but you can adjust it based on your needs.- Minimum session duration: 3 minutes
- Maximum session duration: 24 hours (1440 minutes)
Final Tips
- Choose shorter session durations for frequent IP changes (e.g., scraping).
- Use longer sessions for tasks that require consistent IPs (e.g., account management).
- Adjust settings via the dashboard or API for more control.