This guide will walk you through installing, configuring, and using the Geonode Proxy Manager extension.
Geonode Proxy Manager
The Geonode Proxy Manager extension allows you to easily configure multiple proxies within your browser. Instead of manually entering proxy details every time, you can store, switch, and manage proxies directly through the extension.Prerequisites: Get Proxy Credentials from Geonode
Before setting up a proxy, first, retrieve your proxy credentials from the Geonode dashboard.- Follow this guide: How to Obtain Proxy Server Information
Steps: Setting Up a Proxy Using Geonode Proxy Manager Extension
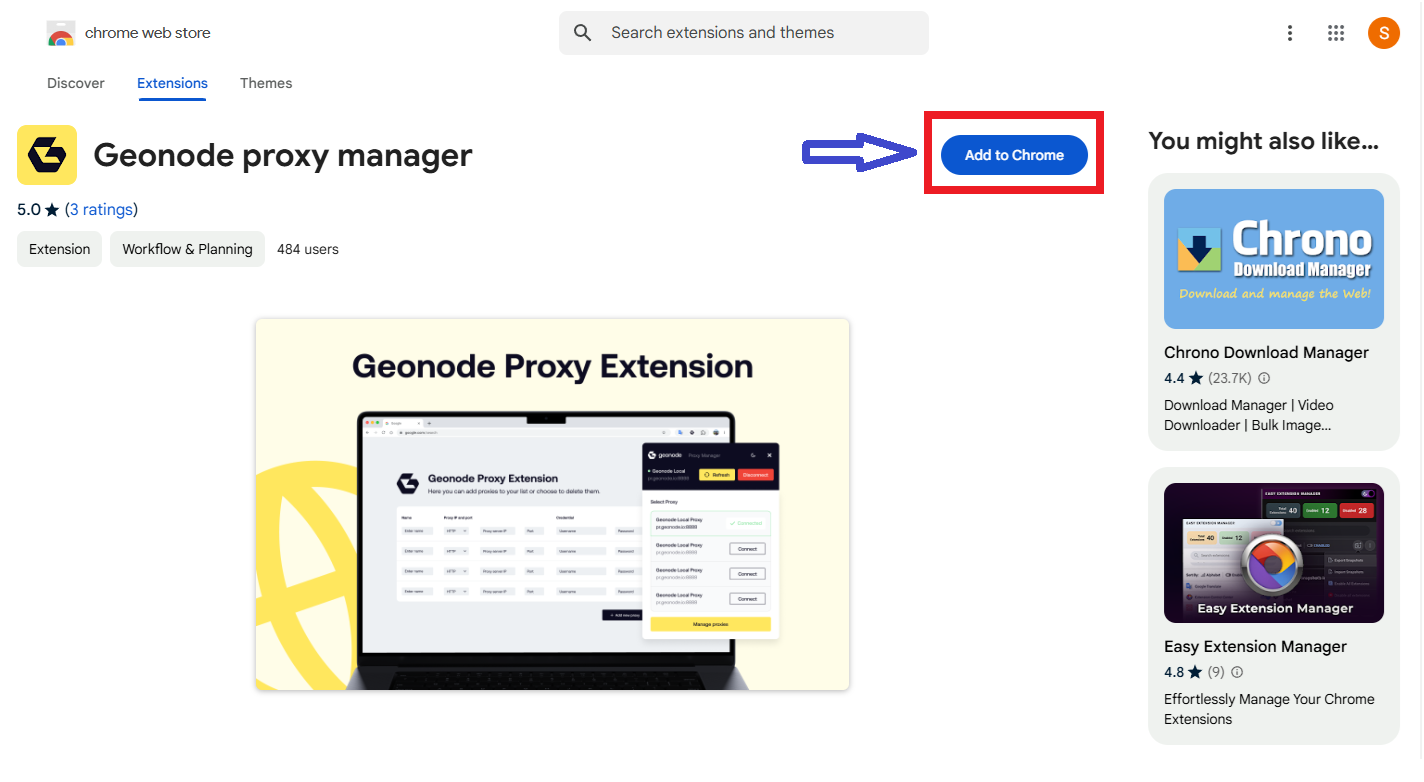
Follow these steps to configure a proxy in Geonode Proxy Manager Extension:Step 1: Install the Geonode Proxy Manager Extension
- Open the Chrome Web Store.
-
Click Add to Chrome to install the extension.
-
Confirm by clicking Add Extension when prompted.

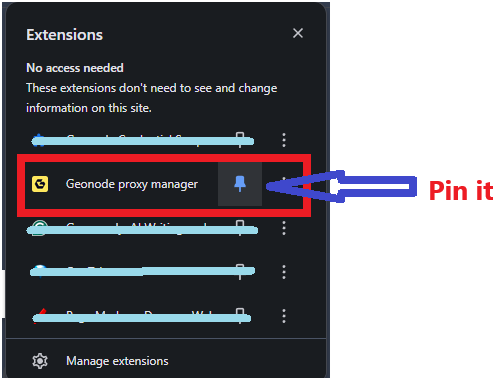
Step 2: Pin the Extension for Quick Access
Once installed, pin the extension to your Chrome toolbar for easier access.- Click on the Extensions icon (puzzle piece) in Chrome.
-
Locate Geonode Proxy Manager and click the Pin icon.
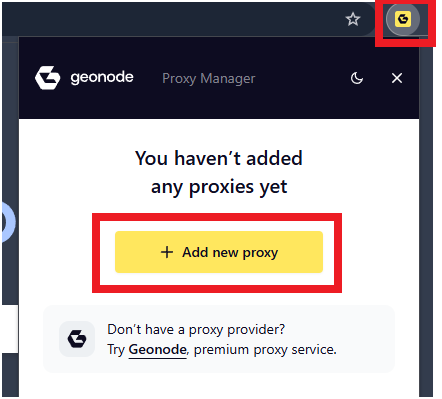
Step 3: Open the Geonode Proxy Manager
- Click on the Geonode Proxy Manager icon in your Chrome toolbar.
-
If no proxies are added yet, click Add New Proxy.
-
You will redirect to proxy manager page

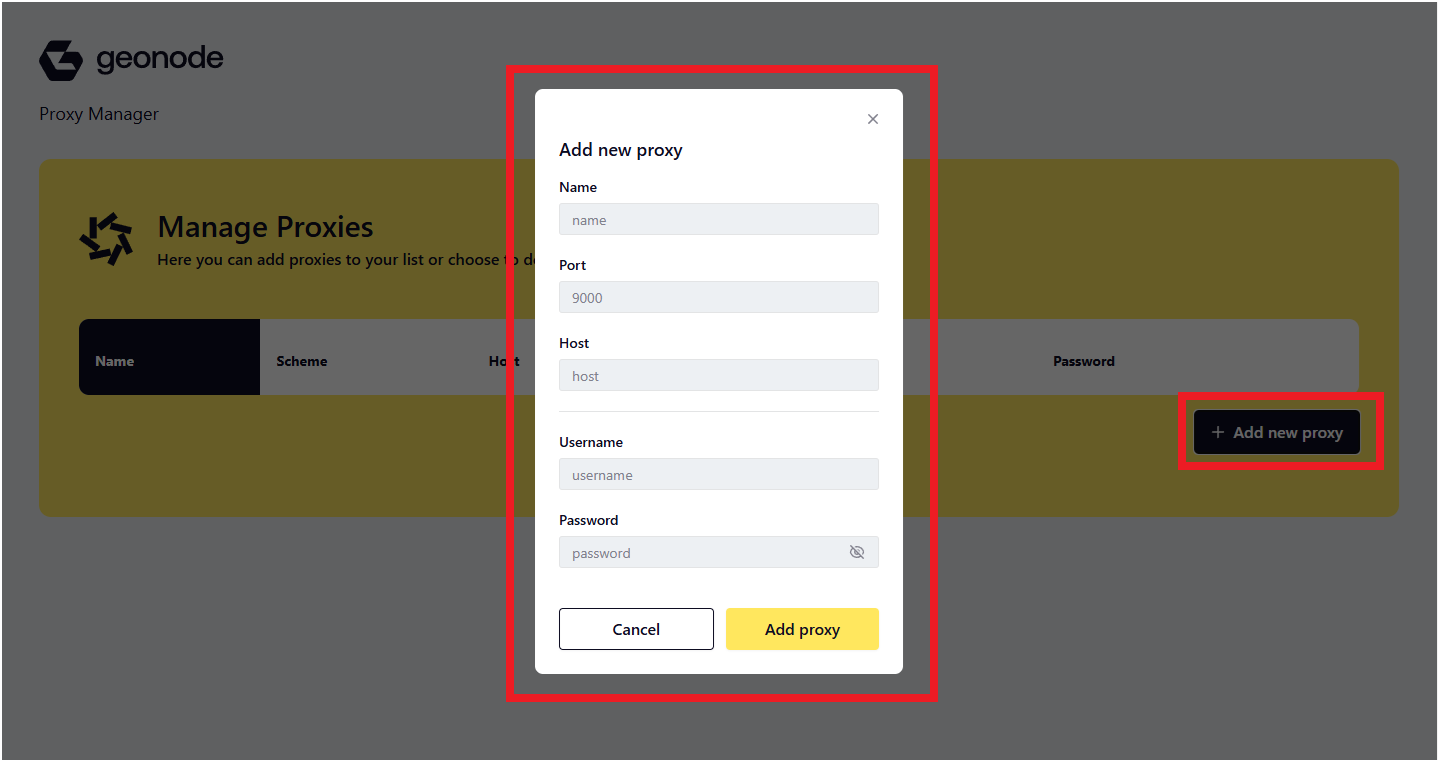
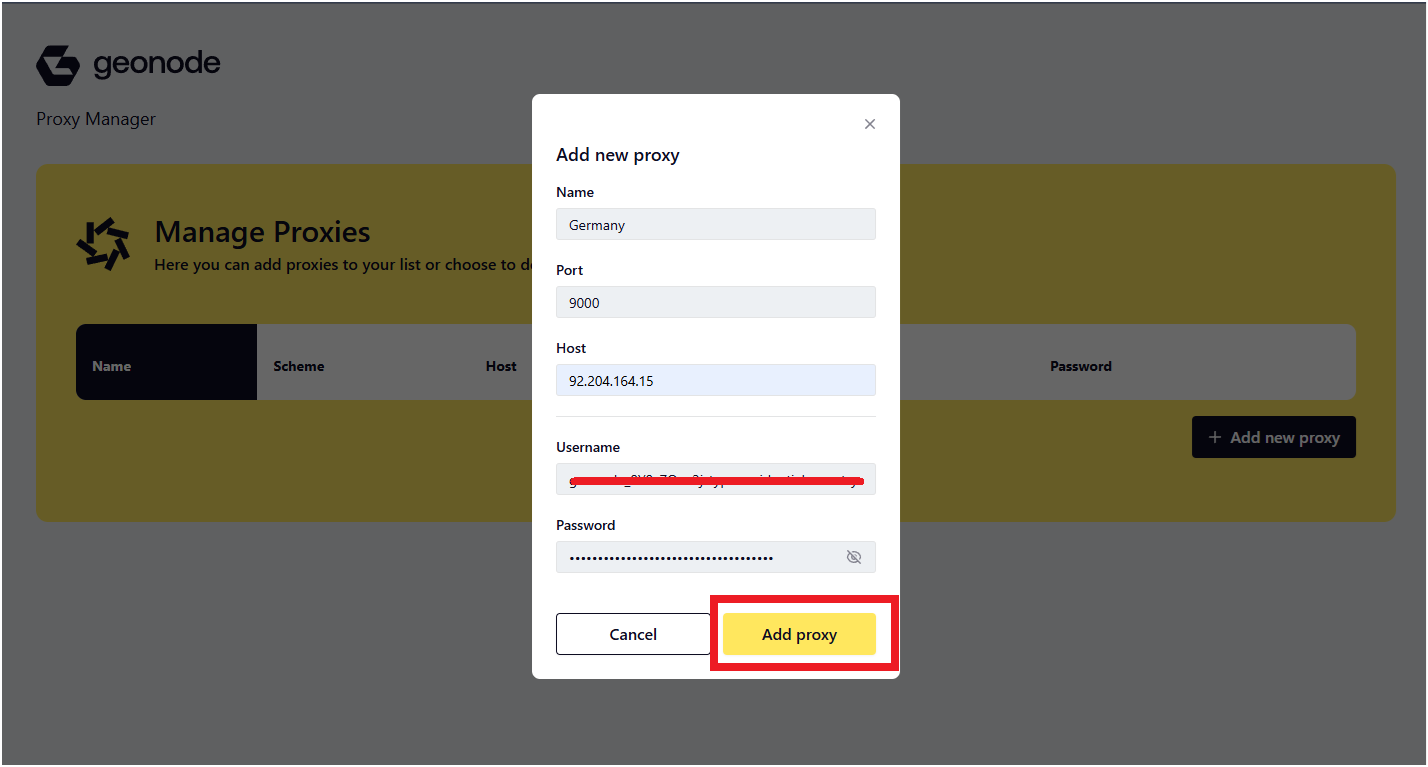
Step 4: Add a New Proxy
- Click Add New Proxy.
-
A popup will appear where you need to enter the proxy details:
- Name: Give your proxy a recognizable name.
- Port: Enter the port (e.g., 9000).
- Host: Input the proxy server host (e.g.,
92.204.164.15). - Username & Password: Enter your authentication details.
-
Click Add Proxy to save.
-
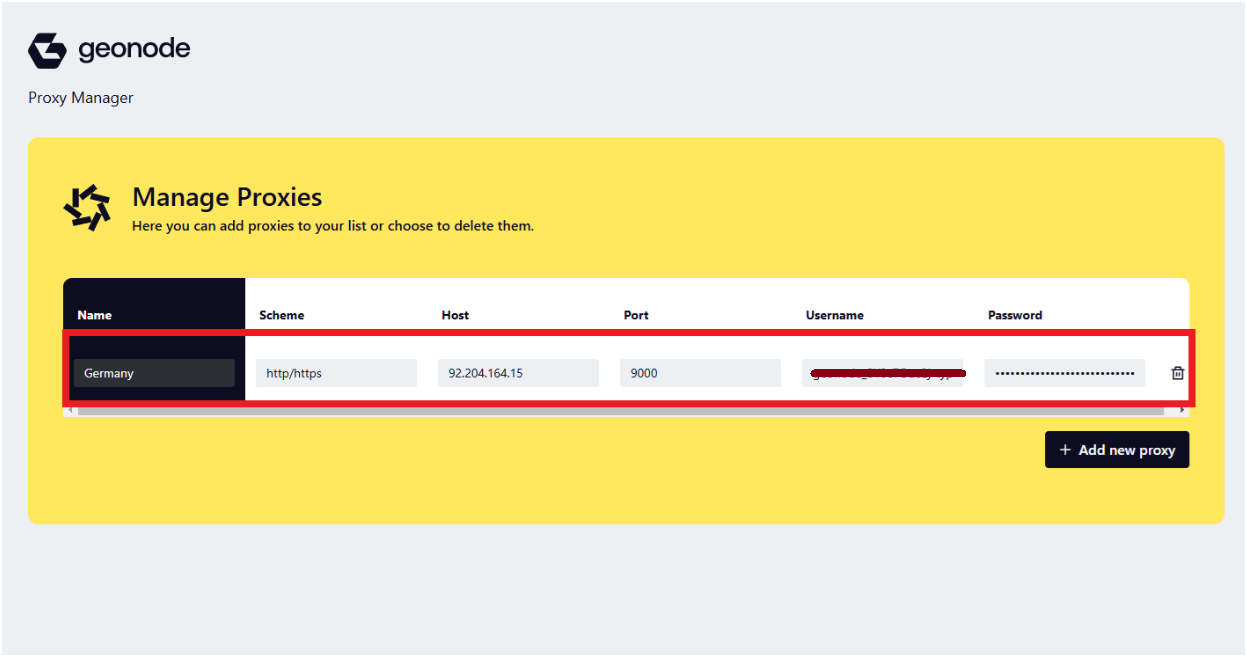
After adding the proxy, go back to the Proxy Manager. You will see your added proxy in the list.
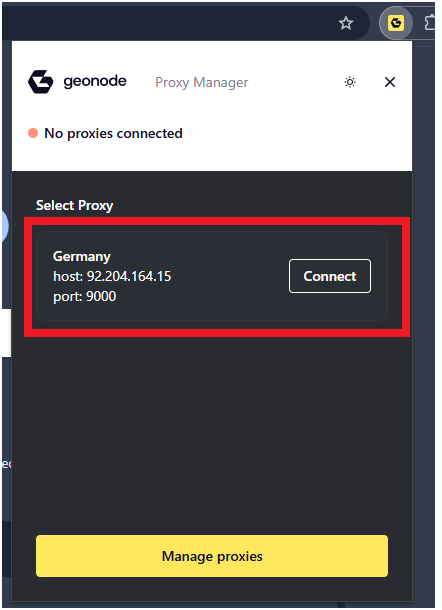
Step 5: Connect to the Proxy
Once you have added the proxy, it will appear in your Geonode Proxy Manager extension.- Click on the Geonode Proxy Manager icon in your Chrome toolbar.
-
You will see the proxy you just added in the list.
-
Click the Connect button to activate the proxy.
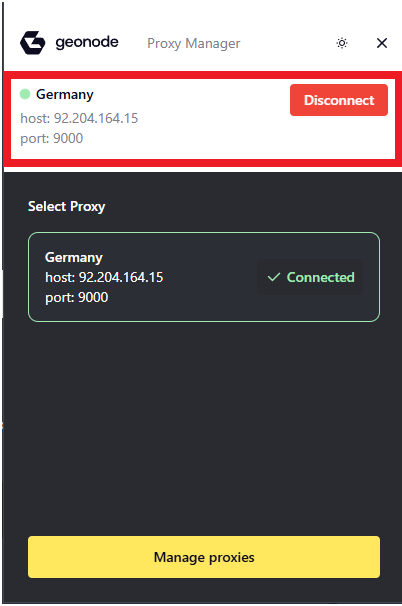
Verify Proxy Connection
To ensure the proxy is working, check your IP address using an online tool or follow this guide:If you encounter any issues, refer to the troubleshooting section or Geonode support.
FAQs
Can I switch between multiple proxies
Can I switch between multiple proxies
Yes, you can add multiple proxies and switch between them by selecting the desired proxy from the list and clicking Connect.
Why should I use the Geonode Proxy Manager?
Why should I use the Geonode Proxy Manager?
- Saves time by storing proxy details for quick switching.
- Enhances privacy by routing browser traffic through different proxy servers.
- Supports multiple proxies for various use cases.
How can I verify if my proxy is working?
How can I verify if my proxy is working?
You can check your IP address using an online tool like WhatIsMyIP or refer to this guide: Verify Proxy Connection
What should I do if my proxy is not working?
What should I do if my proxy is not working?
- Ensure you entered the correct proxy details (host, port, username, password).
- Try disconnecting and reconnecting the proxy.
- Check if your proxy plan is active in the Geonode Dashboard.
Does this extension work with all websites?
Does this extension work with all websites?
Yes, but some websites may block proxy connections. If you face restrictions, try switching to a different proxy server.
Can I use this extension with a VPN?
Can I use this extension with a VPN?
Yes, but using both a VPN and a proxy simultaneously may lead to connection conflicts or slower browsing speeds.
Is this extension free to use?
Is this extension free to use?
The extension is free to install, but you need an active Geonode Proxy Plan to use proxy services.