This guide walks you through each step of the proxy configuration process.
What is Endpoint Generator
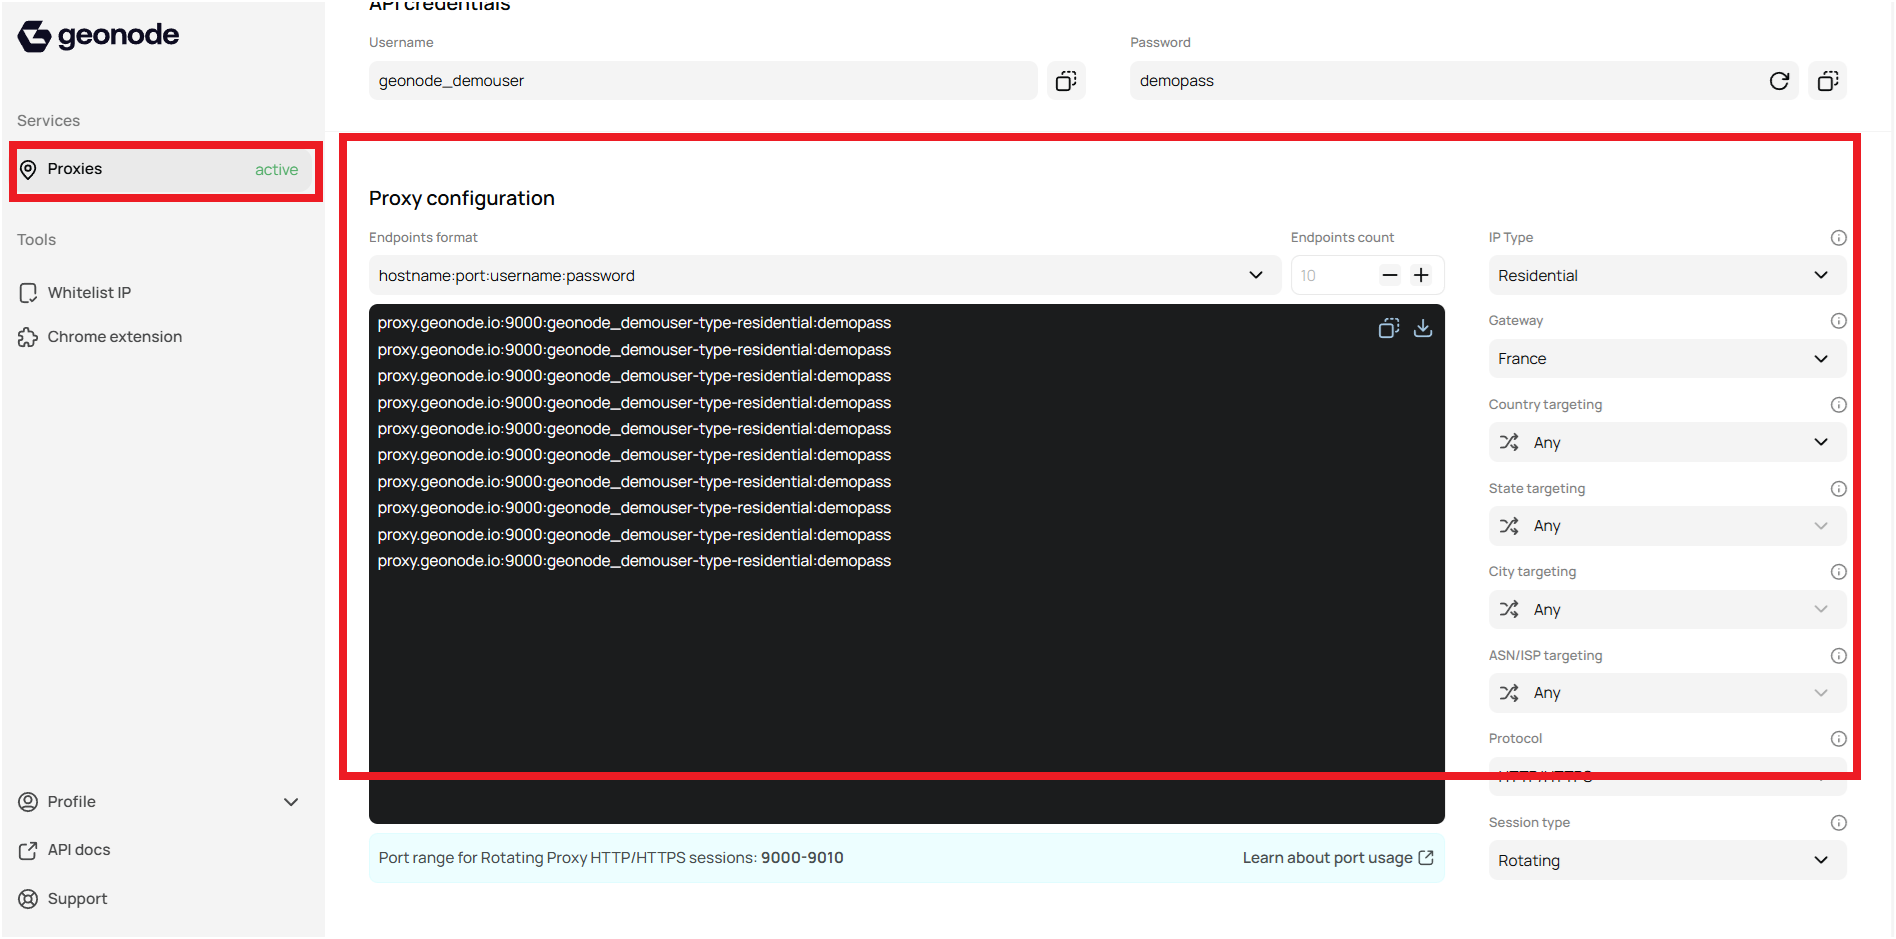
The Endpoint Generator helps you generate a list of proxies based on your needs. Select IP type, host, location, protocol, and session type parameters, and export the list of endpoints in TXT formats.Step 1: Accessing the User Dashboard
- Navigate to the dashboard.
- Scroll down to Proxy configuration
Step 2: Choosing an Endpoint Format
There are six formats available for generating proxy endpoints based on your authentication and connection preferences:
Step 3: Choosing an Endpoint Count
You can specify the number of endpoints you want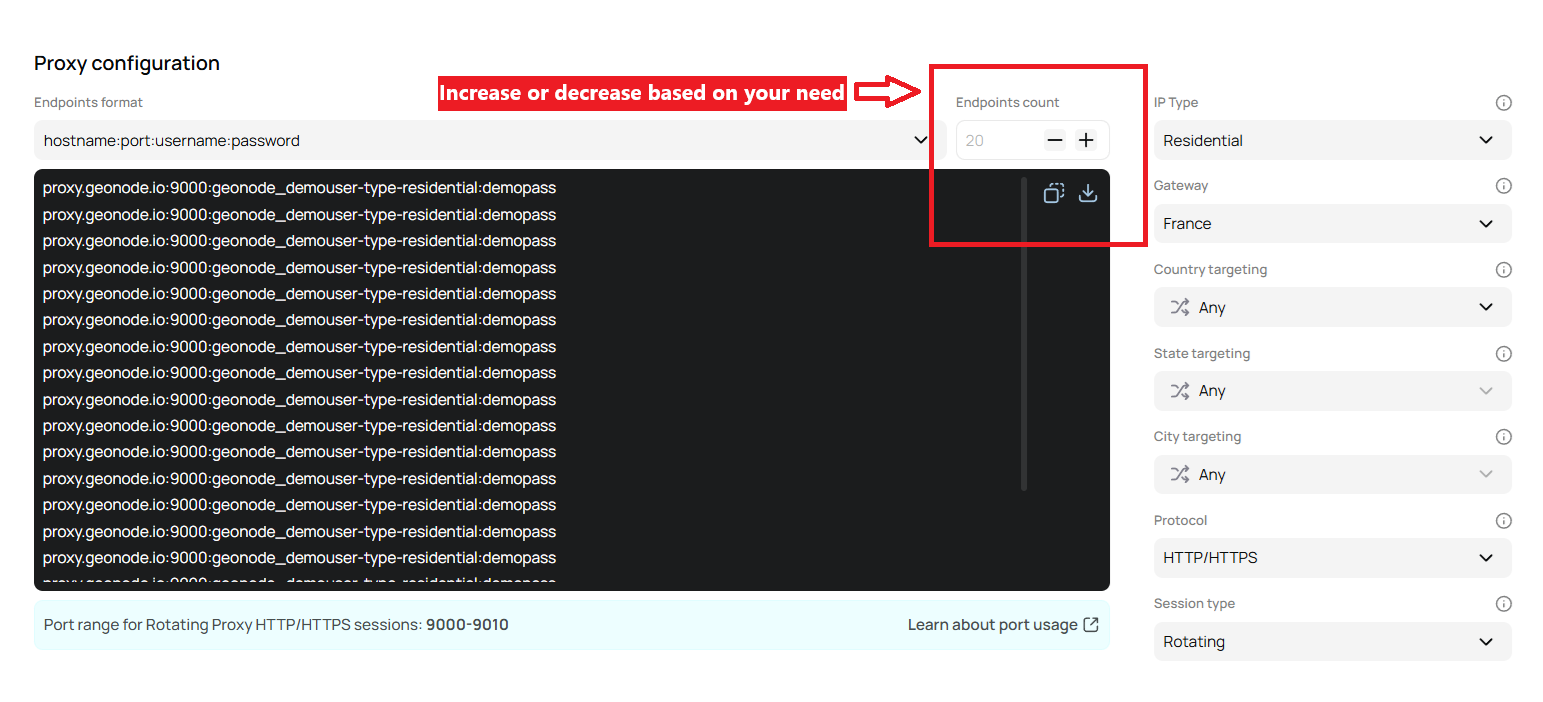
Step 4: Configure Proxy Parameters:
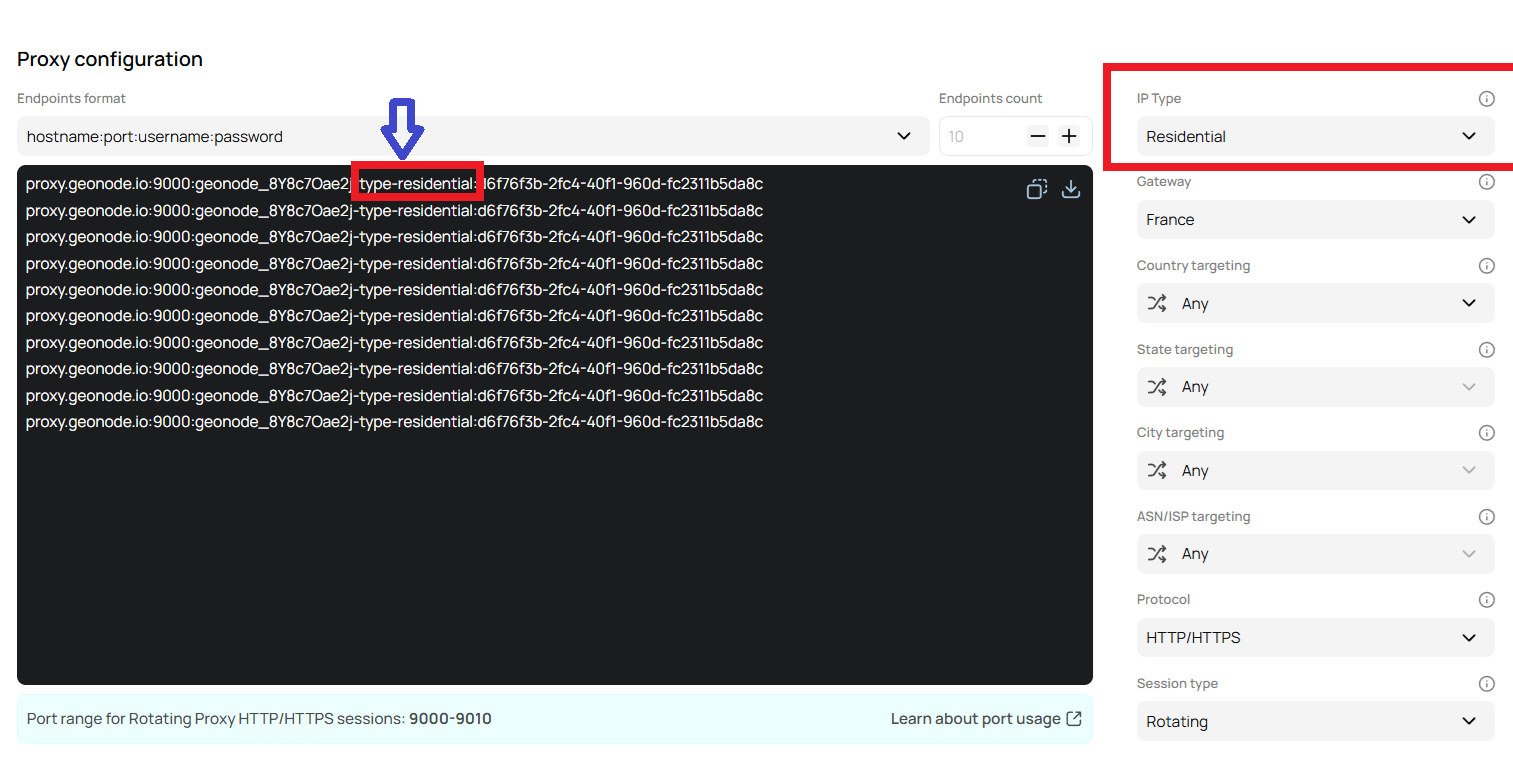
There are seven ways available for configuring proxy endpoints based on your needs.1. Selecting IP Type
You can choose the type of IP based on your needs. There are three types available:- Residential IPs
- Datacenter
- Mixed
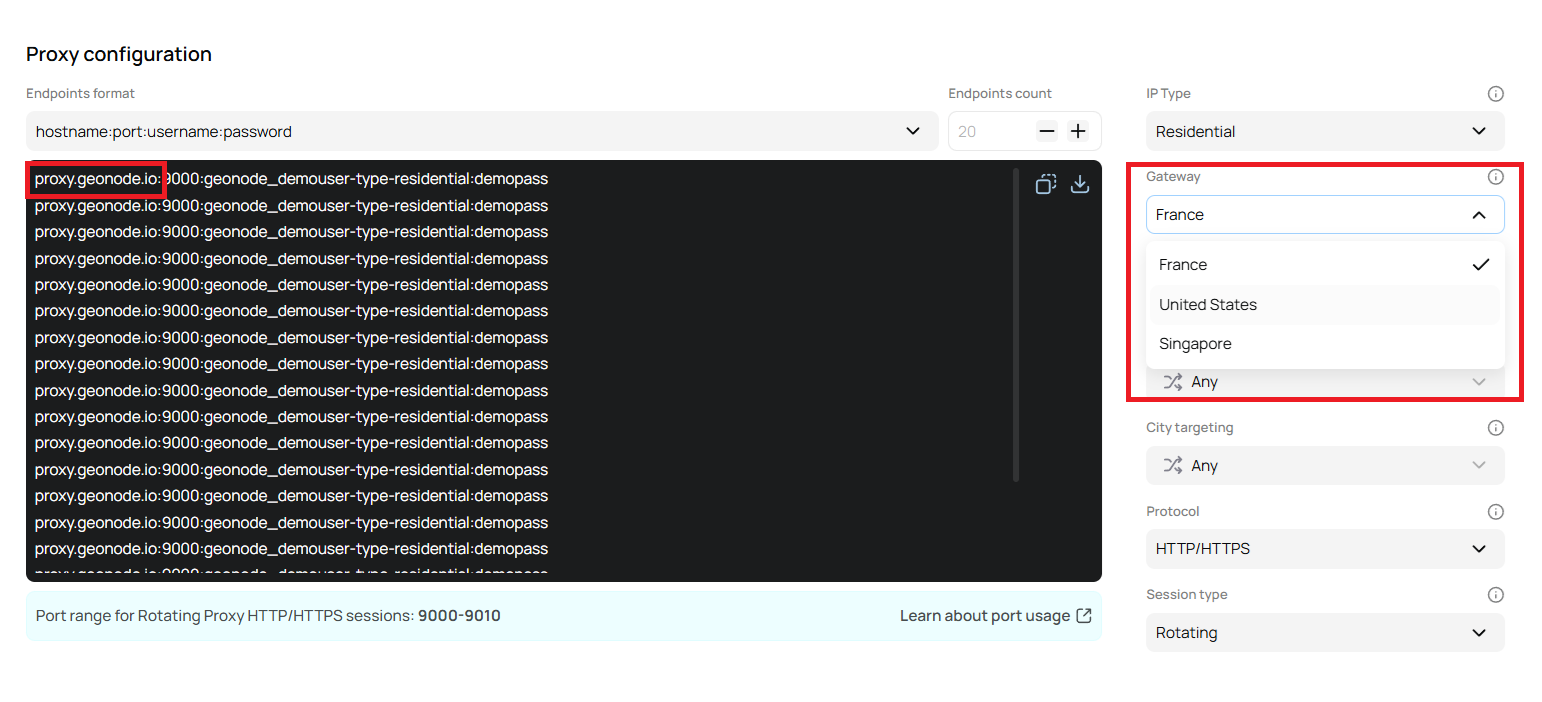
2. Selecting Gateway
You can choose the host based on your needs. There are three different hosts available:| Location | Host Address |
|---|---|
| France | proxy.geonode.io |
| United States | us.premium-residential.geonode.com |
| Singapore | sg.premium-residential.geonode.com |
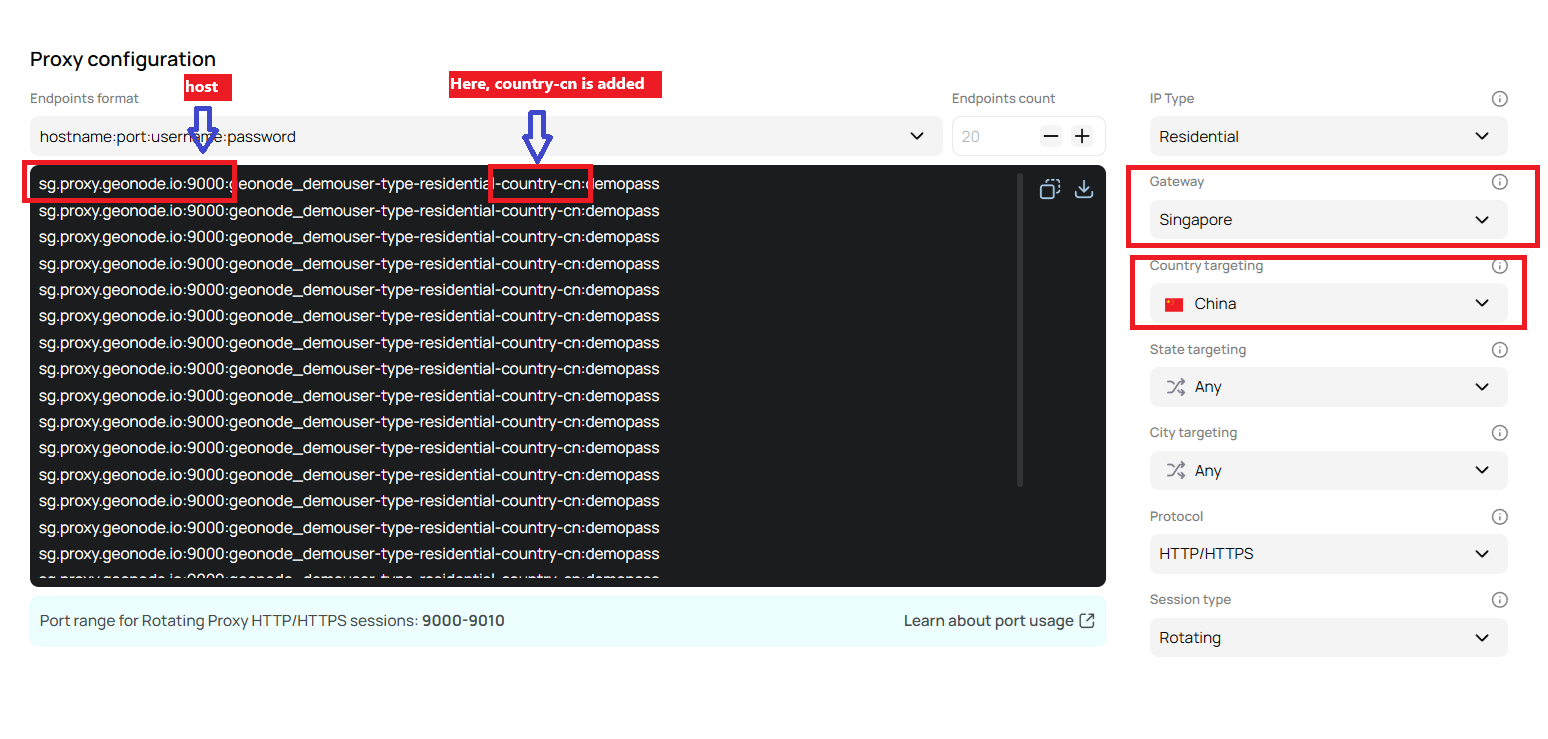
3. Selecting Geo-Target(Country, State, and City)
You can choose a target country, state, or city. By default, “Any” is selected, meaning proxies from any country will be used. Example:- Host: Singapore
- Target Country: China In this case, the host is located closer to China in Asia, ensuring better connectivity and performance when targeting Chinese services.
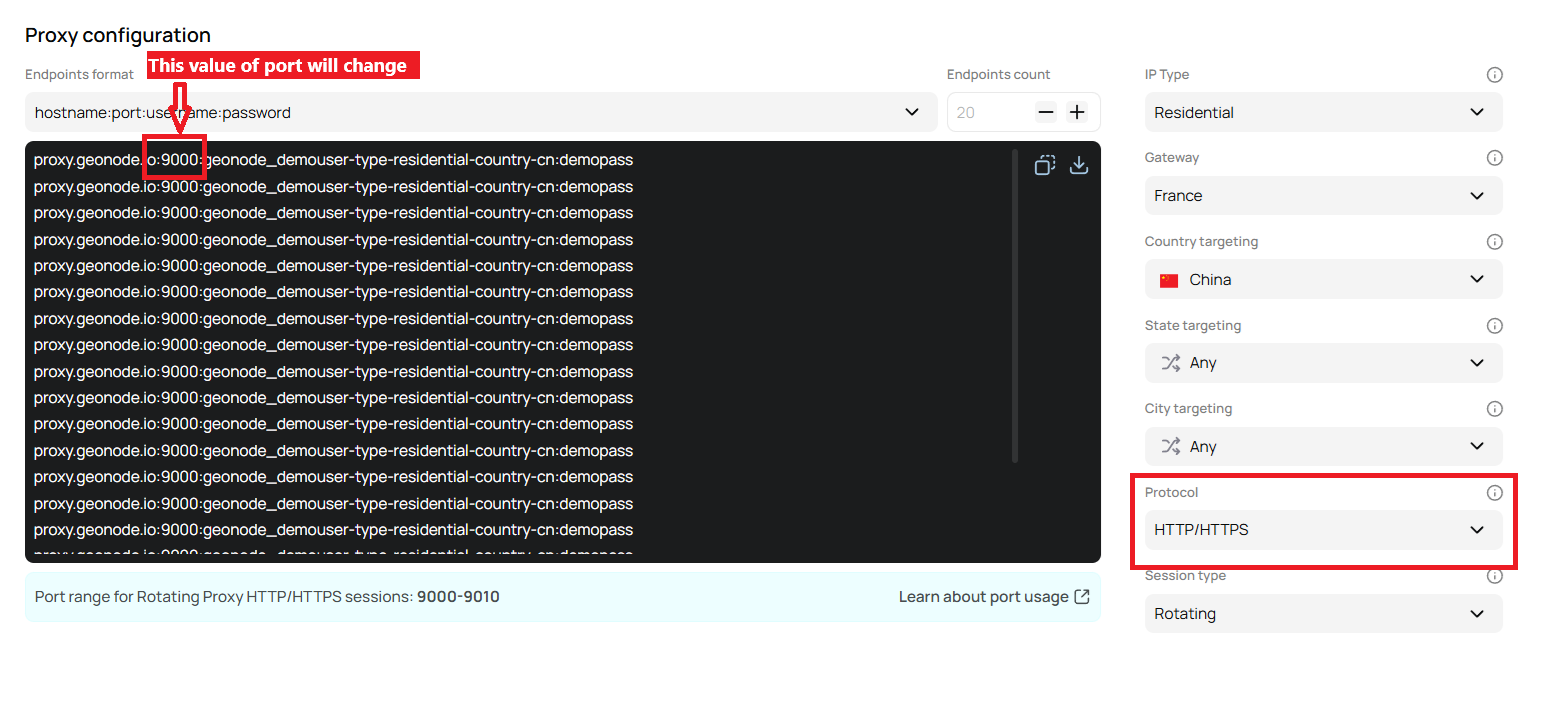
4. Selecting Protocol
Selecting the protocol is crucial as it determines how your proxy connections will be handled. There are two protocols available:- HTTP/HTTPS
- SOCKS5
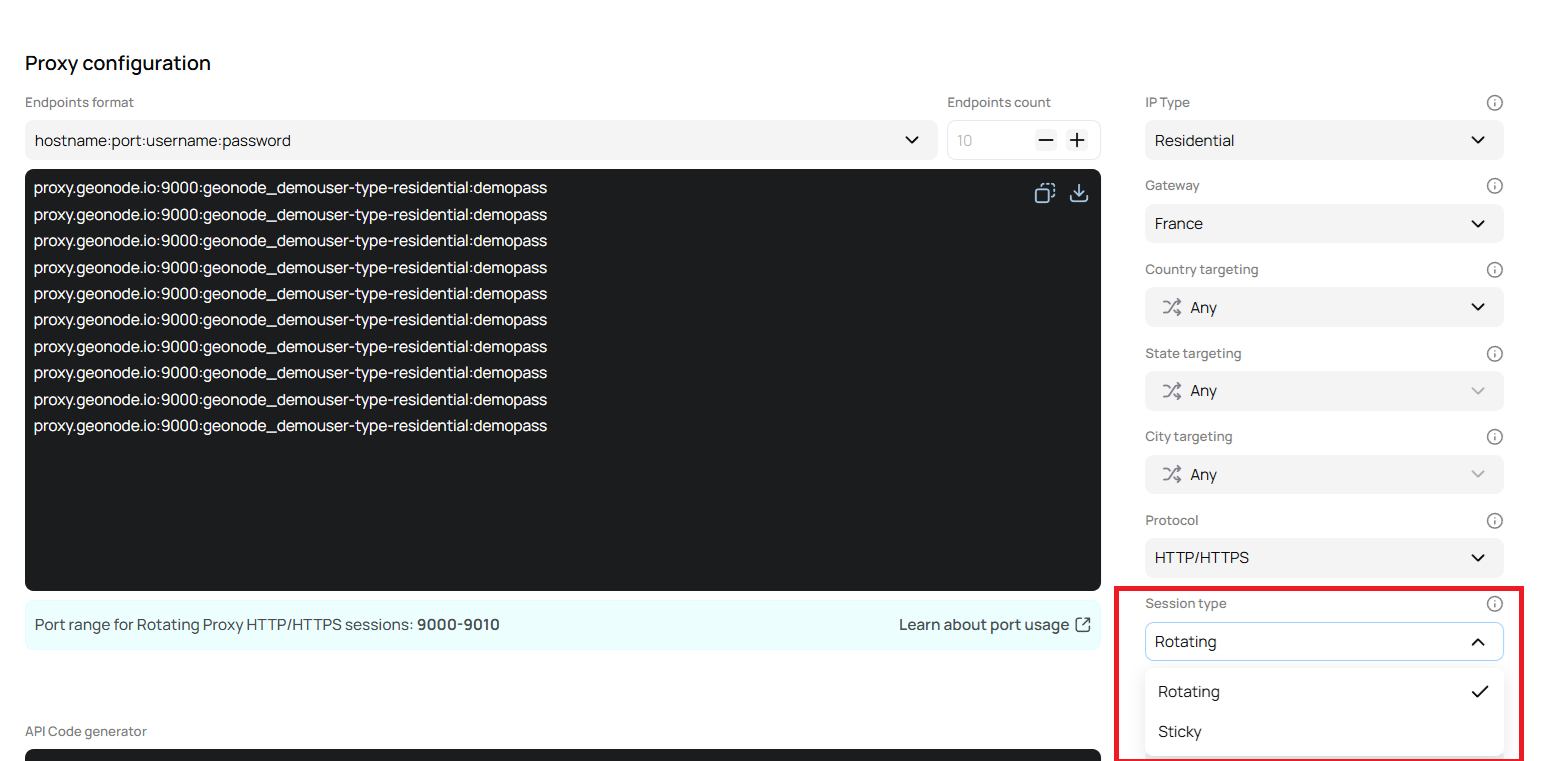
5. Selecting Session Type
There are two session types available, depending on how you want your proxy to handle connections:- Rotating Session
- Sticky Session
6. Rotating Interval (Only for Sticky Session)
For Sticky Sessions, you can set a rotating interval to control how often the IP address changes. You can adjust this in minutes or hours.
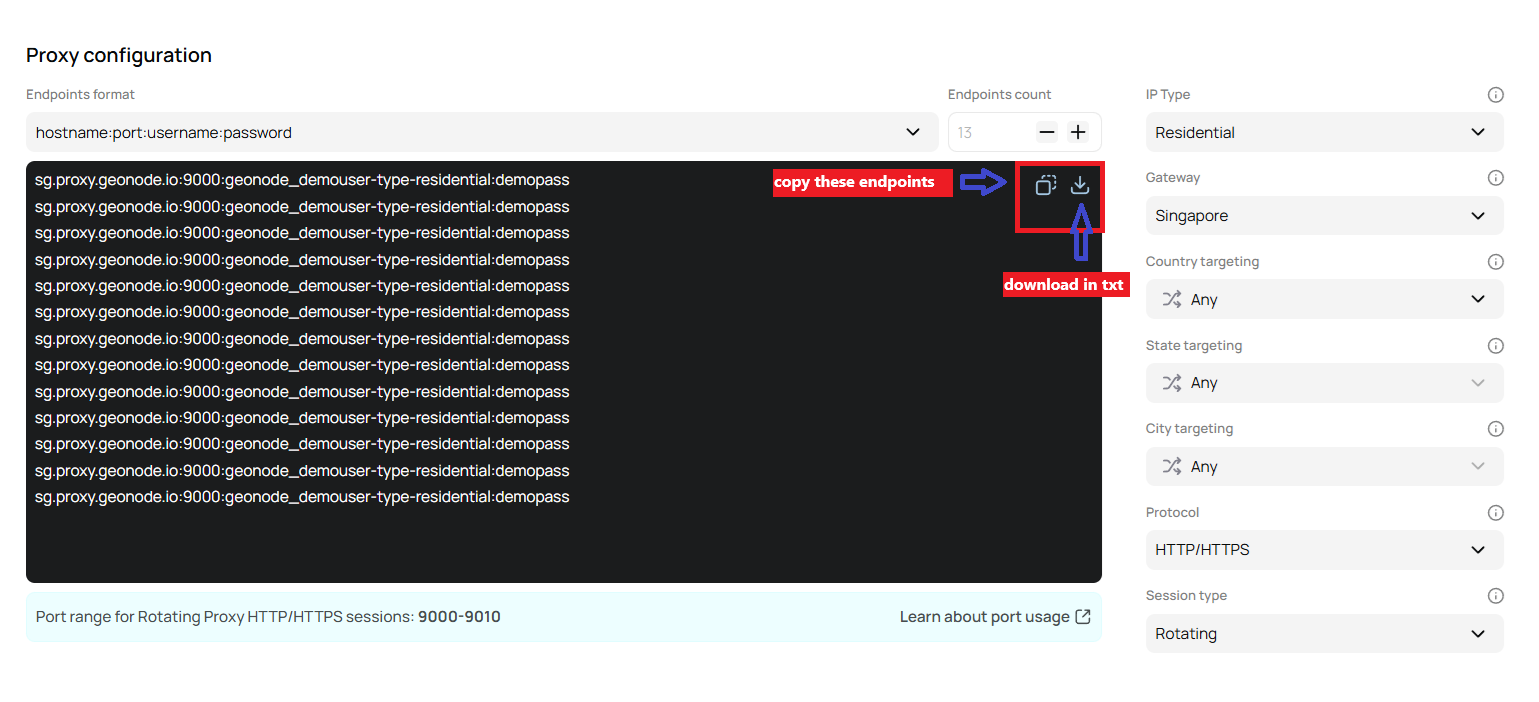
Step 5: Select the Output format.
After successfully configuring the endpoints, you can:- Copy the endpoints directly for immediate use.
- Download a
.txtfile containing the generated endpoints for future reference.