Crawl a Site
Use the Crawl dashboard to enter a starting URL, configure crawl options, and start crawling a website.
Enter the Website URL
Open Crawl a site from the Web Data section of the dashboard.
Enter the starting URL in the crawl field. This is the seed URL where the crawl begins.
Configure Your Crawl
Open Settings to configure crawl options before starting.
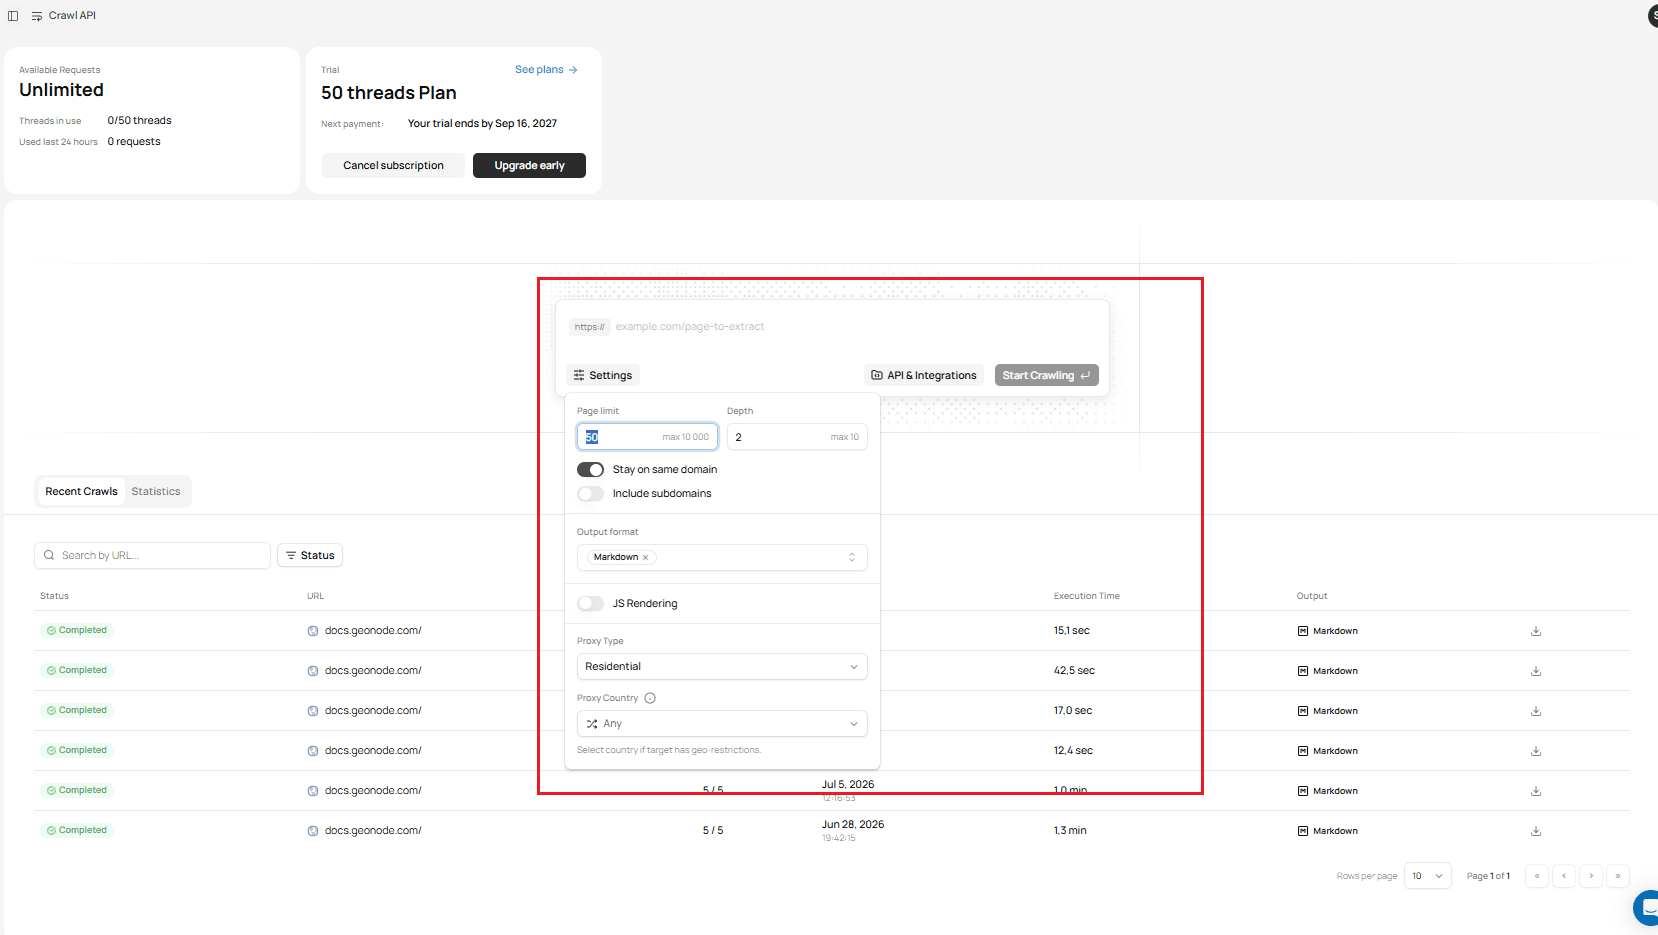
Available settings include:
| Setting | Description |
|---|---|
| Page limit | Maximum number of pages to crawl. The maximum value depends on your plan. |
| Depth | How many link levels to follow from the starting URL. Maximum value is 10. |
| Stay on same domain | Keep the crawl limited to the same domain as the starting URL. |
| Include subdomains | Allow crawling pages on subdomains of the starting domain. |
| Output format | Format used for crawl output, such as Markdown. |
| JS Rendering | Enable JavaScript rendering when the target pages require it. |
| Proxy Type | Proxy network used for the crawl, such as Residential. |
| Proxy Country | Optional country targeting when the target has geo-restrictions. |
For detailed information about crawl parameters and how they affect your request, see Configuring Crawl Requests.
Start Crawling
After entering the URL and configuring the available settings, select Start Crawling.
The crawl is submitted as a job and appears in the Recent Crawls section.
Review the Crawl Job
Once the crawl is running or completed, find it in Recent Crawls.
Each completed crawl shows:
- Status
- Starting URL
- Pages crawled
- Created time
- Execution time
- Output format
Use the download action in the Output column to download the crawl results.
What's Next?
You now know how to configure a crawl, start crawling, and download results from the dashboard.
Continue to Manage Crawl Jobs to learn how to search, filter, and manage your previous crawls.
Was this page helpful?