How to
How to Set Proxy Session Lifetime
This guide explains how to configure session lifetime in Geonode to control how long each proxy session stays active.
What Is Session Lifetime
Session lifetime defines how long a proxy connection remains active before resetting.
Setting the right duration helps to:
- Maintain session consistency for account management.
- Optimize proxy usage for scraping, automation, and security.
- Prevent detection by avoiding overly frequent IP changes.
Ways to Configure Session Lifetime
You can set session lifetime in two ways:
- Through the Geonode Dashboard (covered in this guide).
- Via an API request → Set Session Lifetime via API.
Step 1: Select a Service or Product
Make sure you have an active Residential Proxies plan in your Geonode account.
From the sidebar, open Proxy Configuration to start setting up your proxies.
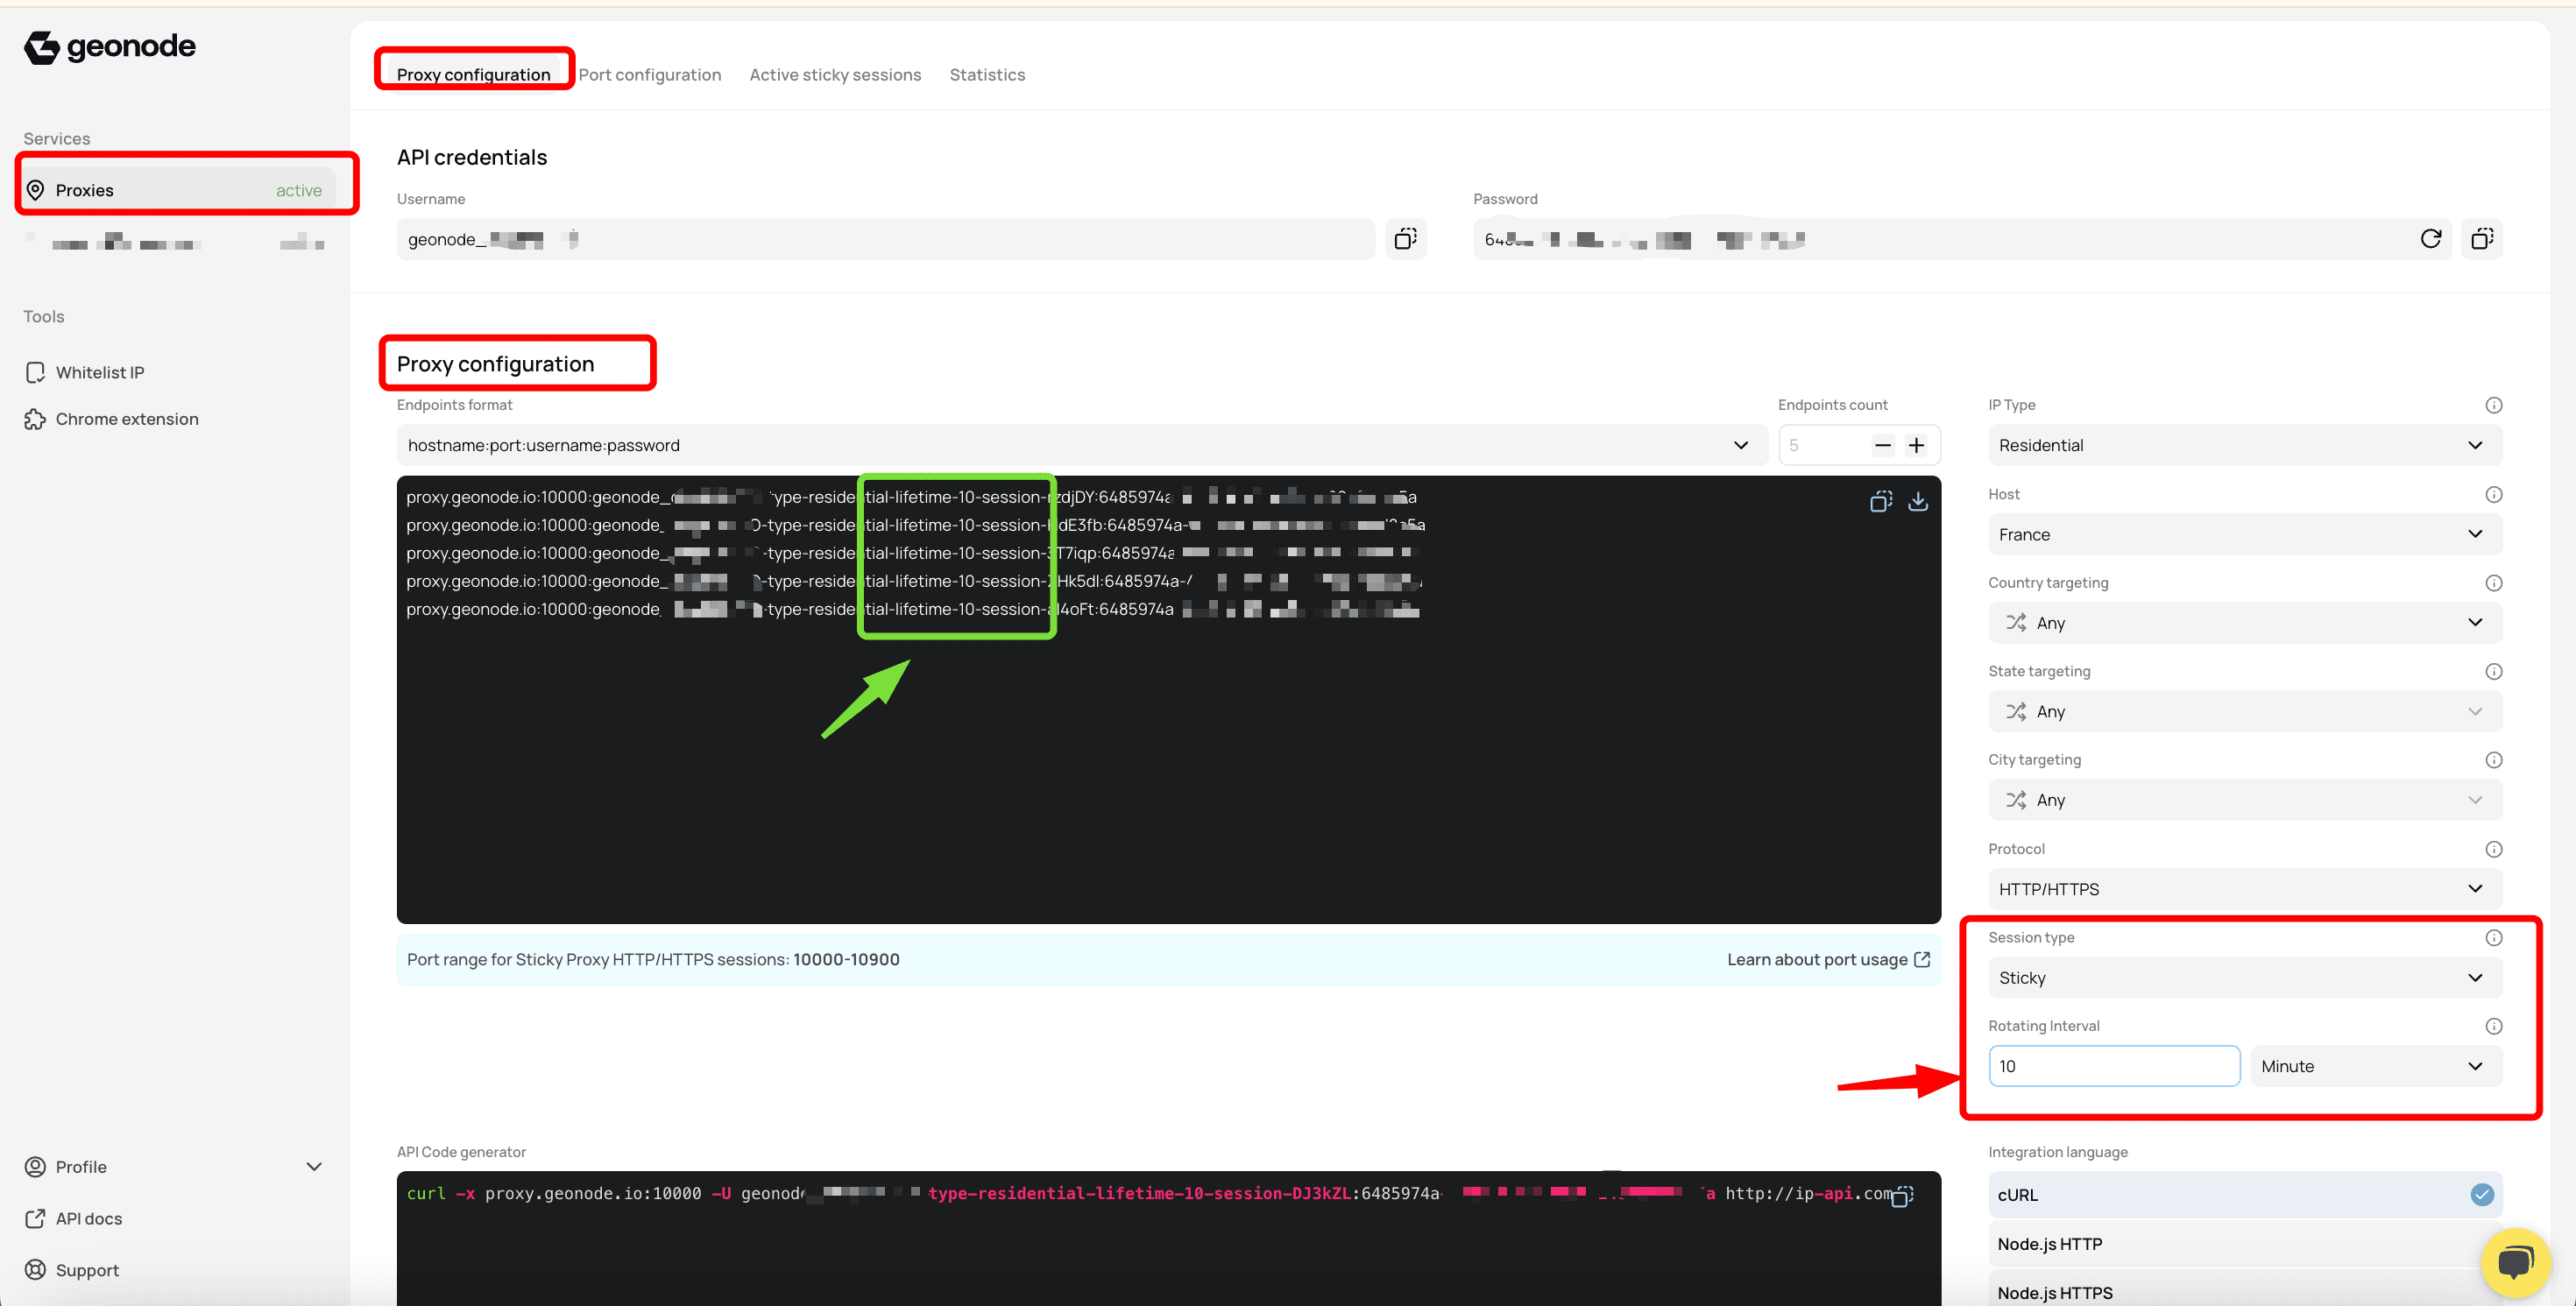
Step 2: Configure Your Proxy
- In Proxy Configuration, select the Sticky proxy type.
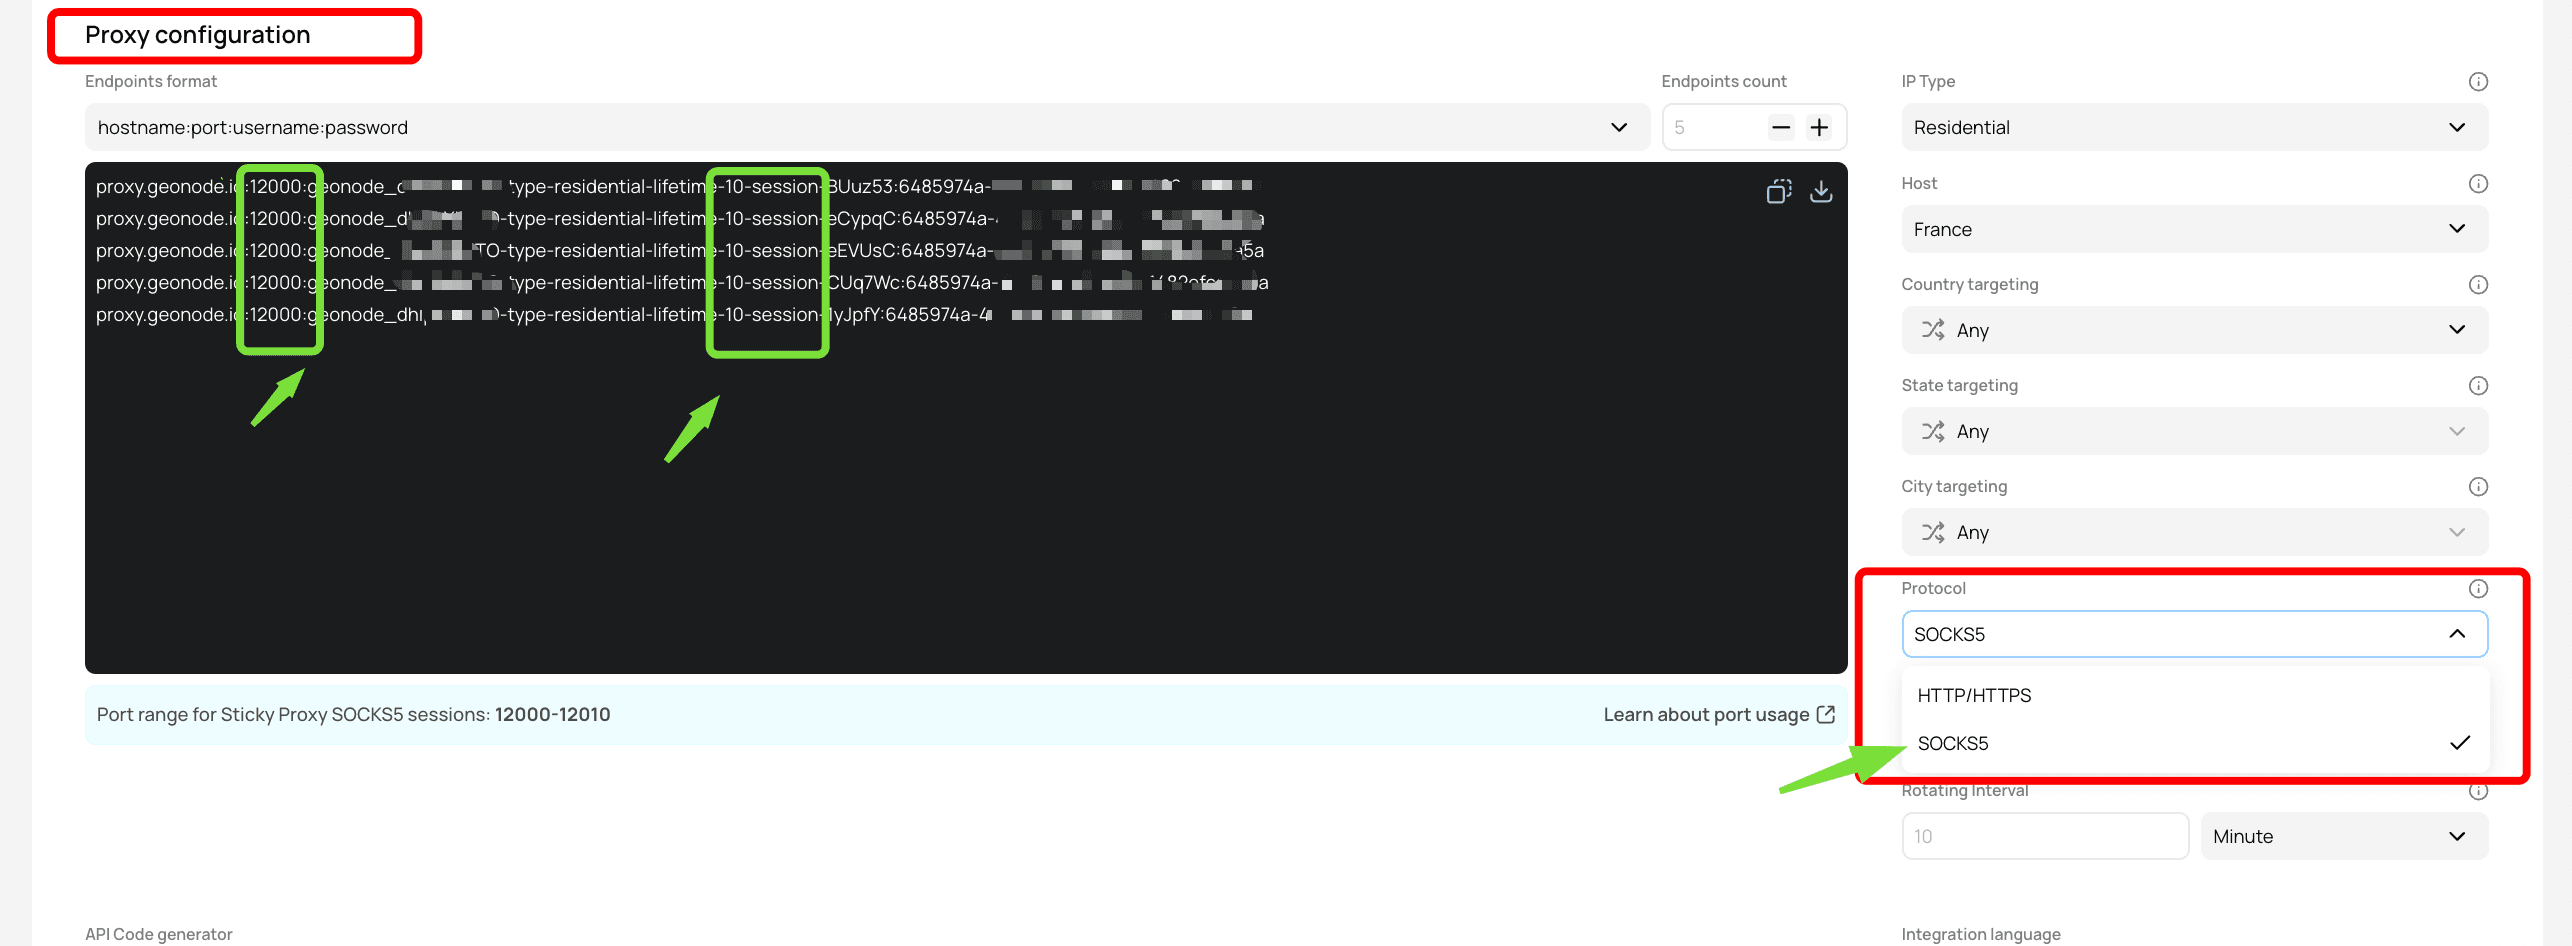
- Choose a proxy protocol: HTTP/HTTPS or SOCKS5.
- Changing session lifetime automatically updates the generated proxy list.
- The new duration will apply to all selected sessions.
Step 3: Set the Session Lifetime
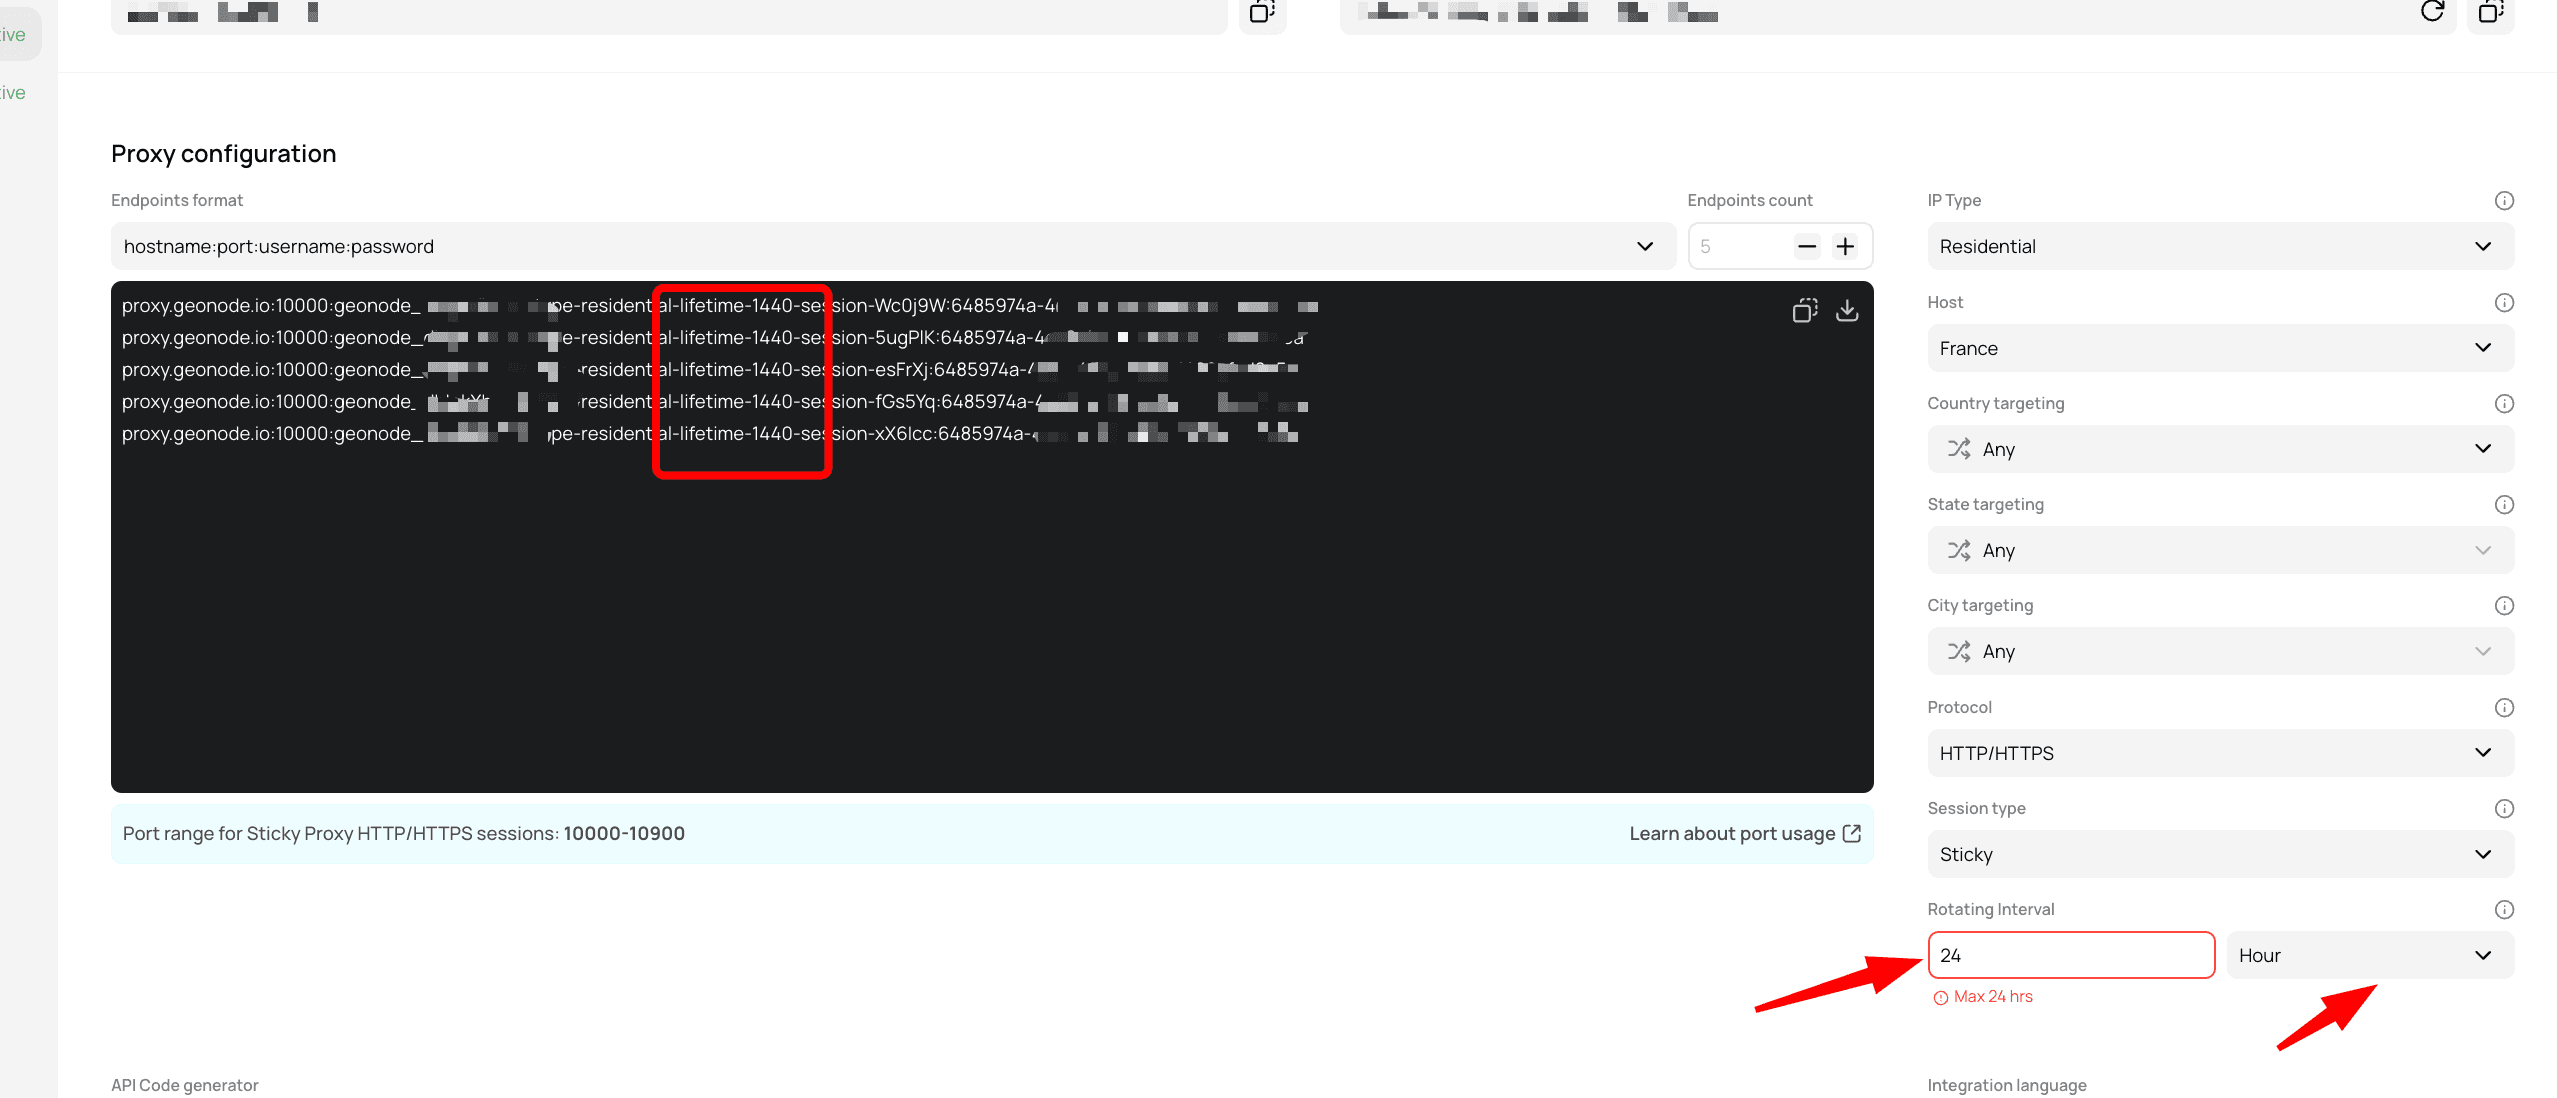
By default, session lifetime is 10 minutes, but you can adjust it as needed.
- Minimum: 3 minutes
- Maximum: 24 hours (1440 minutes)
You can enter the value in either minutes or hours, depending on your preference.
You can change this setting directly in the Dashboard or through the API.
Best Practices
- Use shorter sessions for frequent IP changes (for example, scraping). - Choose longer sessions for stability in login or account-based workflows. - Adjust settings as needed to balance performance and anonymity.