Quick Start Guide
1. Access the User Dashboard
Start by accessing your user dashboard — this is where you manage all proxy settings.
- Open your Dashboard.
- Scroll down to Proxy Configuration.
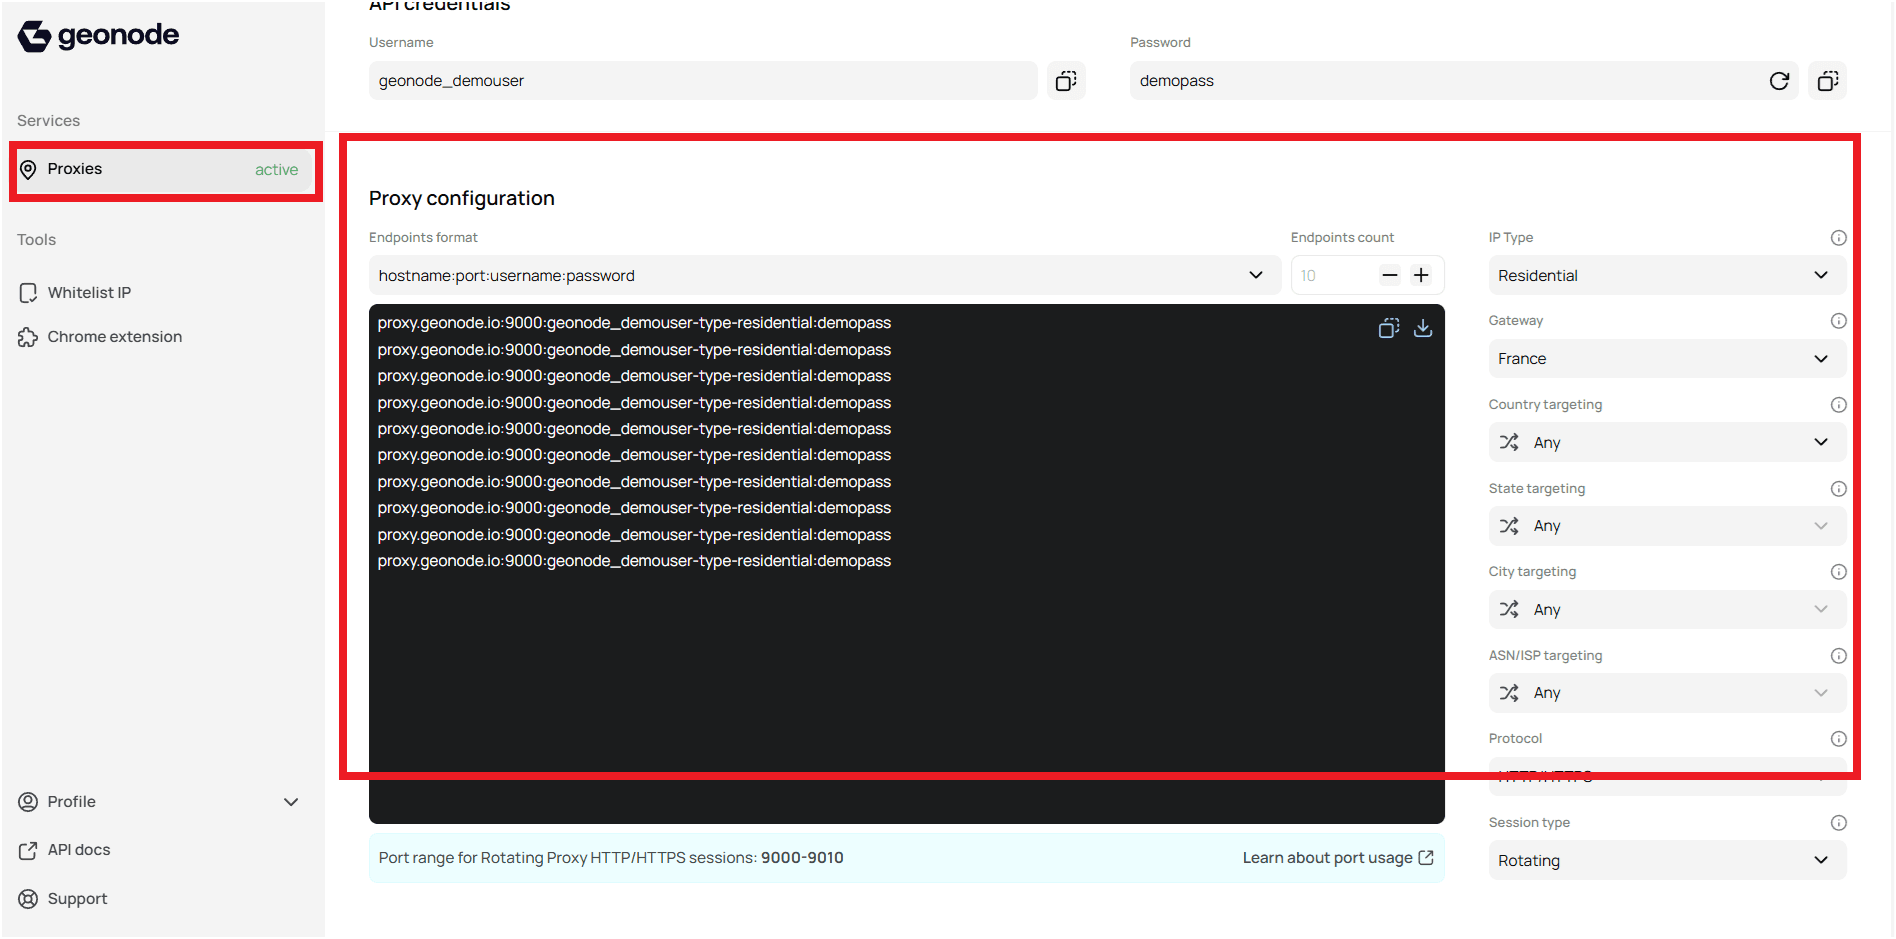
2. Get Proxy Credentials from Geonode
Obtain your authentication credentials directly from the dashboard.
- Username: Copy your unique API username.
- Password: Copy your API password.
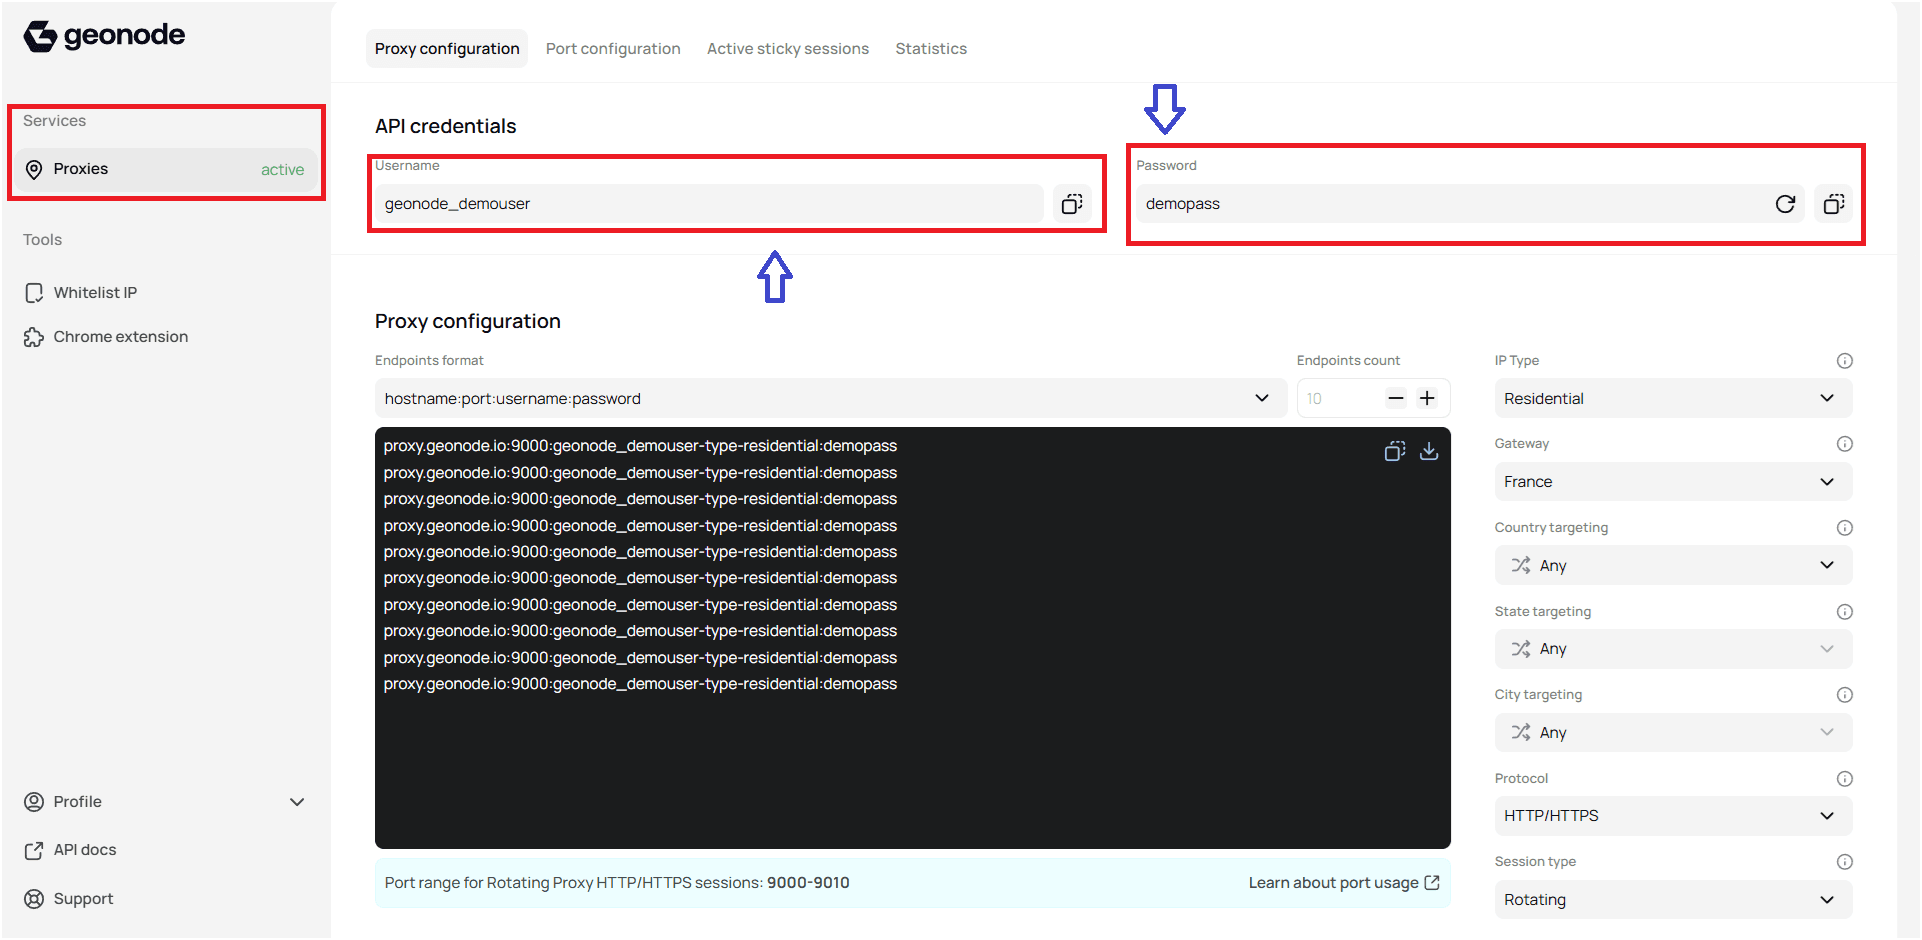
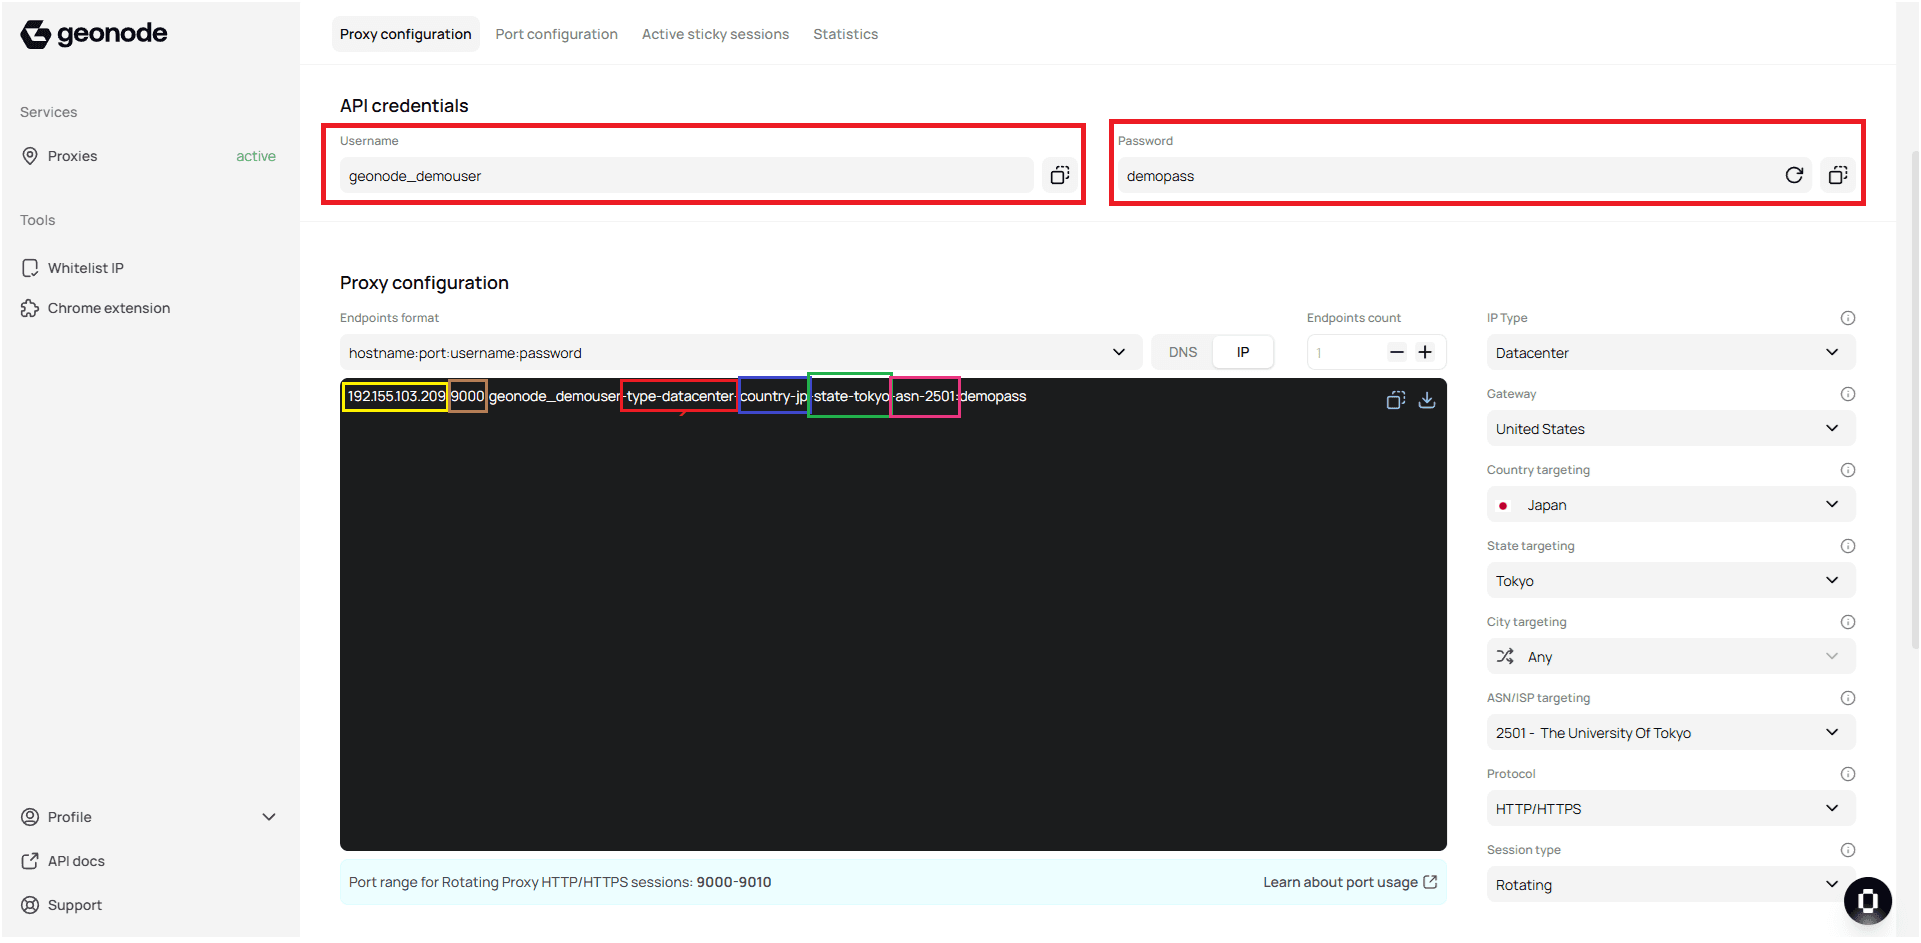
3. Configure Proxy Parameters
Within the Proxy Configuration section, adjust the parameters as needed.
| Parameter | Example | Description |
|---|---|---|
| Endpoint Format | hostname:port:username:password | Connection string format |
| IP Type | -type-datacenter | Choose between Datacenter or Residential |
| Gateway | 192.155.103.209 | Proxy gateway |
| Geo-Targeting | -country-jp, -state-tokyo, -as-2501 | Specify region or ASN (state and city cannot be combined) |
| Protocol | HTTP / HTTPS | Default port 9000 |
| Session Type | — | Rotate or Sticky sessions |
| Output Format | — | Customize response format |
See the full guide:
How to use the Endpoint Generator to configure proxy parameters
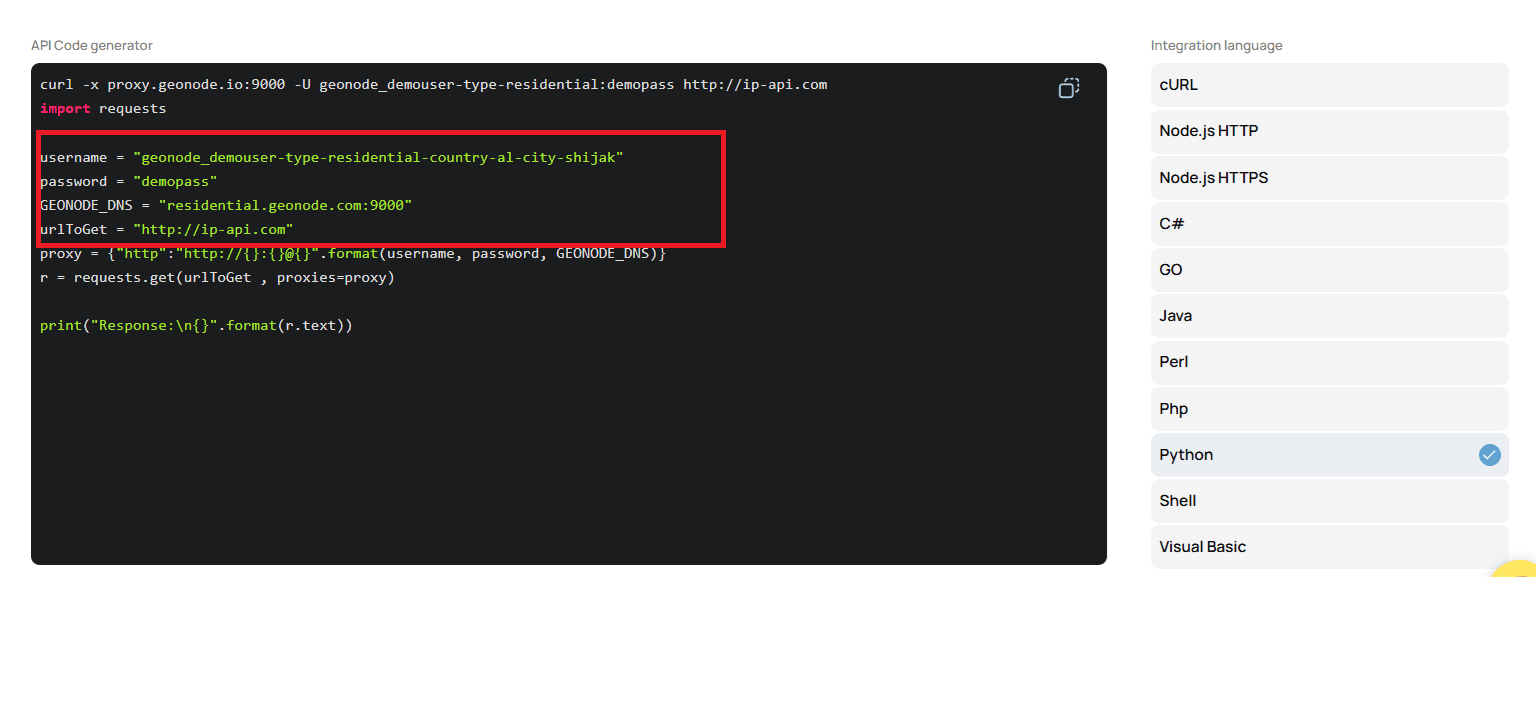
4. Make Your First API Call
Once your endpoint is configured, generate your first API request.
- Go to API Code Generator in the dashboard.
- Select your configuration settings.
- Copy the generated code snippet.
5. Configure Proxy in Different Browsers or OS
To integrate your proxy on specific platforms, follow one of the setup guides below.
Desktop Operating Systems
Mobile Operating Systems
Browsers
- Chrome
- Edge
- Brave
- Firefox
- Safari
- Incognito Mode
- Incogniton
- AdsPower
- Ghost Browser
- GoLogin
- Dolphin Anty
- ClonBrowser
- MoreLogin
- MultiLogin
Extensions
Conclusion
You’re all set!
Your Geonode proxy is now configured and ready for use across browsers, operating systems, and API integrations.
If you encounter any issues, refer to the troubleshooting section or Geonode support.