This guide will help you configure a Geonode proxy in the GeeLark browser, both for mobile and desktop profiles. You’ll learn how to:
- Add and manage Geonode proxies in GeeLark
- Create mobile and desktop profiles
- Set up device environments
- Launch virtual profiles and test if proxies work
Prerequisites: Get Proxy Credentials from Geonode
Before setting up a proxy, first, retrieve your proxy credentials from the Geonode dashboard.- Follow this guide: How to Obtain Proxy Server Information
Steps: Setting Up a Proxy in GeeLark
Follow these steps to configure a proxy in GeeLark:Install GeeLark
- Go to the GeeLark Download Page.
- Download the browser based on your operating system.
- Install the software and create an account.
For Mobile
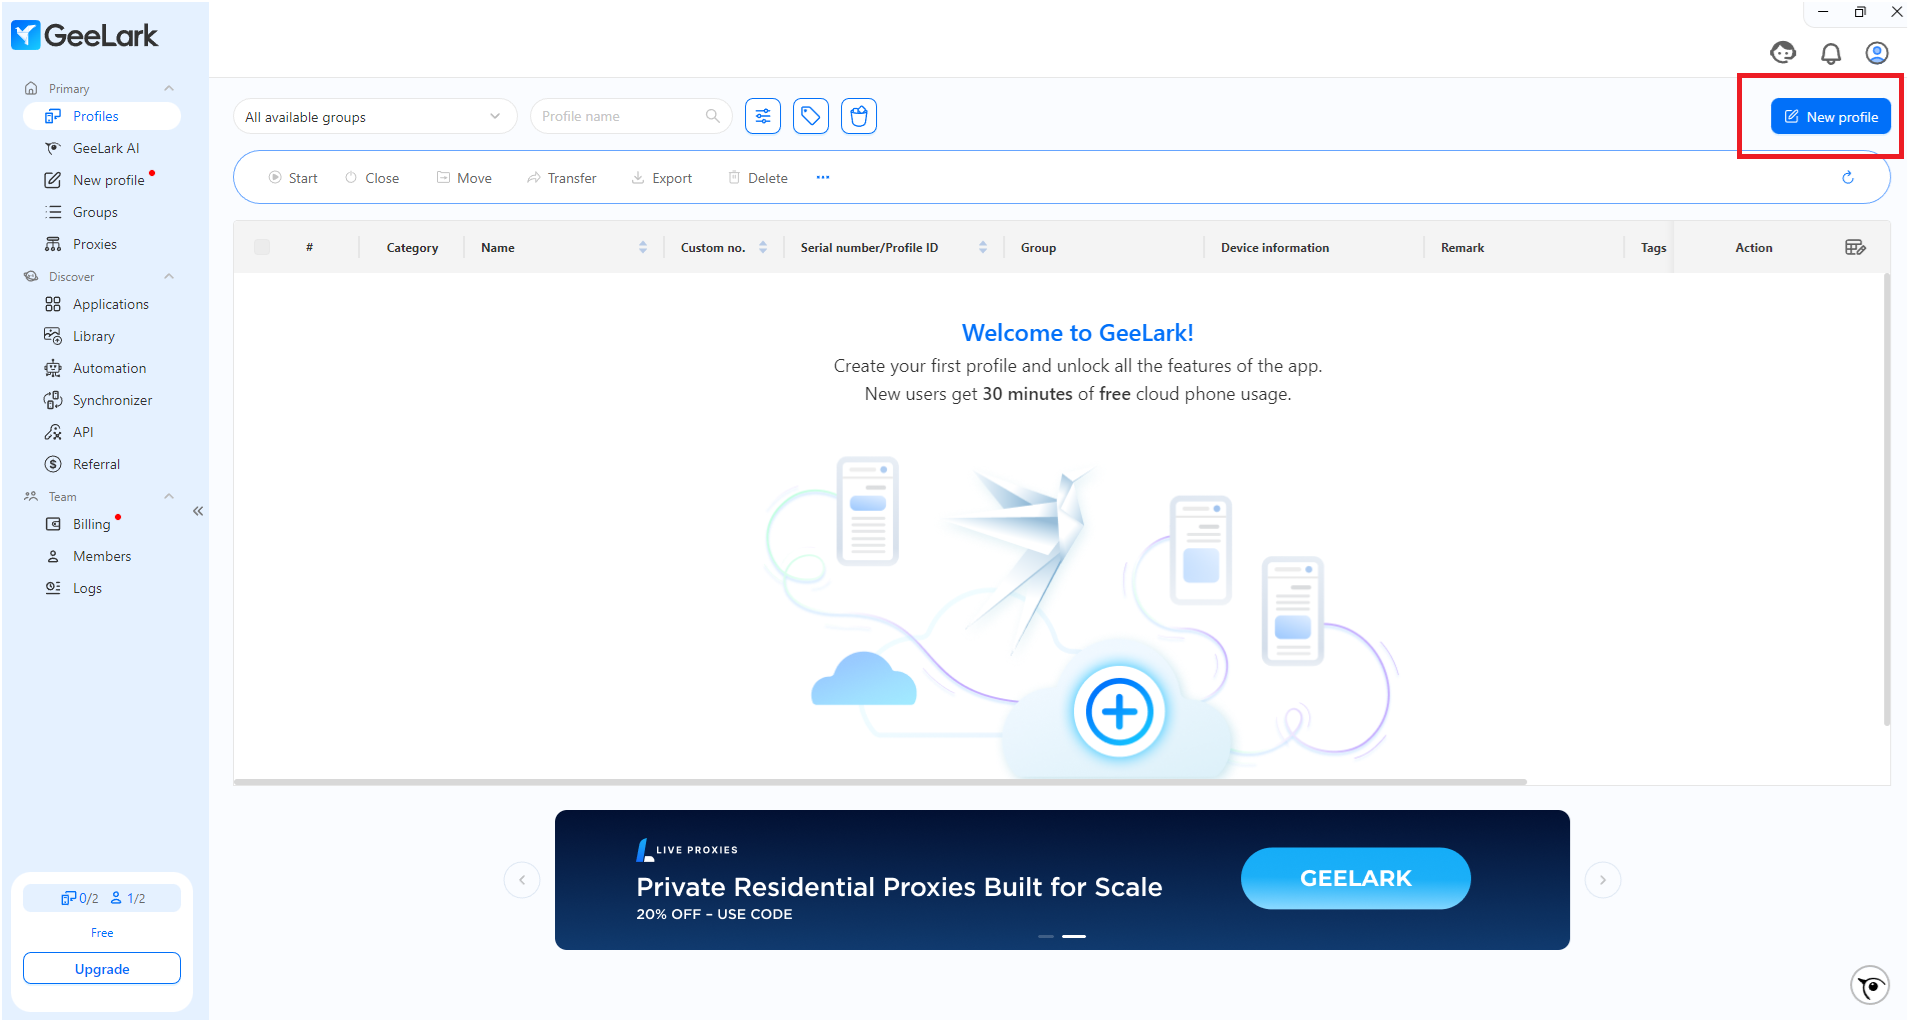
Step 1: Create a New Profile
-
Open GeeLark and click the New Profile button.
-
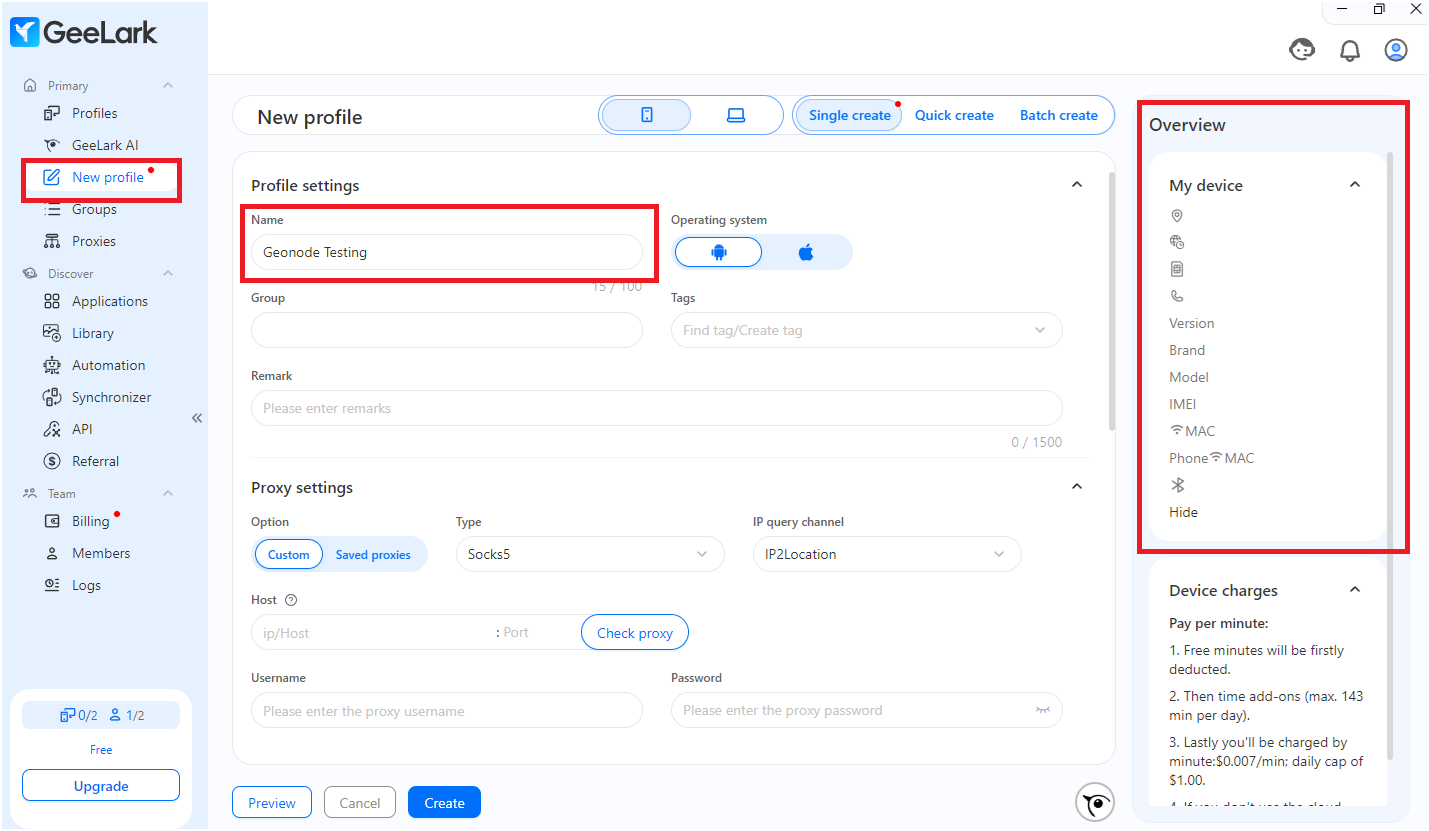
Enter the required details:
- Profile name
- Operating system
-
On the right side, review your browser details.
Step 2: Add a Proxy
You can add a proxy while creating a profile, or manage them separately from the Proxies tab before profile setup.Option A: Add Proxies First (Recommended for Bulk Management)
-
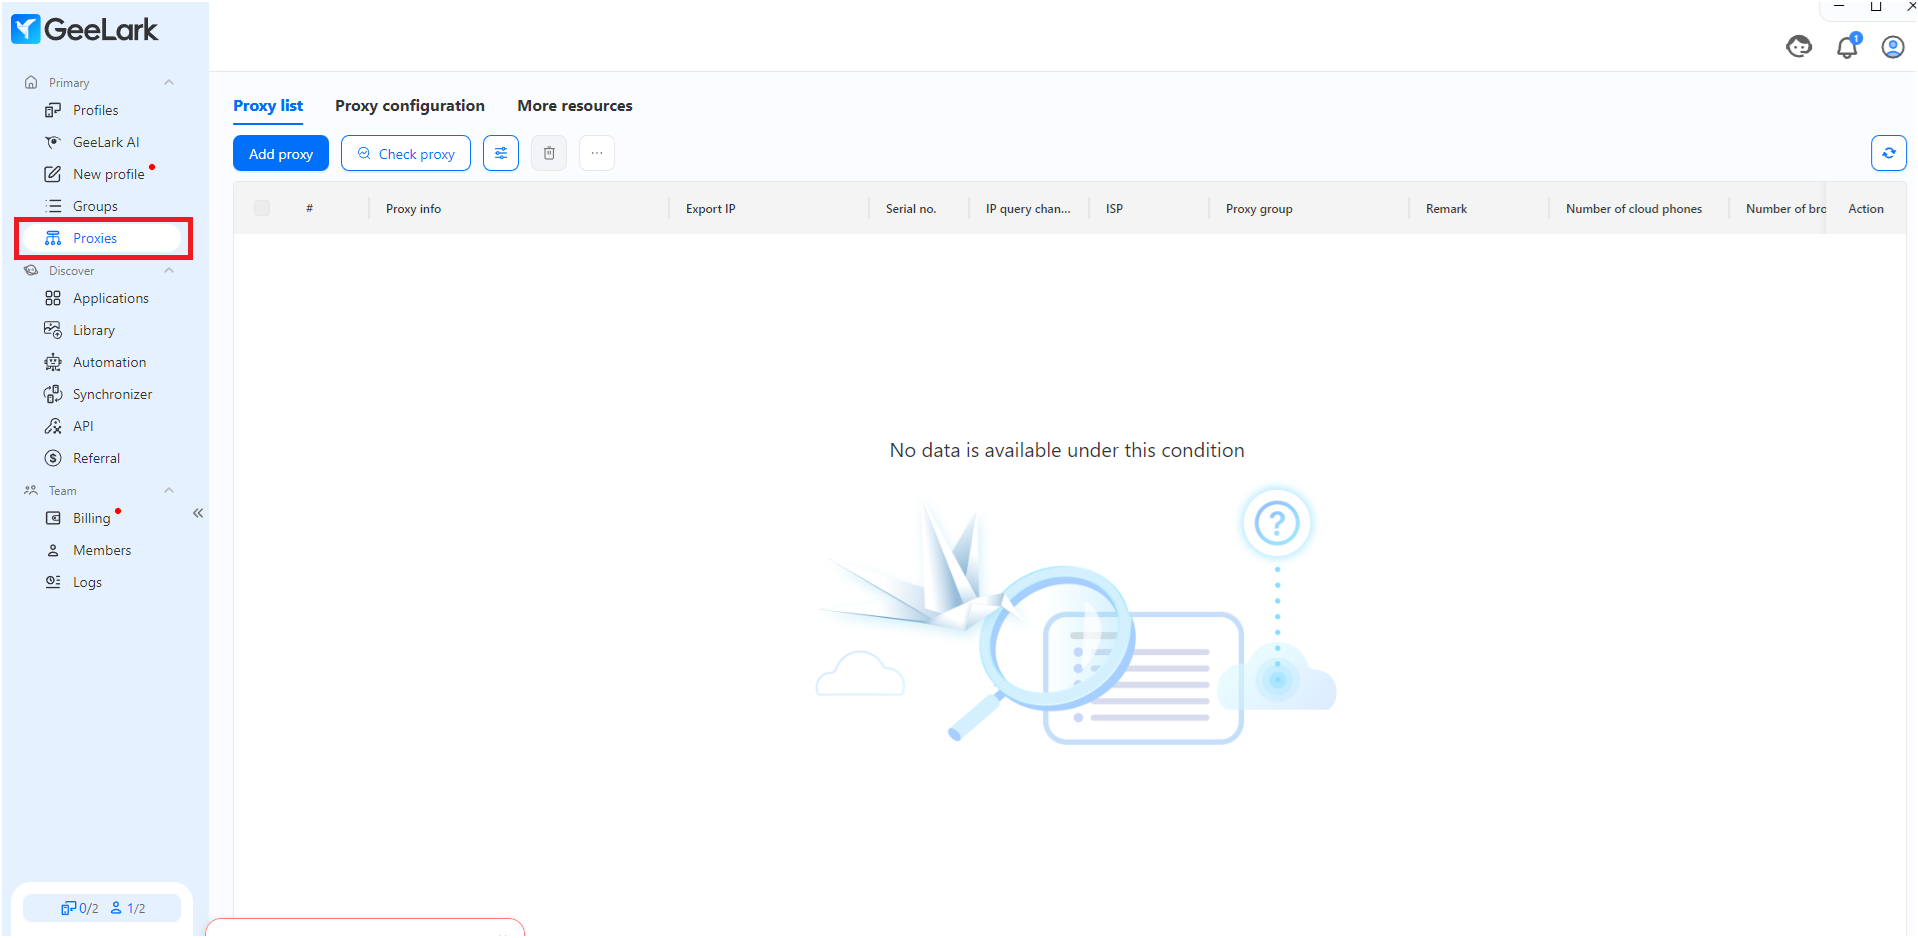
Go to the Proxies tab from the sidebar.
-
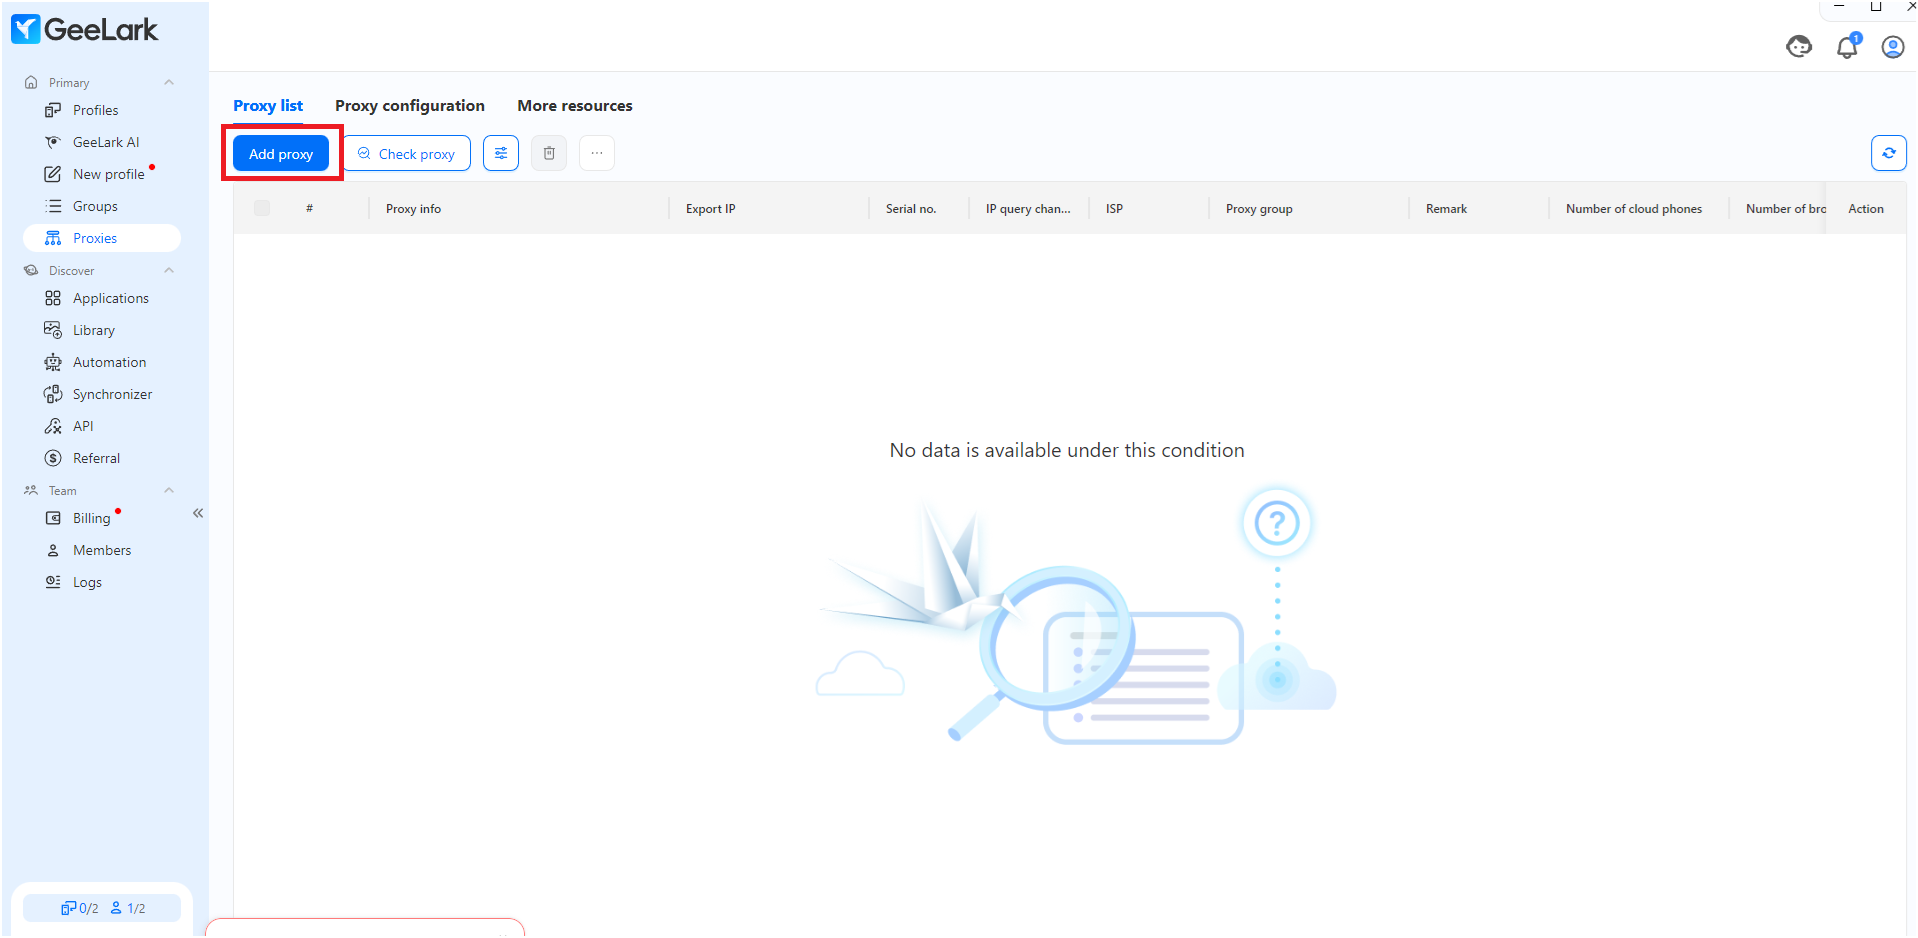
Click the Add proxy button.
-
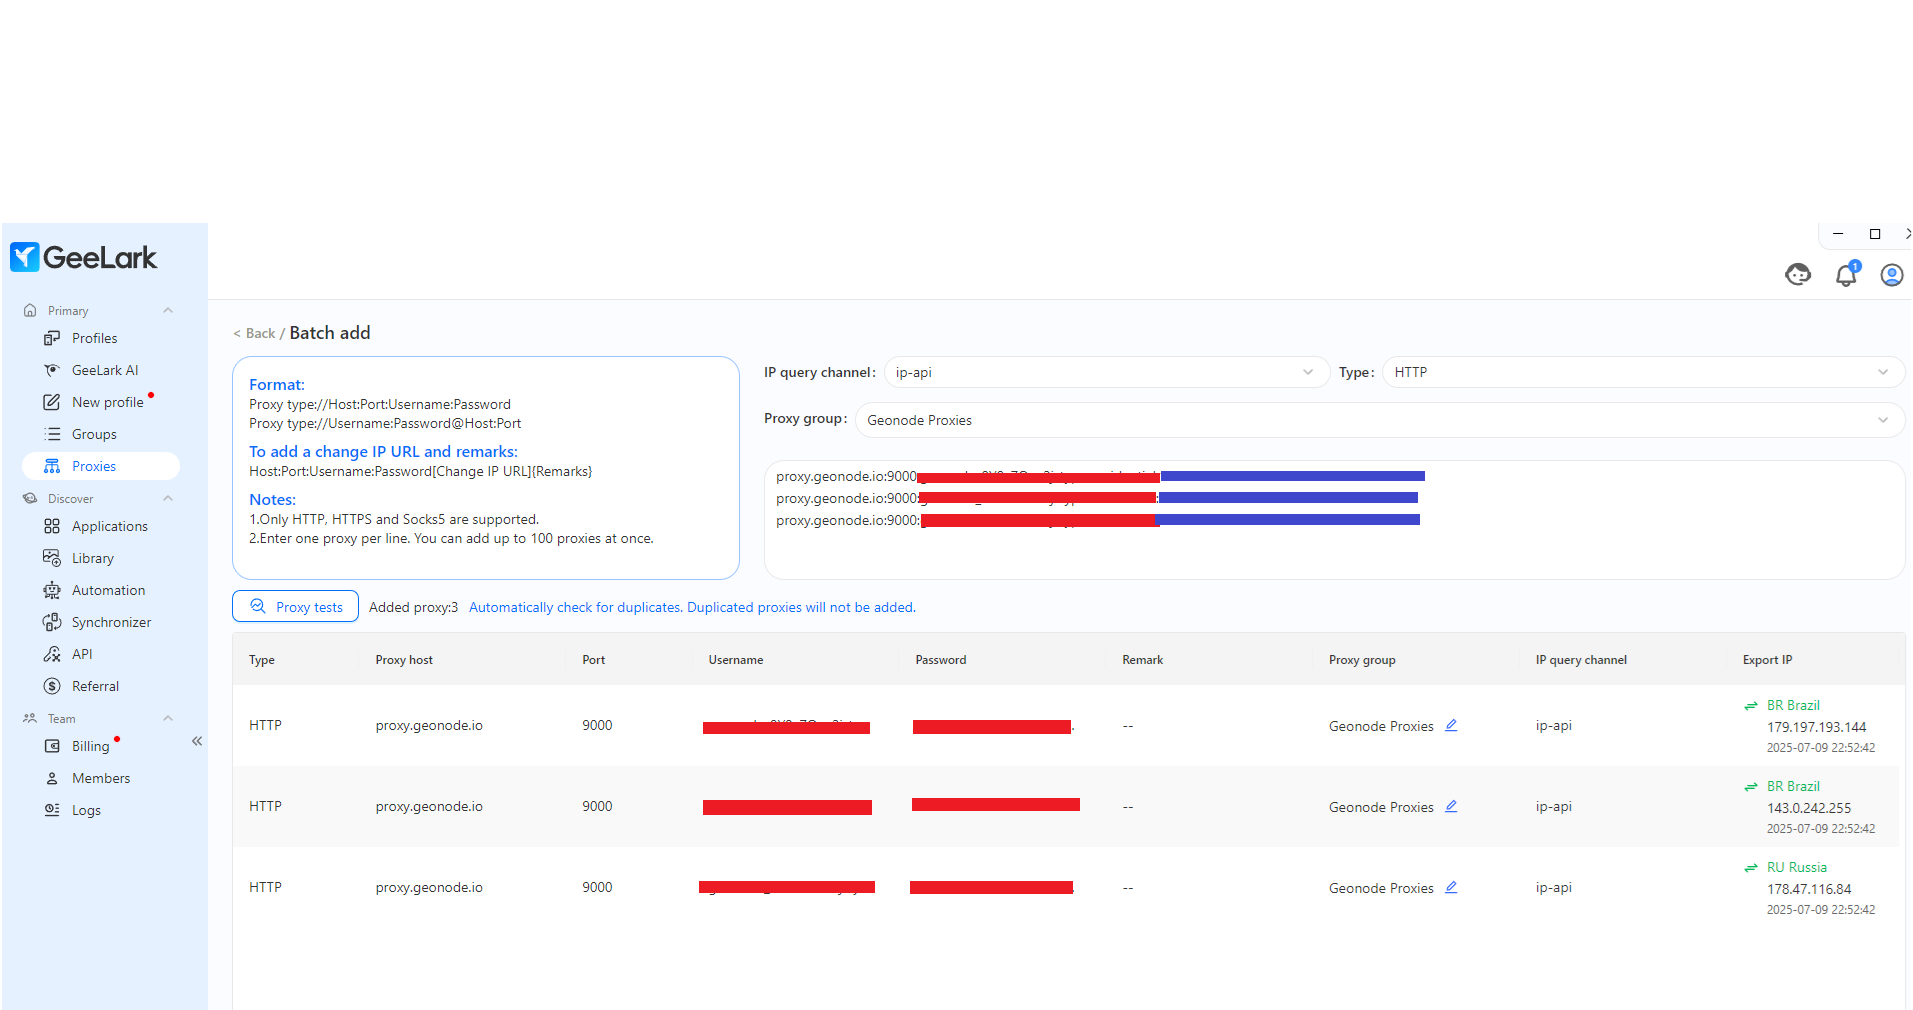
Use the format shown to enter your proxy:
You can also use:Or
-
Select your Type as HTTP, and set:
- Proxy group: e.g., Geonode Proxies
- IP query channel: Use ip-api for geolocation
- Add one proxy per line. You can add up to 100 at once.
-
Once added, the proxy will automatically show up in the table with details like:
- Type: HTTP, HTTPS, or SOCKS5
- Proxy host and Port
- Username and Password
- Remark (Optional comment)
- Proxy group (e.g., “Geonode Proxies”)
- IP Query Channel: Use
ip-apito resolve export IP - Export IP (resolved after testing)
-
Click the Proxy tests button. It will check whether the proxy is active and display:
- The resolved country and IP address
- A green arrow icon showing the proxy is working
- A timestamp of the successful test
Option B: Add Proxy During Profile Creation
- While creating a profile, navigate to the Proxy tab.
- Select your proxy Type (e.g., HTTP).
-
Enter these fields manually:
- Proxy: Your Geonode proxy IP and Port (e.g., proxy.geonode.io:9000)
- Username: Your Geonode username
- Password: Your Geonode password
- Choose IP Query Channel like ip-api to test your proxy live.
-
Click Check Proxy to verify that it’s working.
Step 3: Create and Launch the Profile
Now that your proxy is configured, let’s complete the profile setup by choosing your device settings and launching the profile.1. Fill in Profile Settings
- Click the New Profile button.
-
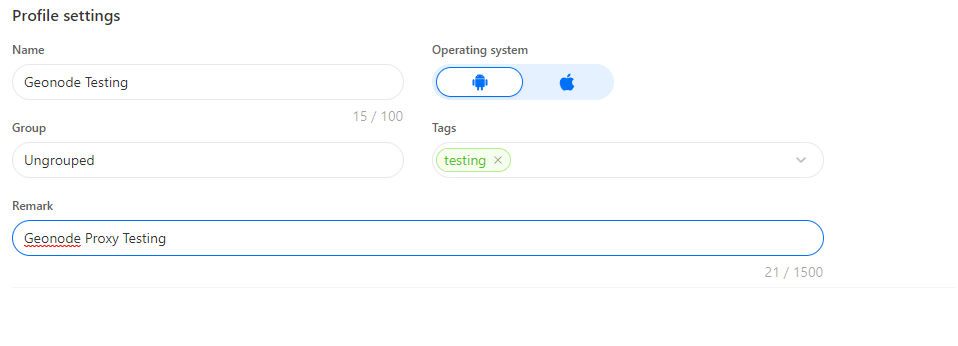
Under Profile Settings, you can:
- Give the profile a name (optional).
- Select the Operating System (Android or iOS).
- Add Group, Tags, and a Remark to keep your profiles organized.
2. Set Up Proxy Settings
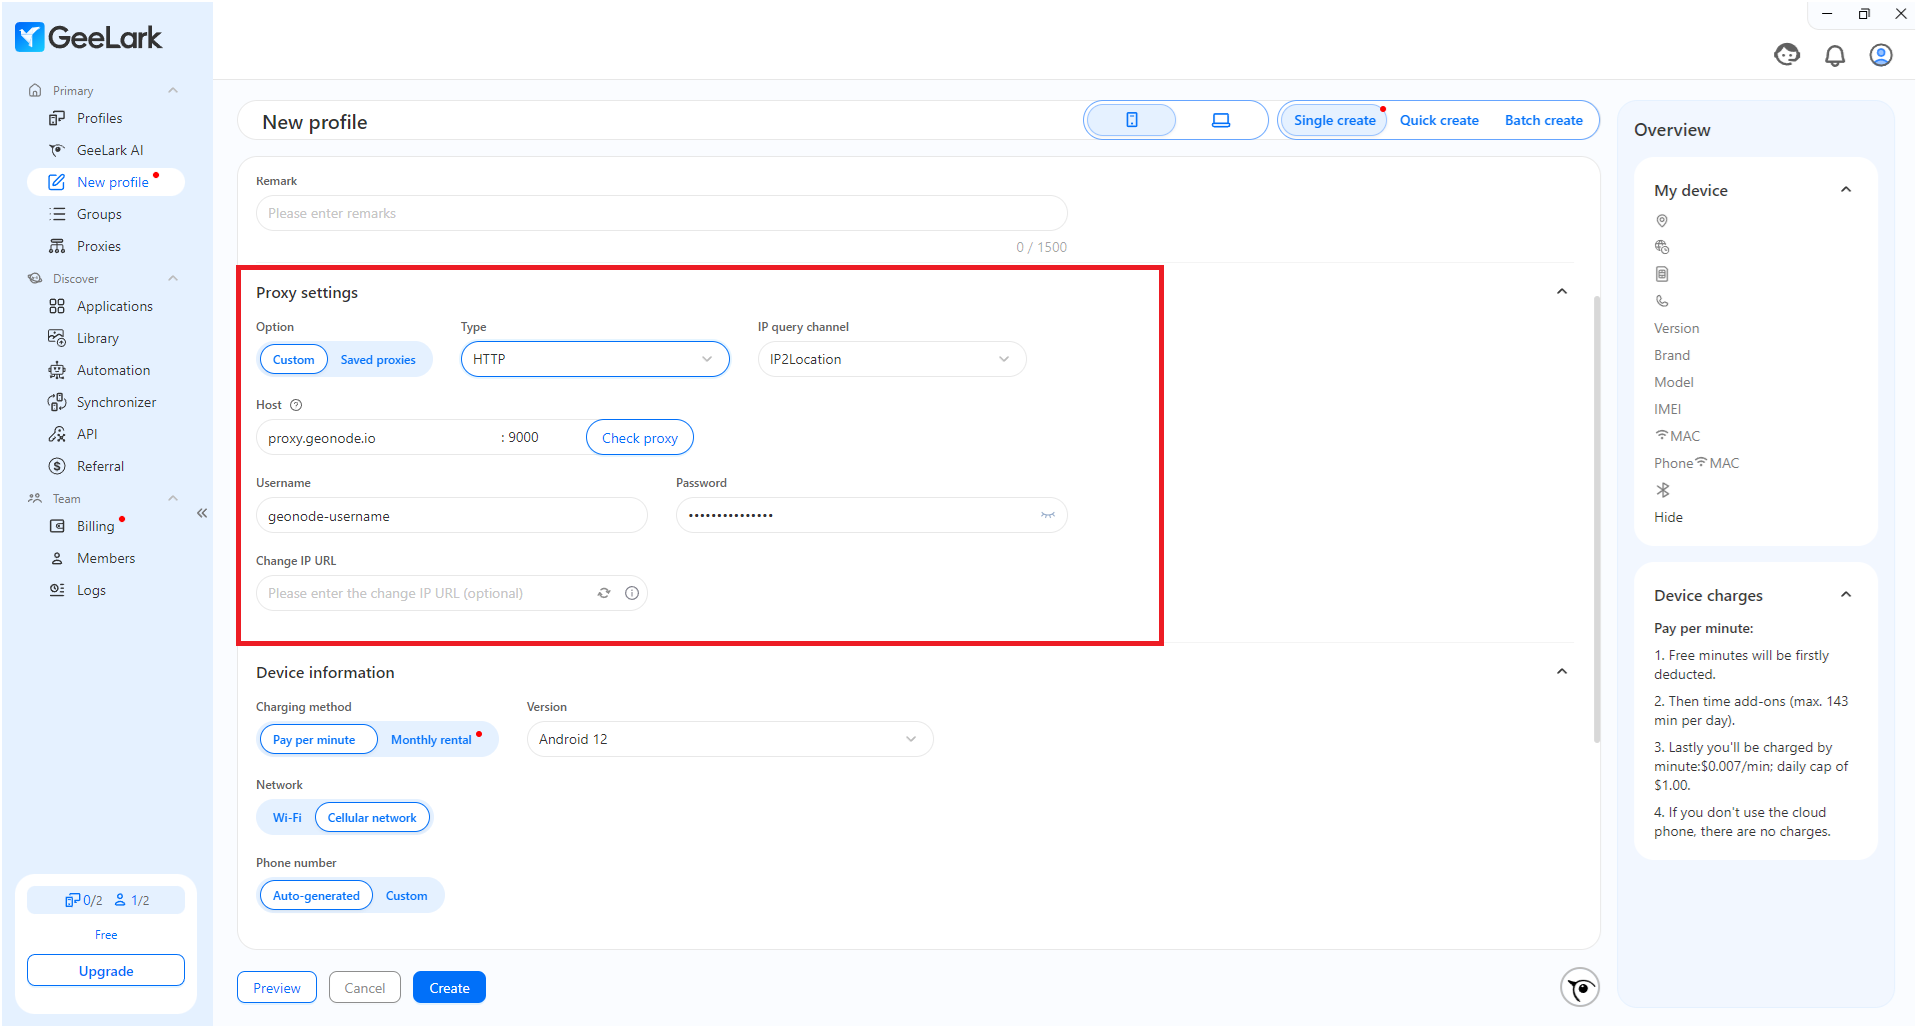
Choose how to add the proxy:Option A: Custom Proxy
- Select Custom
-
Fill in:
- Type: HTTP, HTTPS, or SOCKS5
- Host: proxy.geonode.io
- Port: 9000
- Username and Password
- Set IP Query Channel (e.g., IP2Location or ip-api)
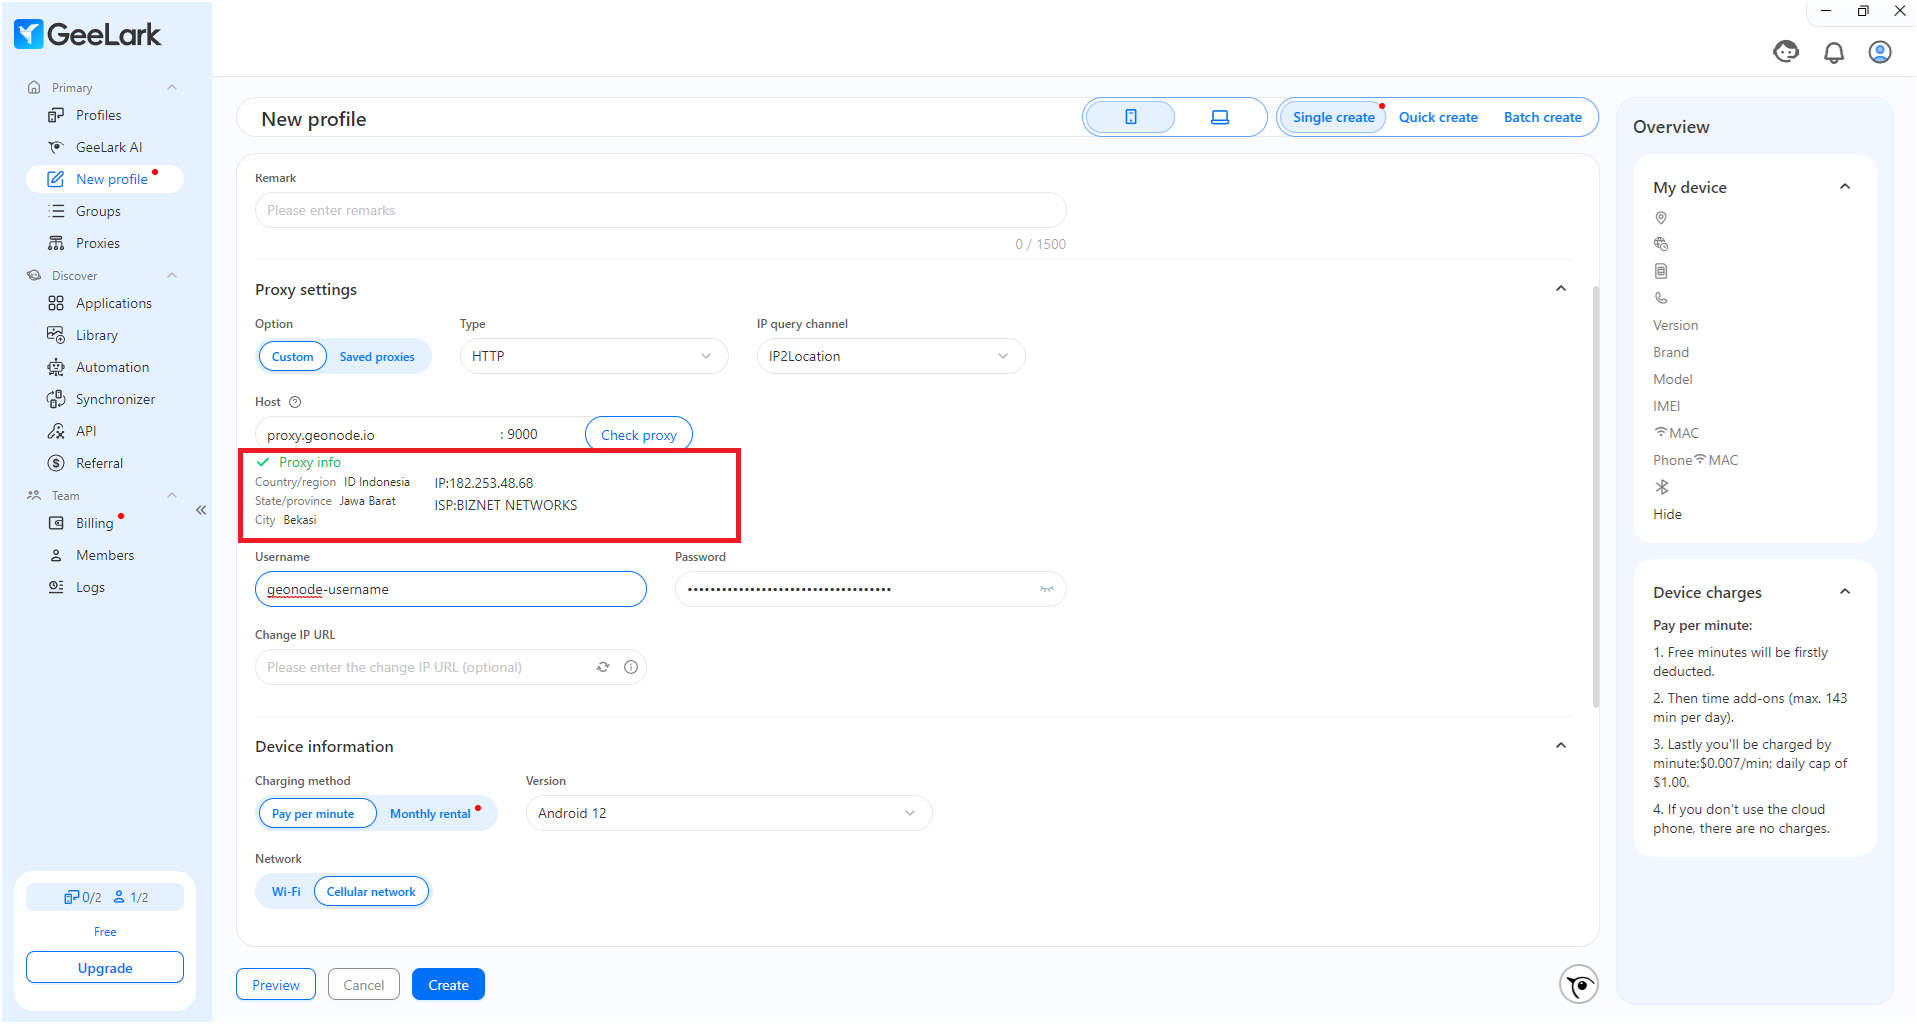
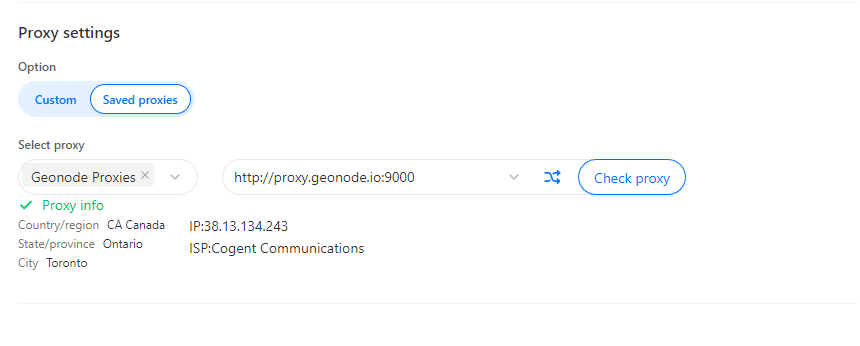
- Click Check Proxy to test your connection. If working, it will show your proxy’s country, city, ISP, and IP details.
Option B: Saved Proxies
- Select Saved proxies
- Choose a proxy group (e.g., Geonode Proxies)
- Pick a specific proxy from the list
- Click Check Proxy to confirm it’s active
3. Choose Device Information
Under Device Information, you can customize how the virtual mobile device behaves.- Charging Method: Pay per minute or Monthly rental
-
Version:
- Select Android version (e.g., Android 12, 13, 15)
- All versions support camera, sound, and app uploads
- Network: Wi-Fi or Cellular Network
- Phone Number: Auto-generated or Custom
- Area: Based on IP (auto matches proxy location) or Custom
- Device Brand & Model: Random or Custom
- Language: Based on IP or select manually

4. Create and Launch the Profile
- Once you’ve completed all settings, click the Create button at the bottom of the form.
- After the profile is created, it will appear in the Profiles list with all your selected details like OS version, proxy region, remark, and tags..
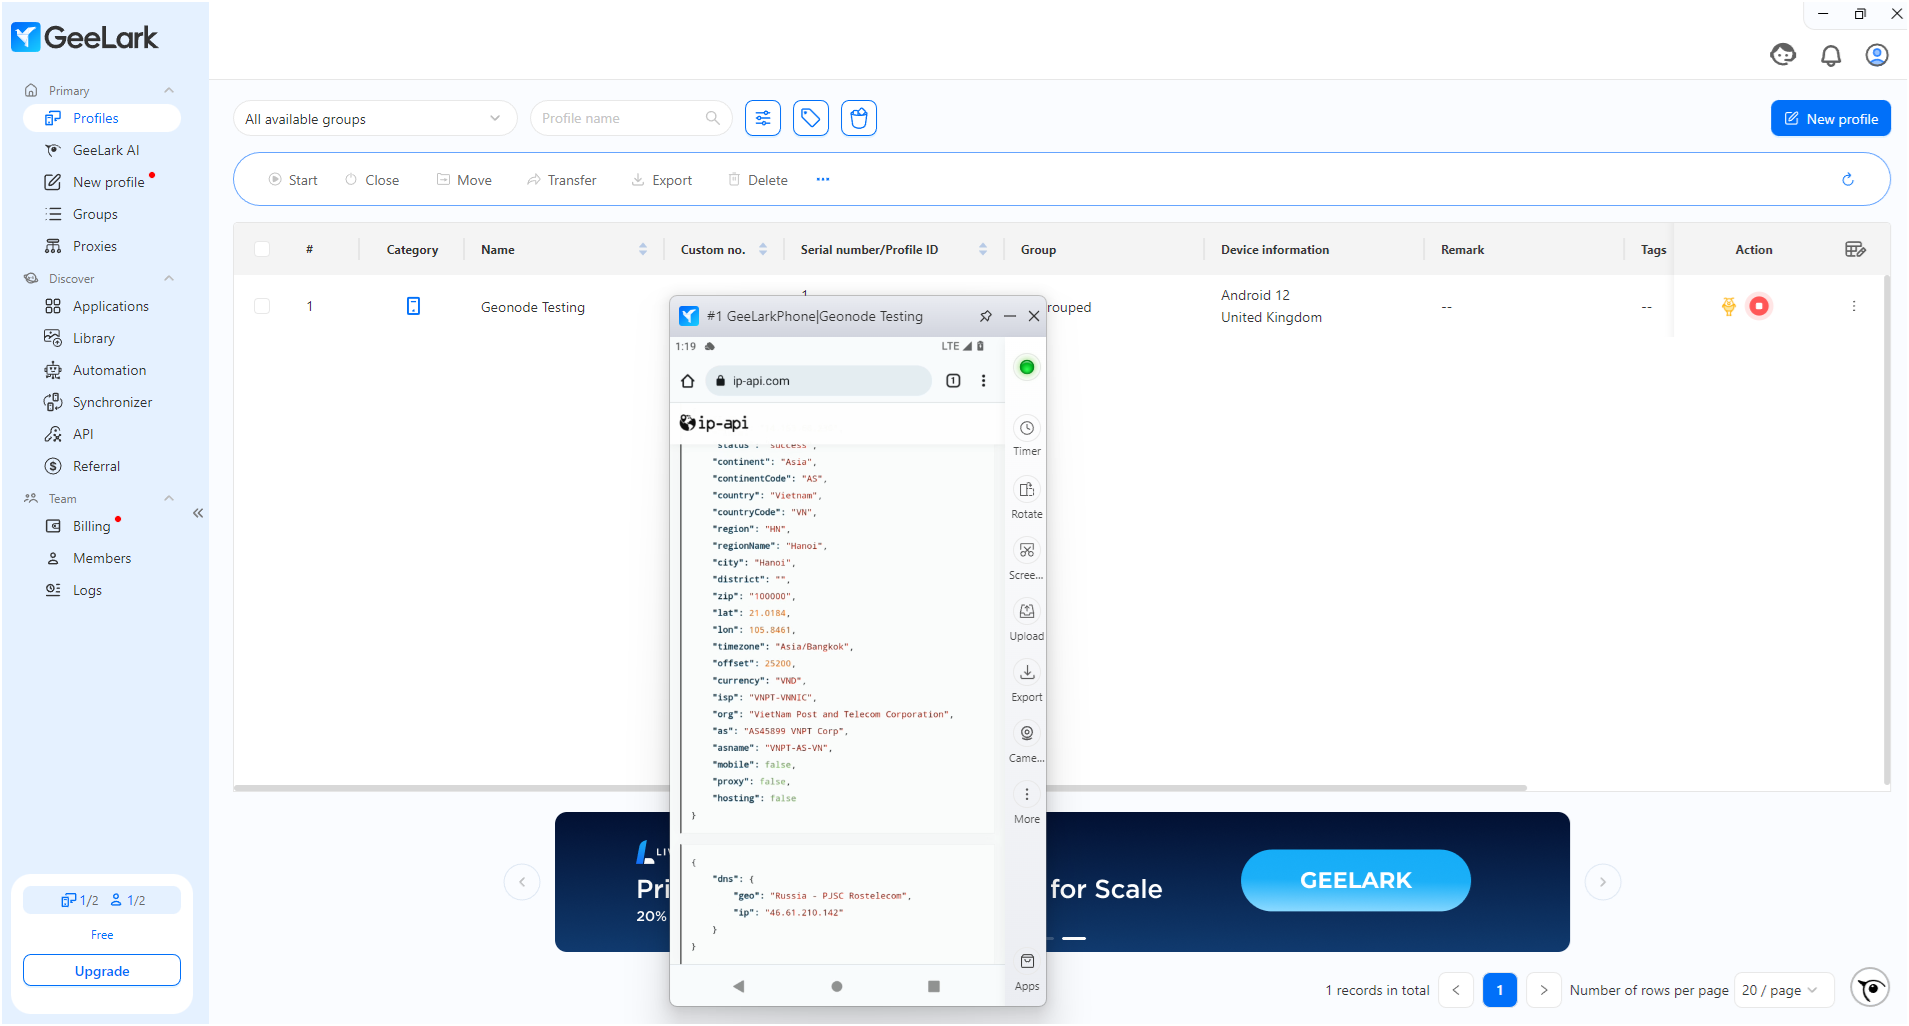
- To launch the virtual mobile device, click the Action (▶️) button next to your profile.
-
A new window will open with the mobile device. You can now:.
- Open any browser
- Test if your proxy is working
- Visit a website like ip-api.com to check the IP, location, and ISP of your configured proxy.
For Desktop
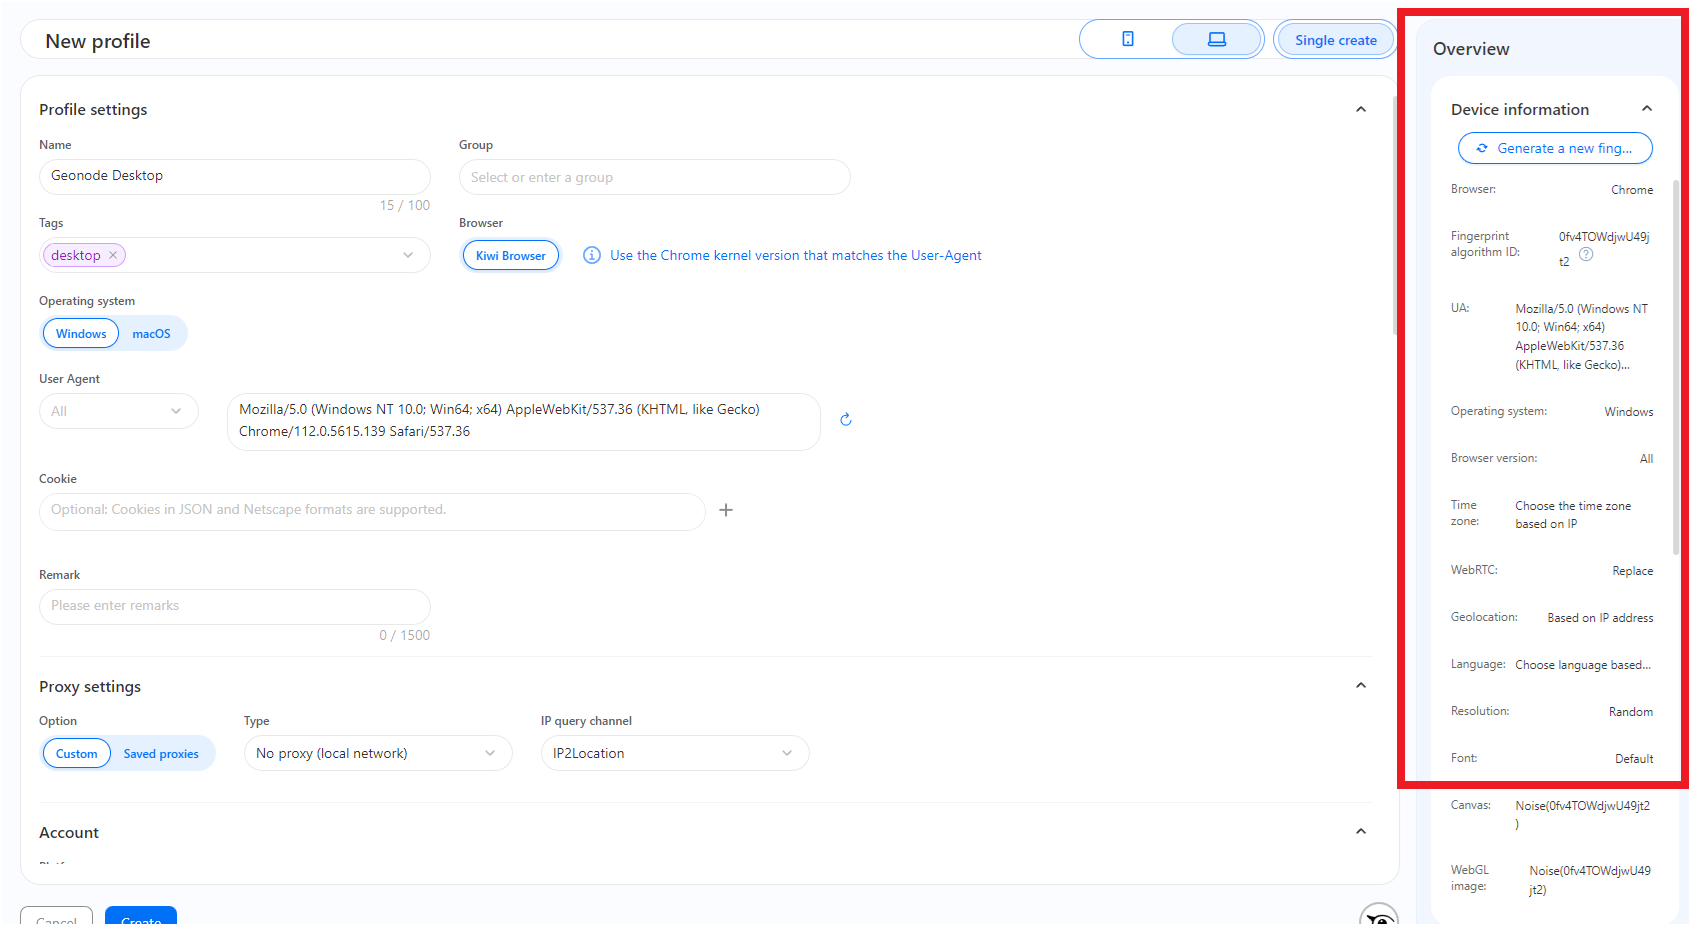
Follow these steps to configure a Geonode proxy in a desktop profile in GeeLark.Step 1: Create a New Desktop Profile
- In the GeeLark panel, click the New Profile button.
- On the top right, switch to the Desktop icon (🖥️).
-
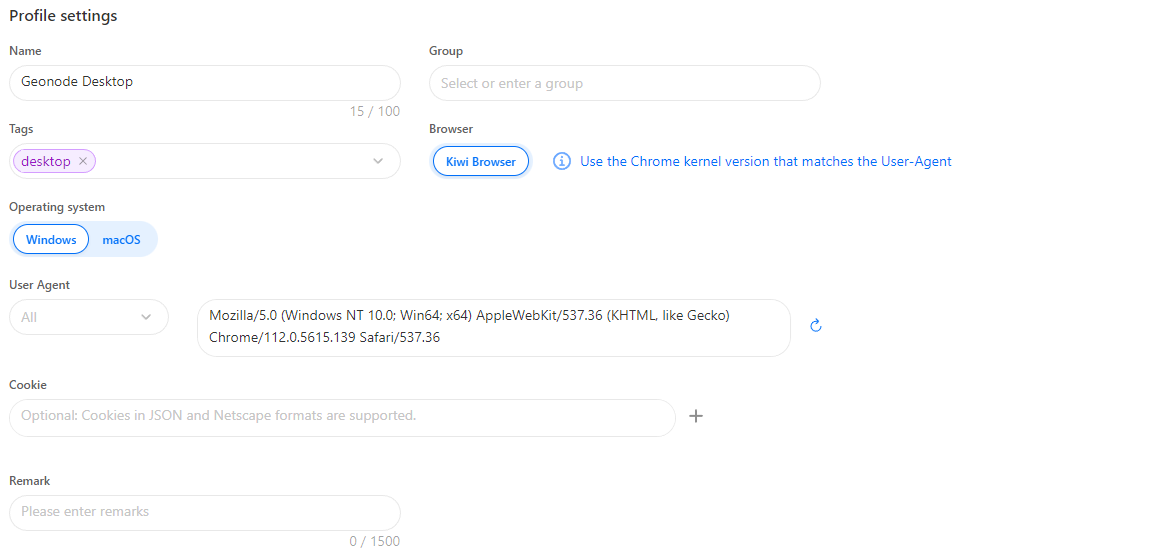
Under Profile Settings, enter:
- Profile Name (optional)
- Group (optional)
- Tags (optional)
- Remark (any helpful note for you)
- Choose your Operating System: Windows or macOS
- Select the Browser (e.g., Kiwi Browser).
- The User-Agent field will auto-generate based on your OS and browser, or you can customize it.
- Cookie: (Optional) Paste session cookies in JSON or Netscape format if you want to retain logins or states from another session.
-
Remark: Write any internal notes for future reference — like the goal of this profile or special usage instructions.
Step 2: Set Proxy for Desktop Profile
The proxy setup for desktop works the same way as on mobile.- Option A: Use a Custom Proxy
- Option B: Use a Saved Proxy
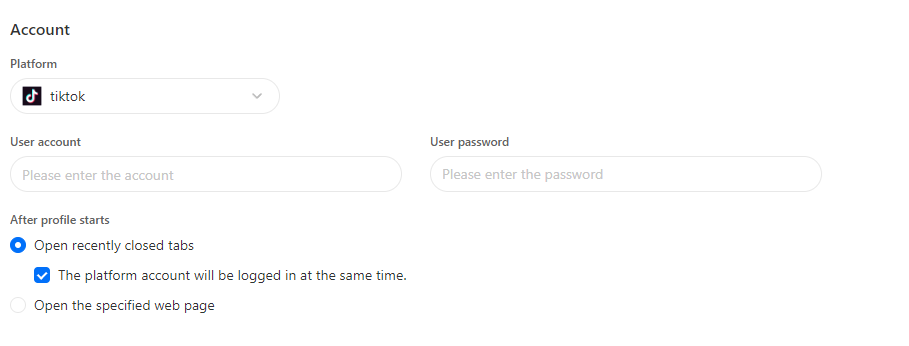
Step 3 (Optional): Account
You can optionally configure:- Platform Account Info (login credentials if needed for specific websites)
-
Set startup behavior:
- Reopen recent tabs
- Open a custom web page at launch
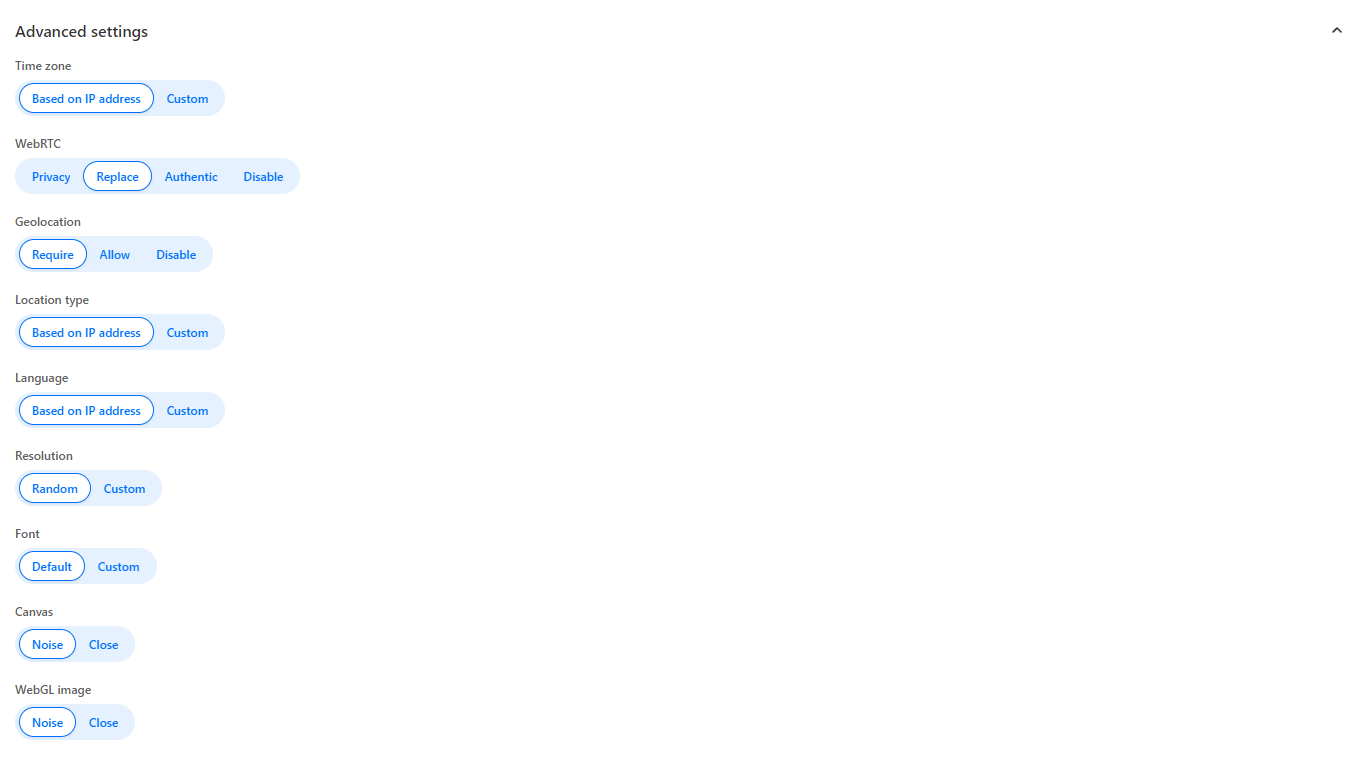
Step 4 (Optional): Advanced Settings
GeeLark also allows you to fine-tune fingerprinting and device behavior under the Advanced Settings panel. You can customize:- Time zone, language, and geolocation
- WebRTC, Canvas, WebGL, AudioContext
- Resolution, font, and device hardware
- Noise-based fingerprint controls (e.g., for Media Devices, ClientRects, SpeechVoices)
- Device properties like storage, battery, Bluetooth, concurrency, and port scan protection
Step 5: Review device information
On the right-hand panel, you’ll see device information, a summary of the fingerprint and environment settings for your desktop profile. This includes:- Browser and OS
- User-Agent
- Time zone
- WebRTC and geolocation options
- Language, canvas, WebGL, fonts, and more
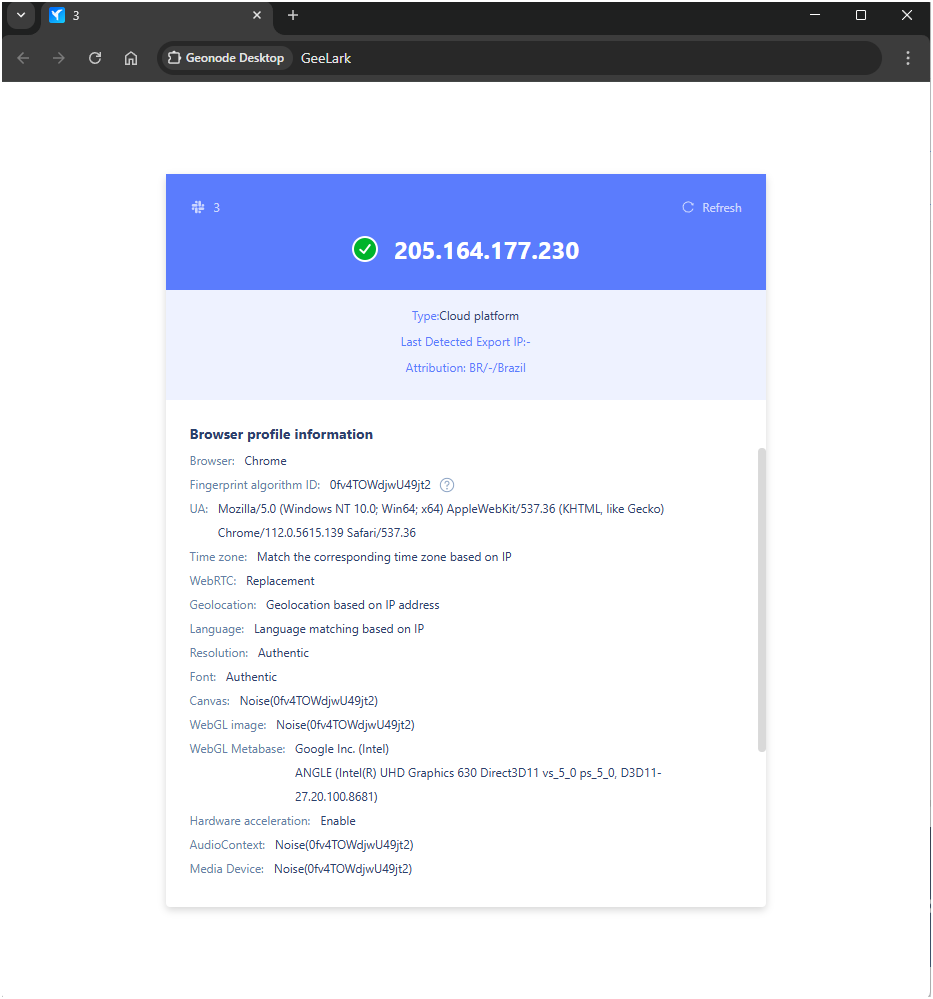
Step 6: Launch the Desktop Profile
Once everything looks good:- Click the Create button
- The profile will now show up in your profile list
- Click the Action button (▶️) to launch the desktop profile
- Open a browser tab and visit a test site like
https://ip-api.comto confirm your Geonode proxy is active and your IP, location, and ISP match expectations
If you encounter any issues, refer to the troubleshooting section or Geonode support.
FAQs
My proxy connection failed. What should I do?
My proxy connection failed. What should I do?
If your connection fails, check the following:
- Ensure that your proxy credentials (IP, Port, Username, Password) are correct.
- Verify that your proxy is active in the Geonode Dashboard.
- Try another proxy format if the selected one isn’t working.
- Refer to this guide for troubleshooting: Troubleshooting Proxy Connection Issues
Why is my IP address not changing?
Why is my IP address not changing?
- You may be using a Sticky Session proxy that keeps the same IP for a certain duration.
- If using a Rotating Session, verify that your requests are being routed through the proxy correctly.
- Check your connection using an IP verification tool: Verify Proxy Connection
Why am I getting a CAPTCHA while browsing?
Why am I getting a CAPTCHA while browsing?
- Some websites detect frequent IP changes and show CAPTCHAs as a security measure.
- Use Sticky Sessions if you need a stable connection.
- Try switching to a mobile or residential proxy for lower detection rates.
My proxy is working, but the internet is slow. What should I do?
My proxy is working, but the internet is slow. What should I do?
- High latency can occur if the proxy server is far from your location.
- Try using a different proxy region to improve speed.
- Reduce the number of simultaneous requests to avoid overloading the proxy.
Why am I getting the authentication prompt repeatedly?
Why am I getting the authentication prompt repeatedly?
- This can happen if the proxy authentication credentials are not correctly stored or passed by your browser or application. Ensure that the correct username and password are saved in your proxy settings.
- Or you can whitelist your IP. Refer to this guide for How to Whitelist an IP