Scraper Overview
The Scraper dashboard lets you extract content from web pages without writing code. It is organized into three main sections that help you monitor your account, create extraction requests, and review previous jobs.
This guide introduces each section of the dashboard. The next guides walk you through creating extraction requests and managing your jobs.
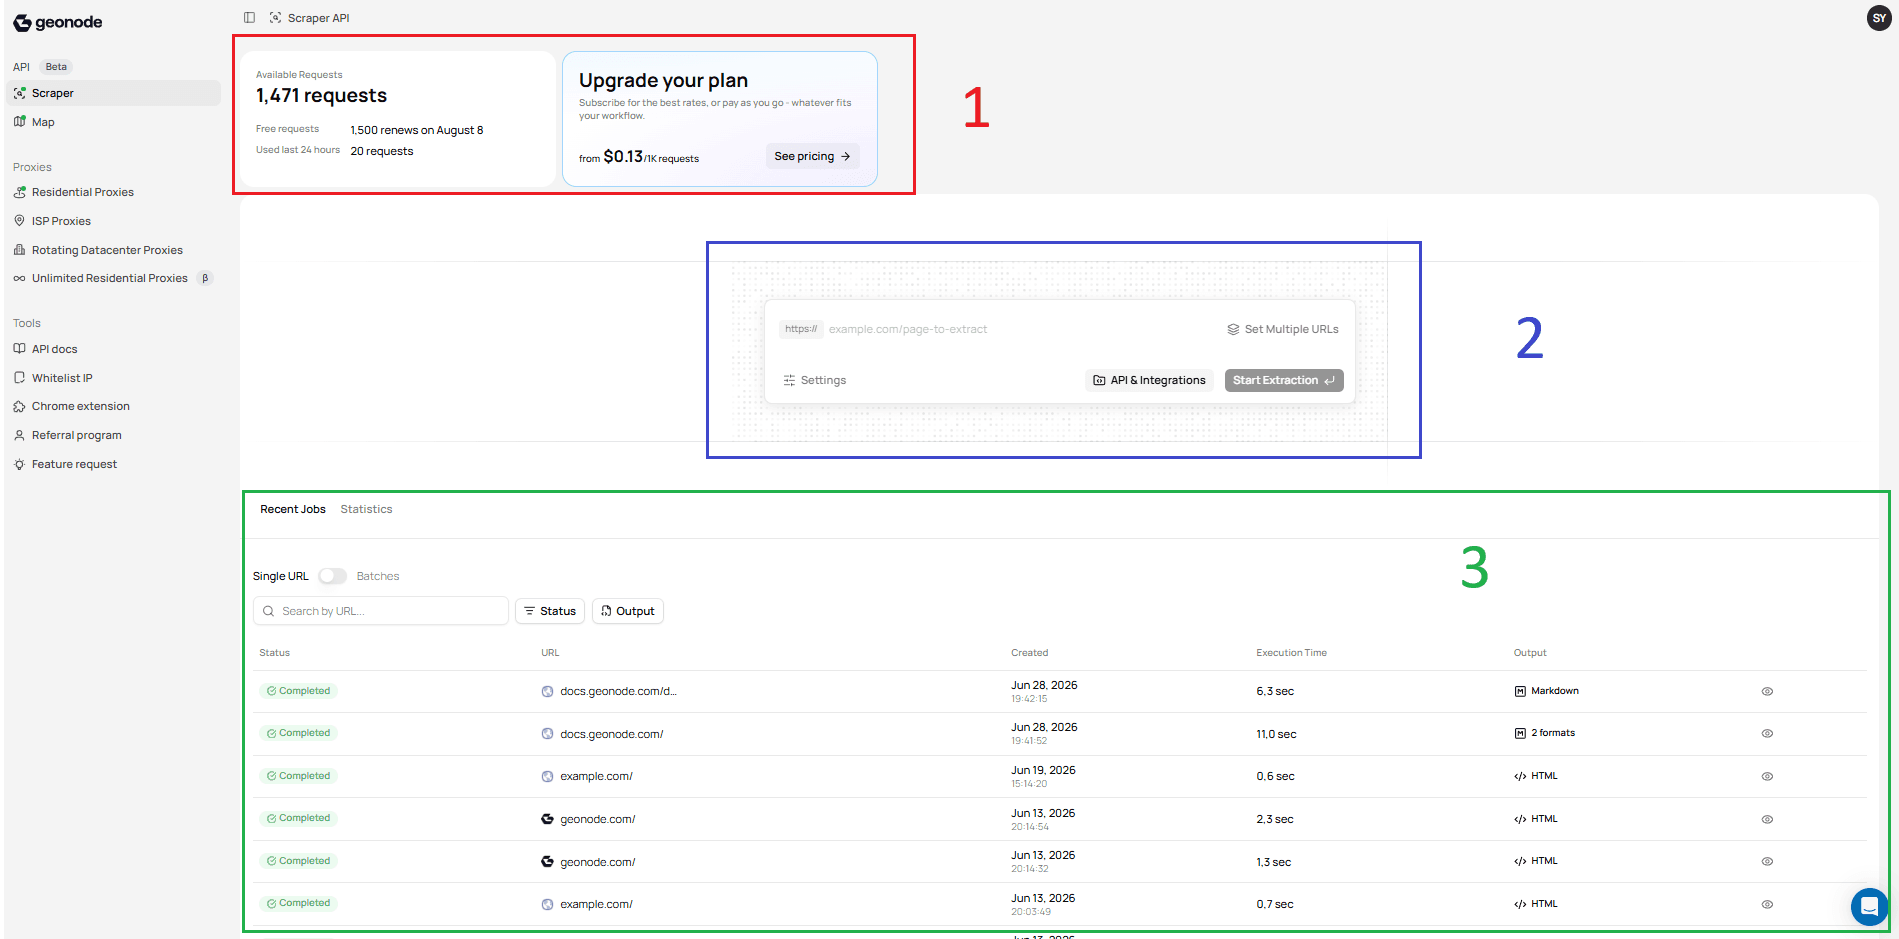
1. Account Overview
The top section provides information about your account and subscription.
Here you can:
- View the number of available requests.
- Check your free request allowance.
- See when your request quota renews.
- Review the number of requests used during the last 24 hours.
- Upgrade your plan if you need additional requests or higher usage limits.
This section gives you a quick overview of your current usage before submitting new requests.
2. Extraction Workspace
The center section is where you create new extraction requests.
From this workspace, you can:
- Enter the URL you want to extract.
- Switch between single and multiple URL extraction.
- Open the Settings panel to configure your request.
- Access API & Integrations.
- Start a new extraction.
This guide only introduces the workspace. The extraction workflows are covered in the following guides:
- Extract Content from a Single URL
- Extract Content from Multiple URLs
For a detailed explanation of each extraction option, refer to the Extraction Guides.
3. Recent Jobs
The bottom section displays your previous extraction requests.
From here, you can:
- View recent extraction jobs.
- Search previous jobs by URL.
- Filter jobs by status and output format.
- Review execution times.
- Open completed extraction results.
Detailed job management is covered in the Manage Extraction Jobs guide.
Next Steps
Now that you're familiar with the Scraper dashboard, continue with Extract Content from a Single URL to create your first extraction request.