macOS
Prerequisites: Get Proxy Credentials from Geonode
Before setting up a proxy, first, retrieve your proxy credentials from the Geonode dashboard.
Follow this guide: How to Obtain Proxy Server Information
Step-by-step setup for macOS
Follow these steps to configure your proxy manually.
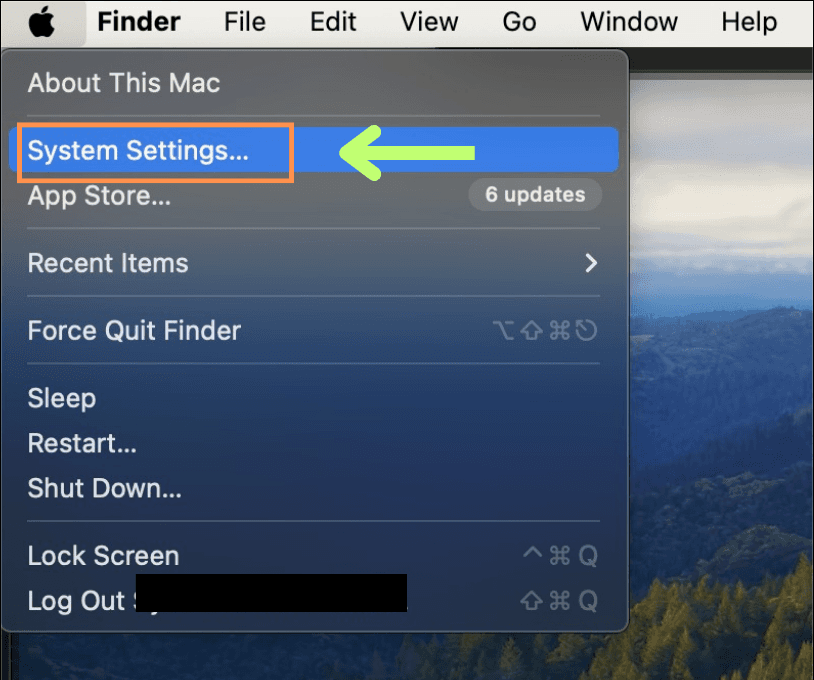
Step 1 — Open System Preferences
- Click the Apple menu icon in the top-left corner.
- Select System Preferences from the dropdown.
Step 2 — Open Network Settings
- In System Preferences, click Network.
- Choose your active Wi-Fi network and click Details (or the “i” icon).
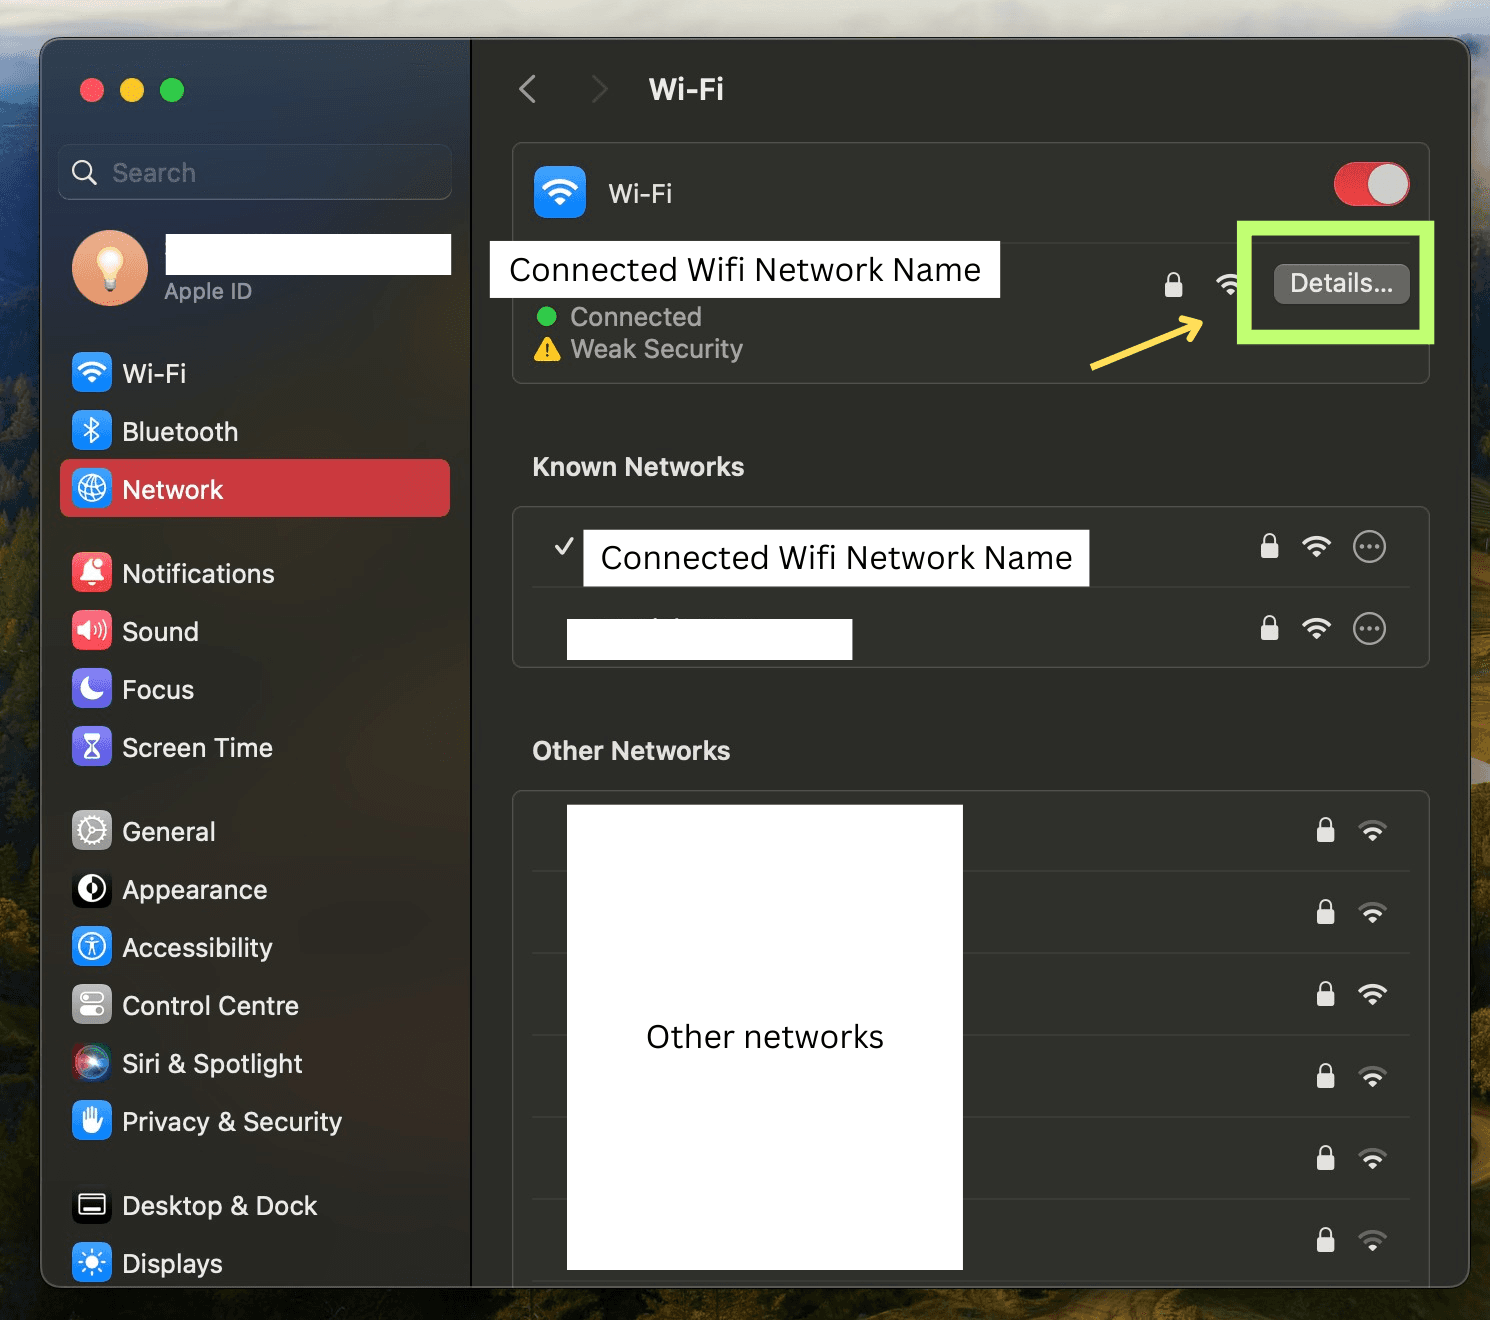
Step 3 — Select Your Active Network
Make sure the selected network is the one you’re currently connected to.
Step 4 — Open the Proxies Tab
- Click Advanced in the Network window.
- Open the Proxies tab.
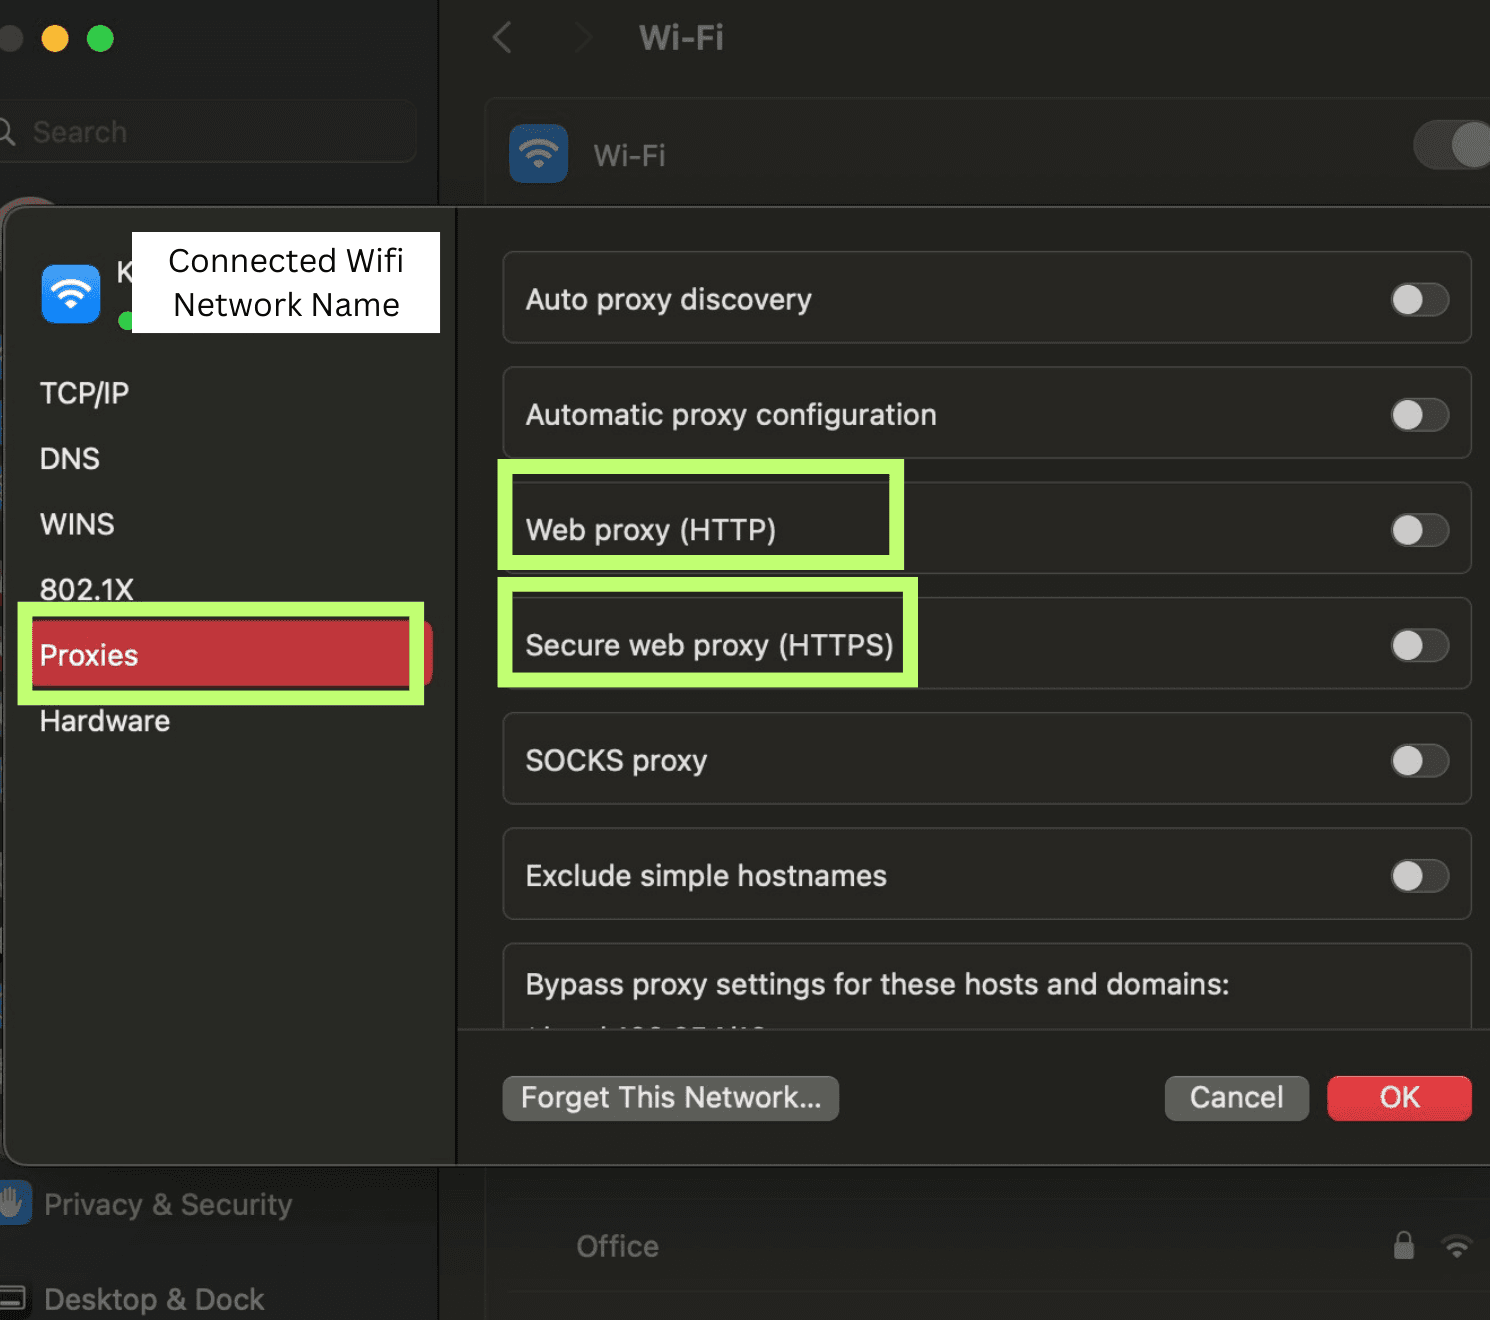
Step 5 — Configure Proxy Settings
- In the Proxies tab, you’ll see several proxy types:
- Web Proxy (HTTP)
- Secure Web Proxy (HTTPS)
- SOCKS Proxy
- Check the box next to the proxy type you’re setting up (for example, Web Proxy (HTTP)).
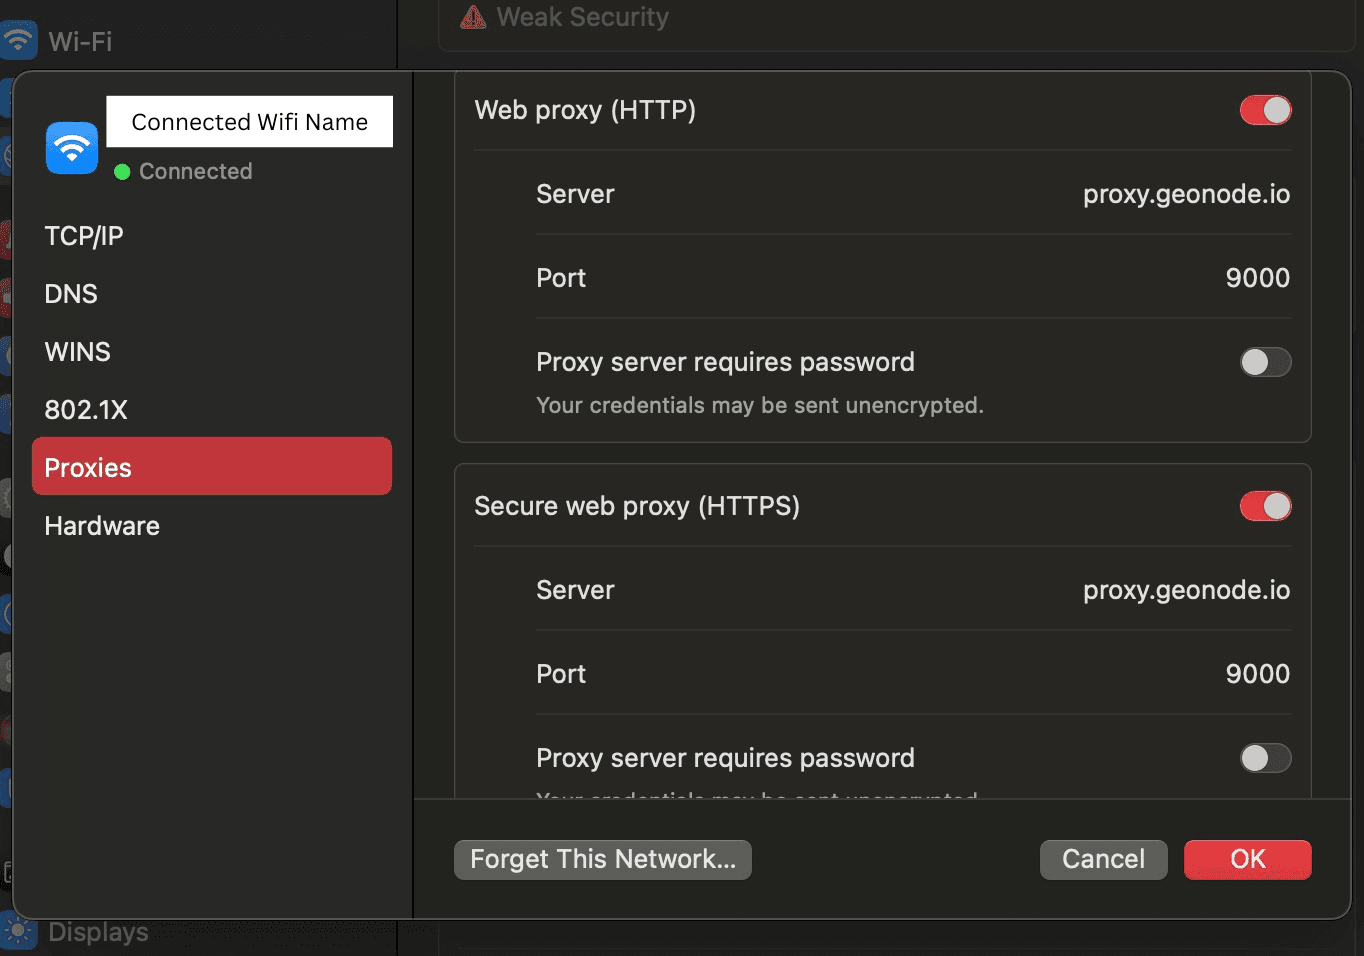
- Enter your Proxy Server address and Port — both can be copied from your Geonode Dashboard (click the copy icon next to Host).
Step 6 — Apply and Save Changes
- Click OK to close Advanced settings.
- Click Apply in the main Network window to save your configuration.
Once the proxy server is set up, some apps (like Chrome or other system programs) may ask for proxy authentication — your proxy username and password.
This is required to continue using the proxies.
If you prefer not to enter credentials manually, you can whitelist your IP instead.
See: How to Whitelist an IP
Verify Proxy Connection
To ensure the proxy is working, check your IP address using an online tool or follow this guide:
If you encounter any issues, refer to the troubleshooting section or Geonode support.