Geonode Proxy Manager
This guide explains how to install, configure, and use the Geonode Proxy Manager Chrome extension.
What Is Geonode Proxy Manager
Geonode Proxy Manager is a Chrome extension that simplifies proxy management.
You can add, save, and switch between multiple proxies directly from your browser without manually entering details each time.
Prerequisites: Get Proxy Credentials from Geonode
Before setting up a proxy, first, retrieve your proxy credentials from the Geonode dashboard.
Follow this guide: How to Obtain Proxy Server Information
Setting Up a Proxy in Geonode Proxy Manager
Follow these steps to configure your proxy using the Geonode Proxy Manager extension.
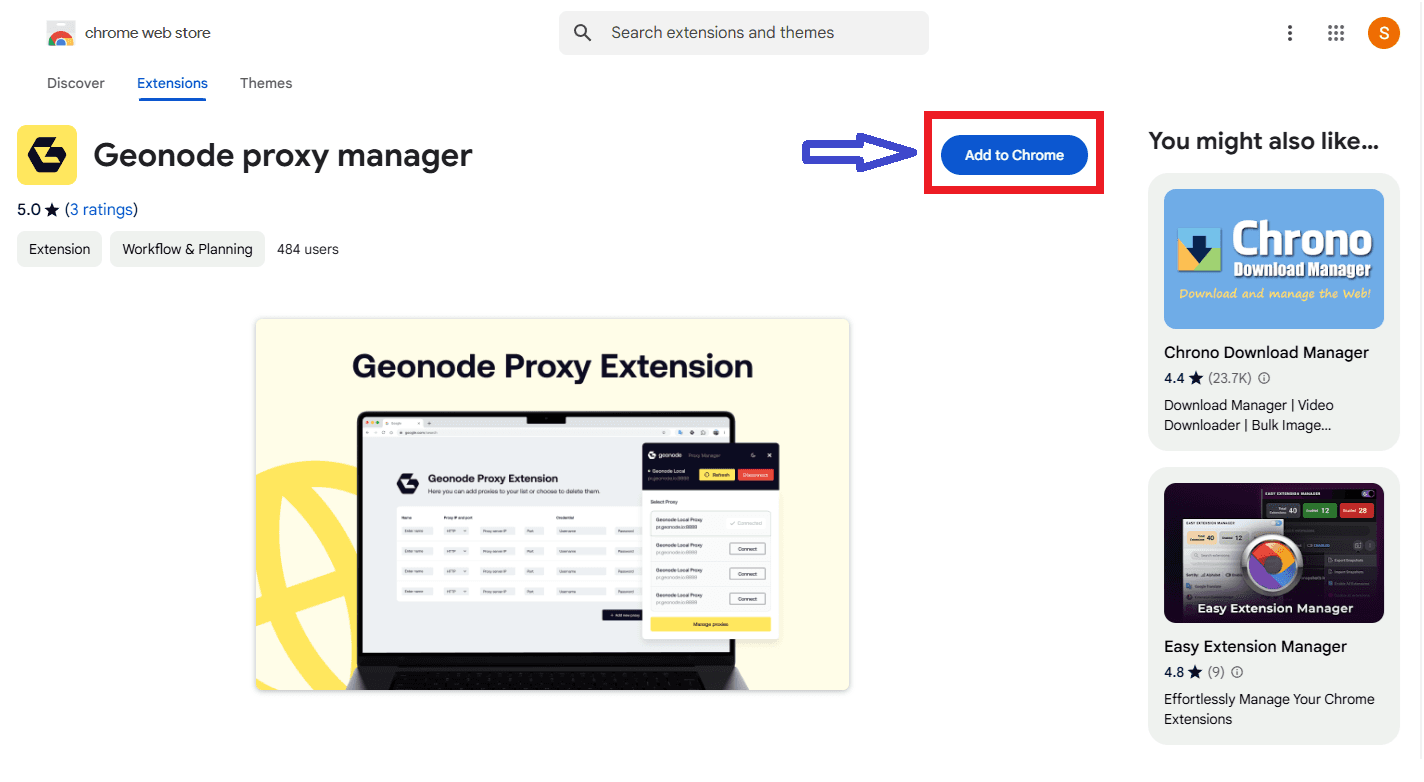
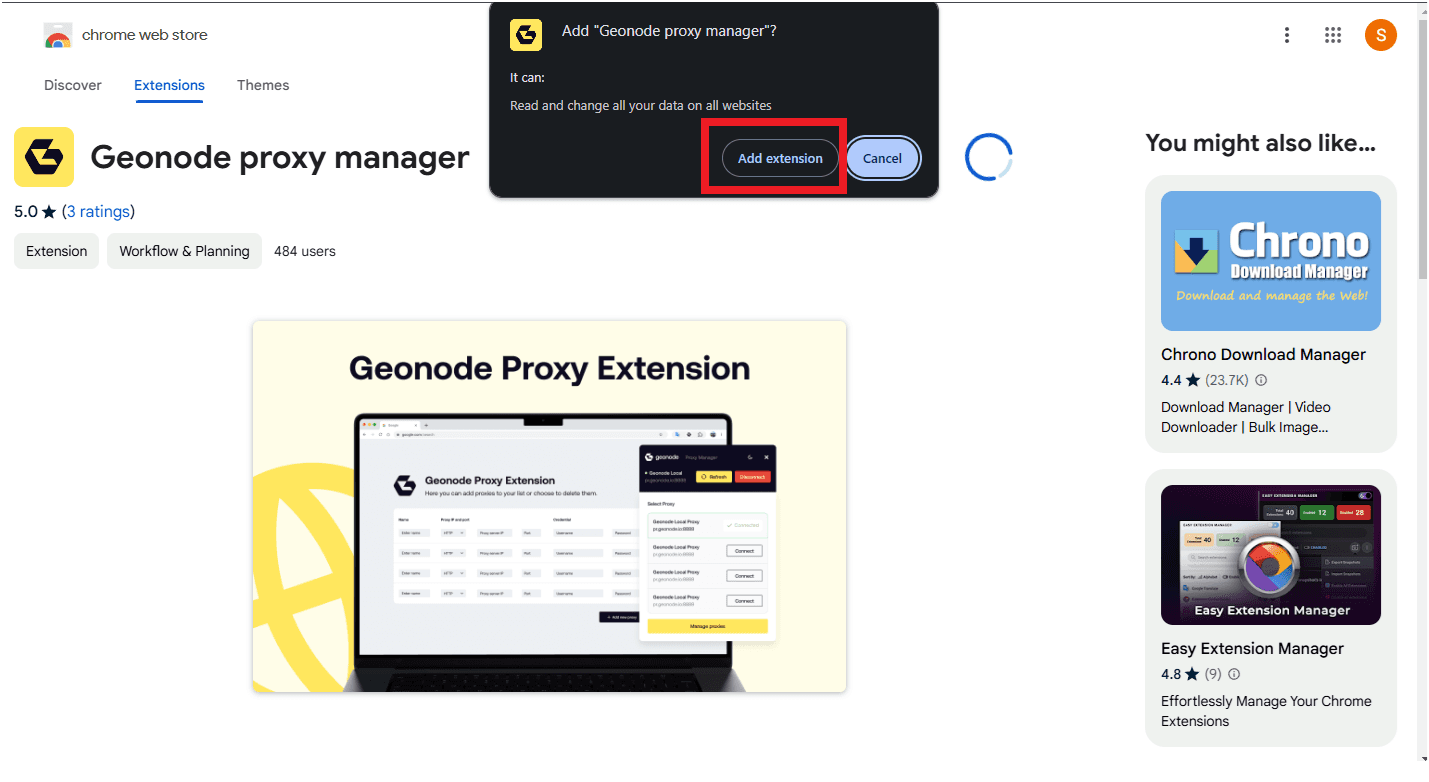
Step 1: Install the Geonode Proxy Manager Extension
-
Open the Geonode Proxy Manager extension page.
-
Click Add to Chrome to install the extension.
-
Confirm installation by selecting Add Extension when prompted.
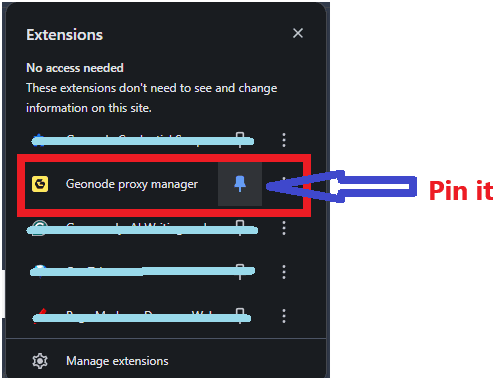
Step 2: Pin the Extension for Quick Access
After installation, pin the extension to your Chrome toolbar for easy access.
-
Click the Extensions icon (puzzle piece) in Chrome.
-
Find Geonode Proxy Manager and click the Pin icon.
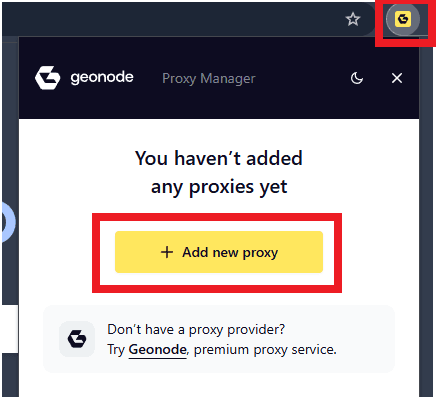
Step 3: Open the Extension
-
Click the Geonode Proxy Manager icon in your Chrome toolbar.
-
If no proxies have been added yet, click Add New Proxy.
-
You’ll be redirected to the Proxy Manager page.
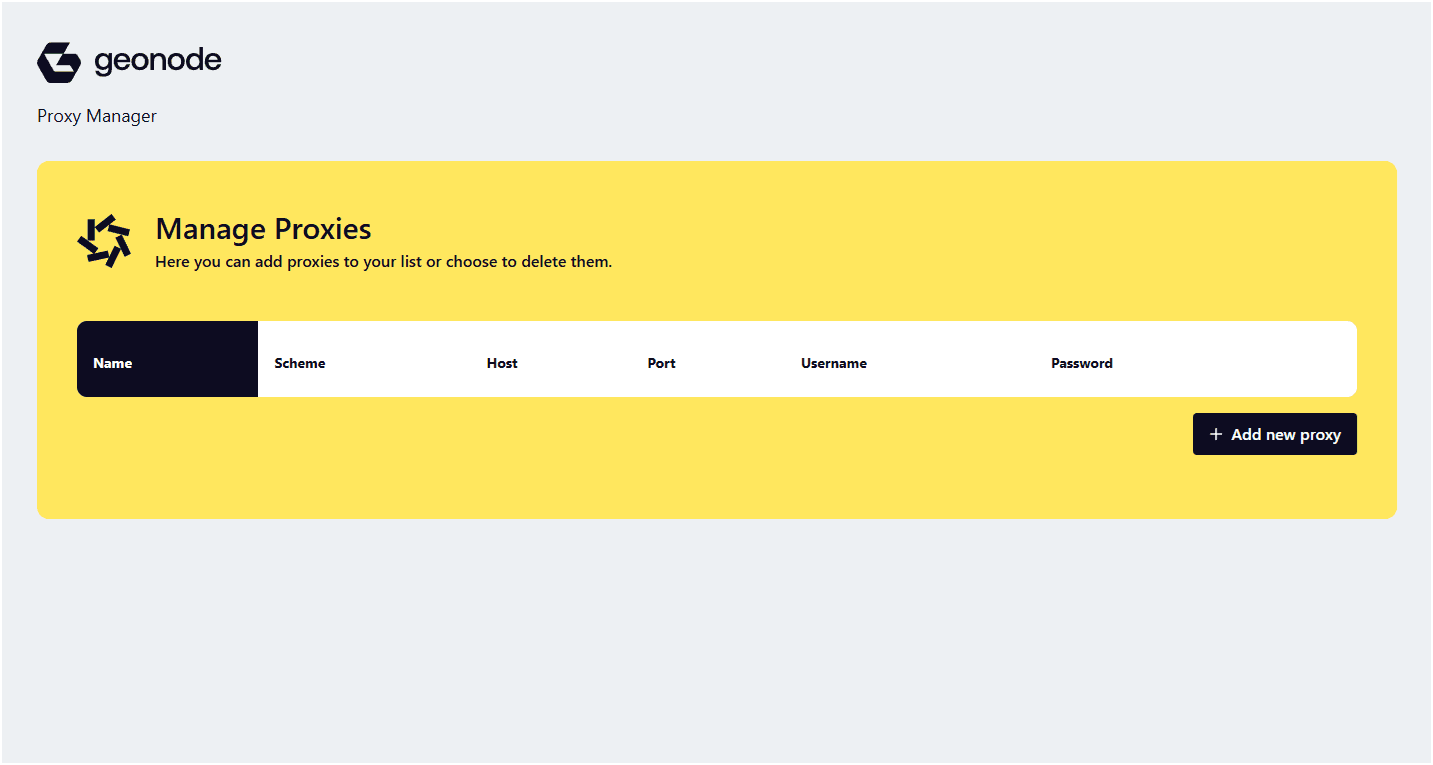
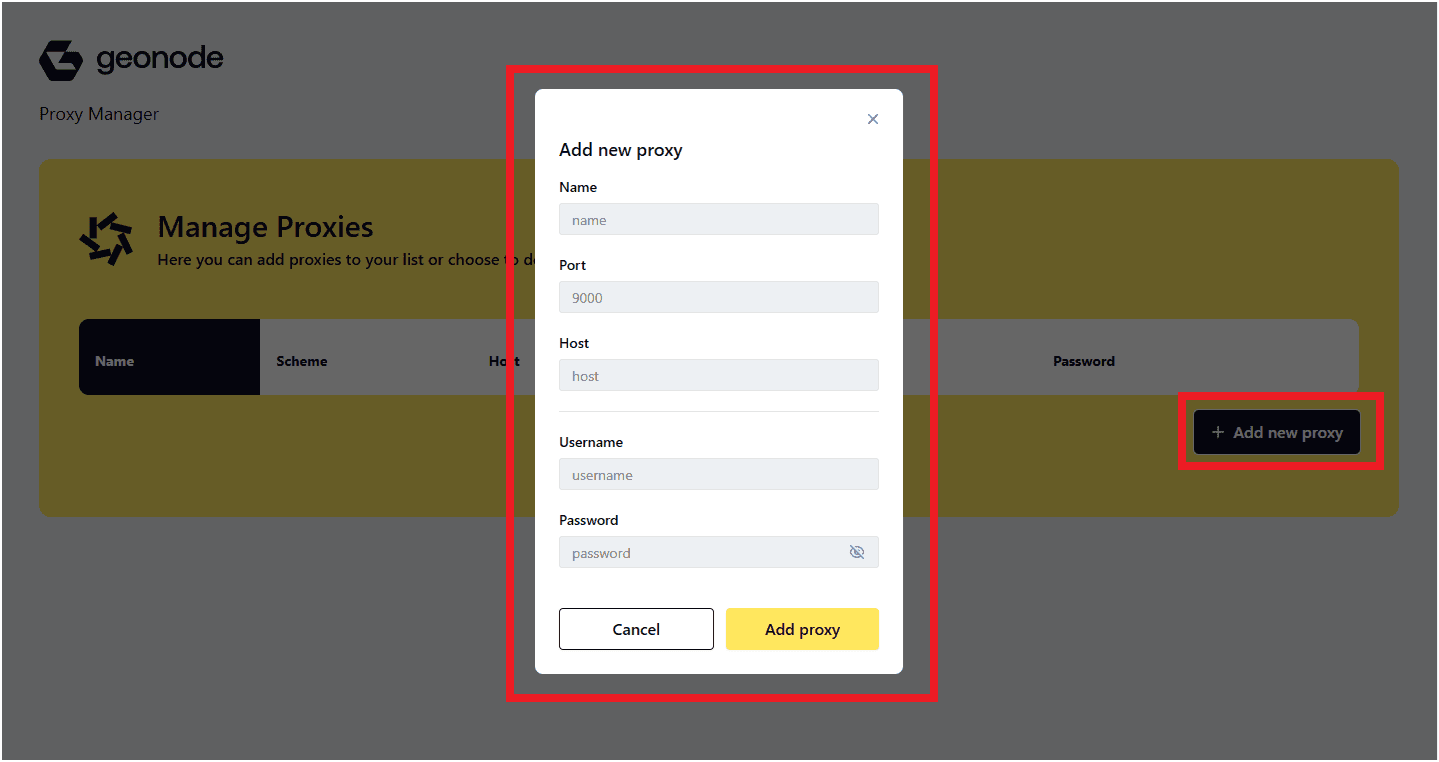
Step 4: Add a New Proxy
-
Click Add New Proxy.
-
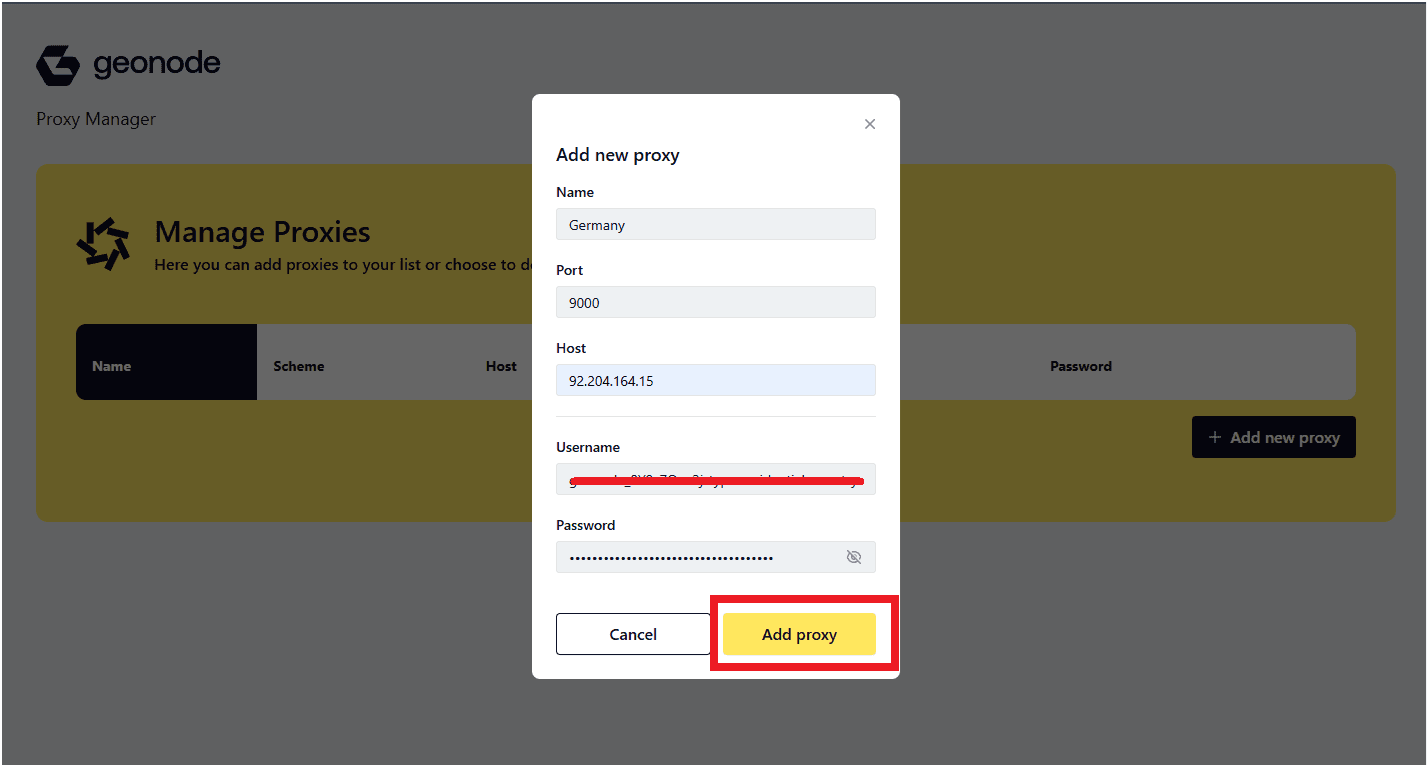
Enter your proxy details in the popup:
- Name — any recognizable label for this proxy
- Host — e.g.,
proxy.geonode.io - Port — usually
9000 - Username and Password — your Geonode credentials
-
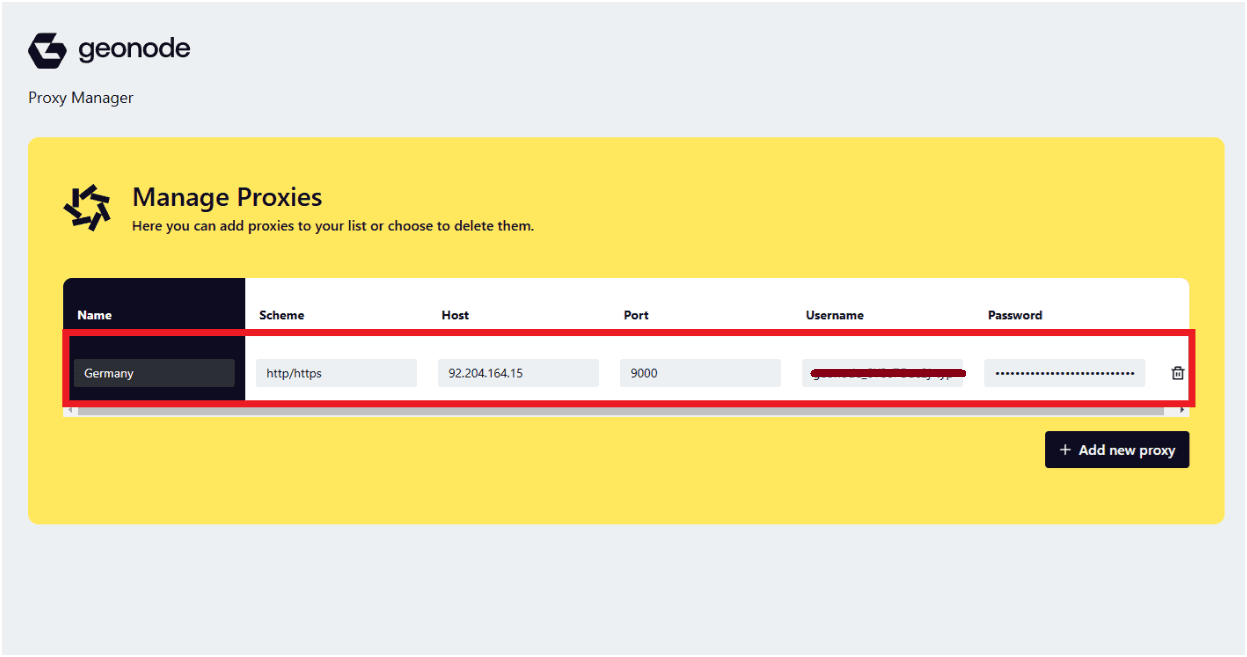
Click Add Proxy to save your configuration.
-
Once saved, go back to the Proxy Manager to confirm that your new proxy appears in the list.
Step 5: Connect to the Proxy
-
Click the Geonode Proxy Manager icon again in your Chrome toolbar.
-
Select the proxy you want to use from the list.
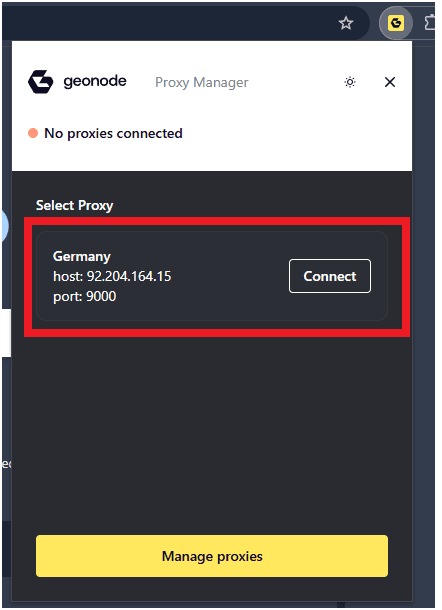
-
Click Connect to activate the proxy.
Once connected, all browser traffic will be routed through the selected proxy.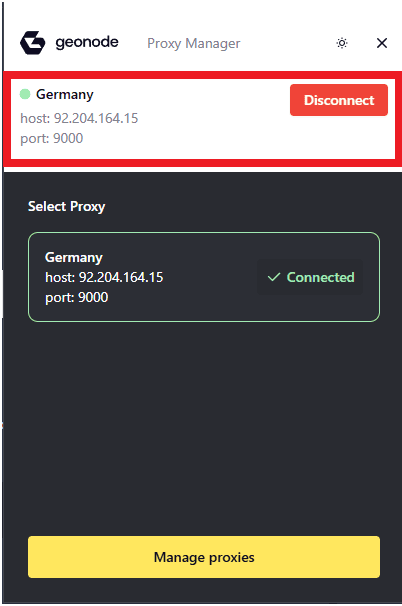
Verify Proxy Connection
To ensure the proxy is working, check your IP address using an online tool or follow this guide:
If you encounter any issues, refer to the troubleshooting section or Geonode support.