Proxy Authorization in API Using Headers
API authorization ensures secure access to Geonode’s proxy services.
This guide explains how to authenticate requests using the Authorization header.
Step 1 — Get your API credentials
Before setting up authentication, make sure you have your Geonode API credentials.
→ How to access your Geonode API credentials
Step 2 — Generate the Authorization header
Geonode’s API uses Basic Authentication, which requires your username and password encoded in Base64.
-
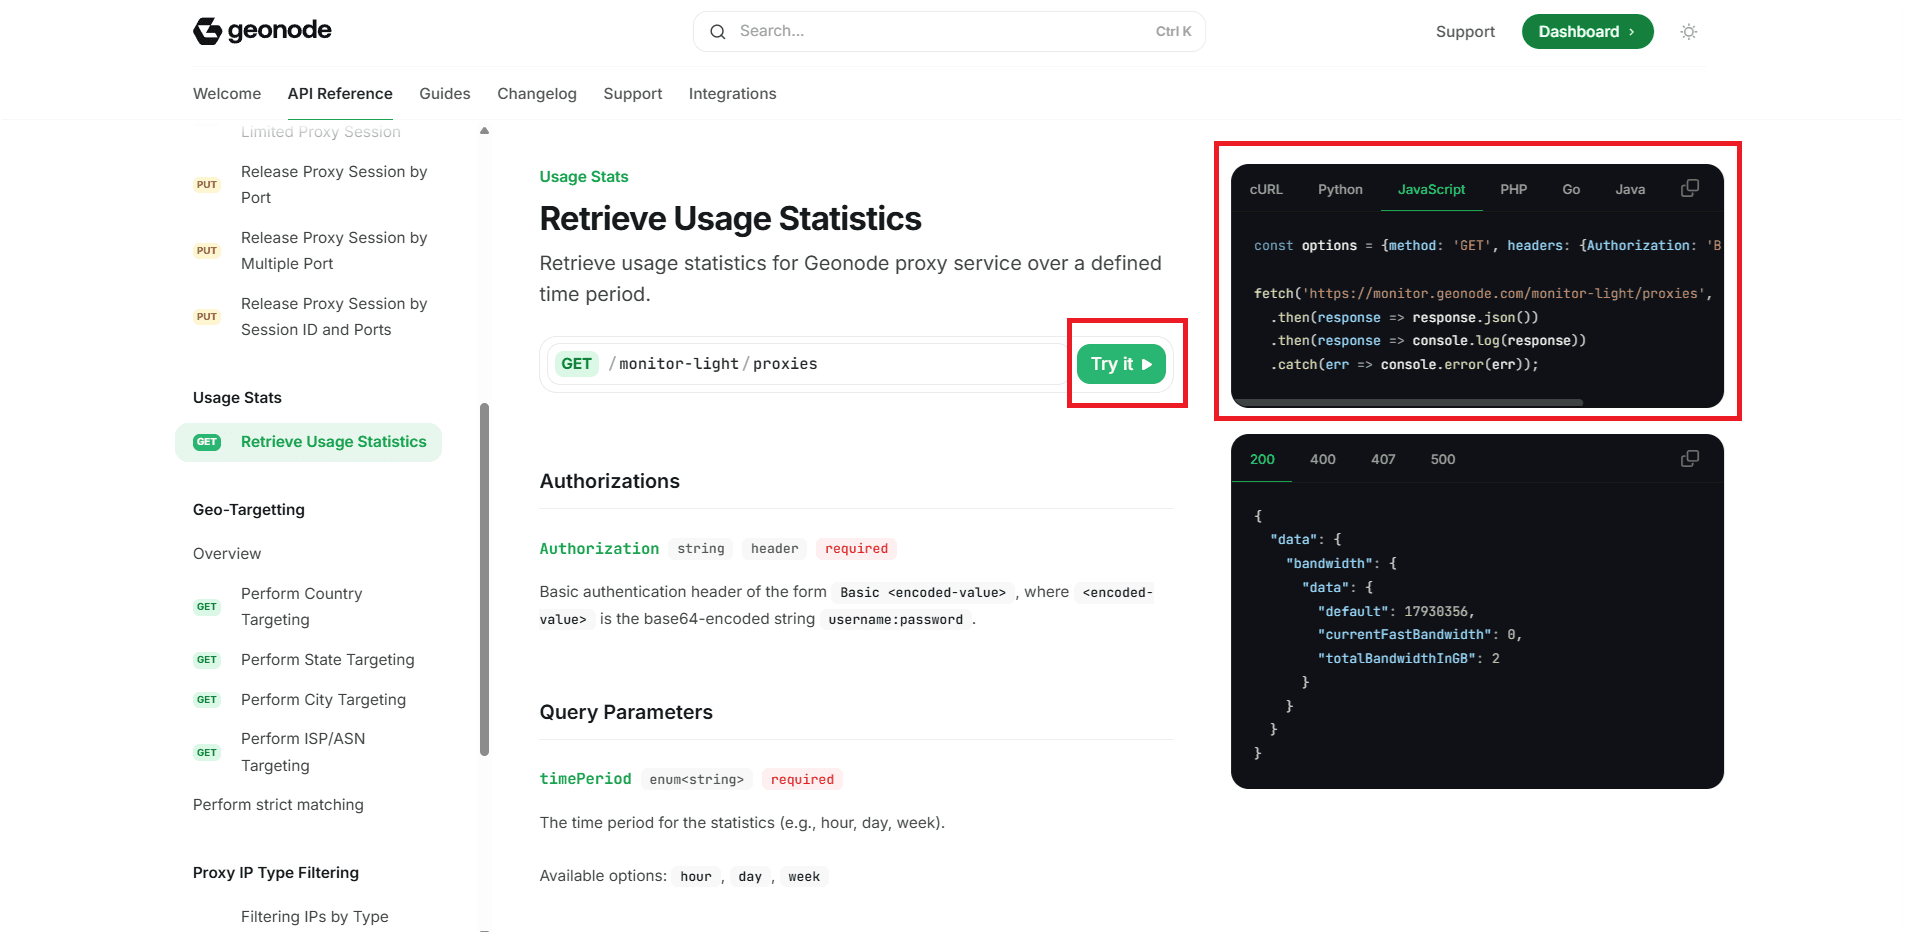
Open the API documentation for the endpoint you want to test (for example, Retrieve Usage Statistics).
-
Click Try it on the API page.
-
A popup will appear asking for your username and password. Enter them.
-
The system automatically generates the
Authorizationheader for you — containing the Base64-encoded string.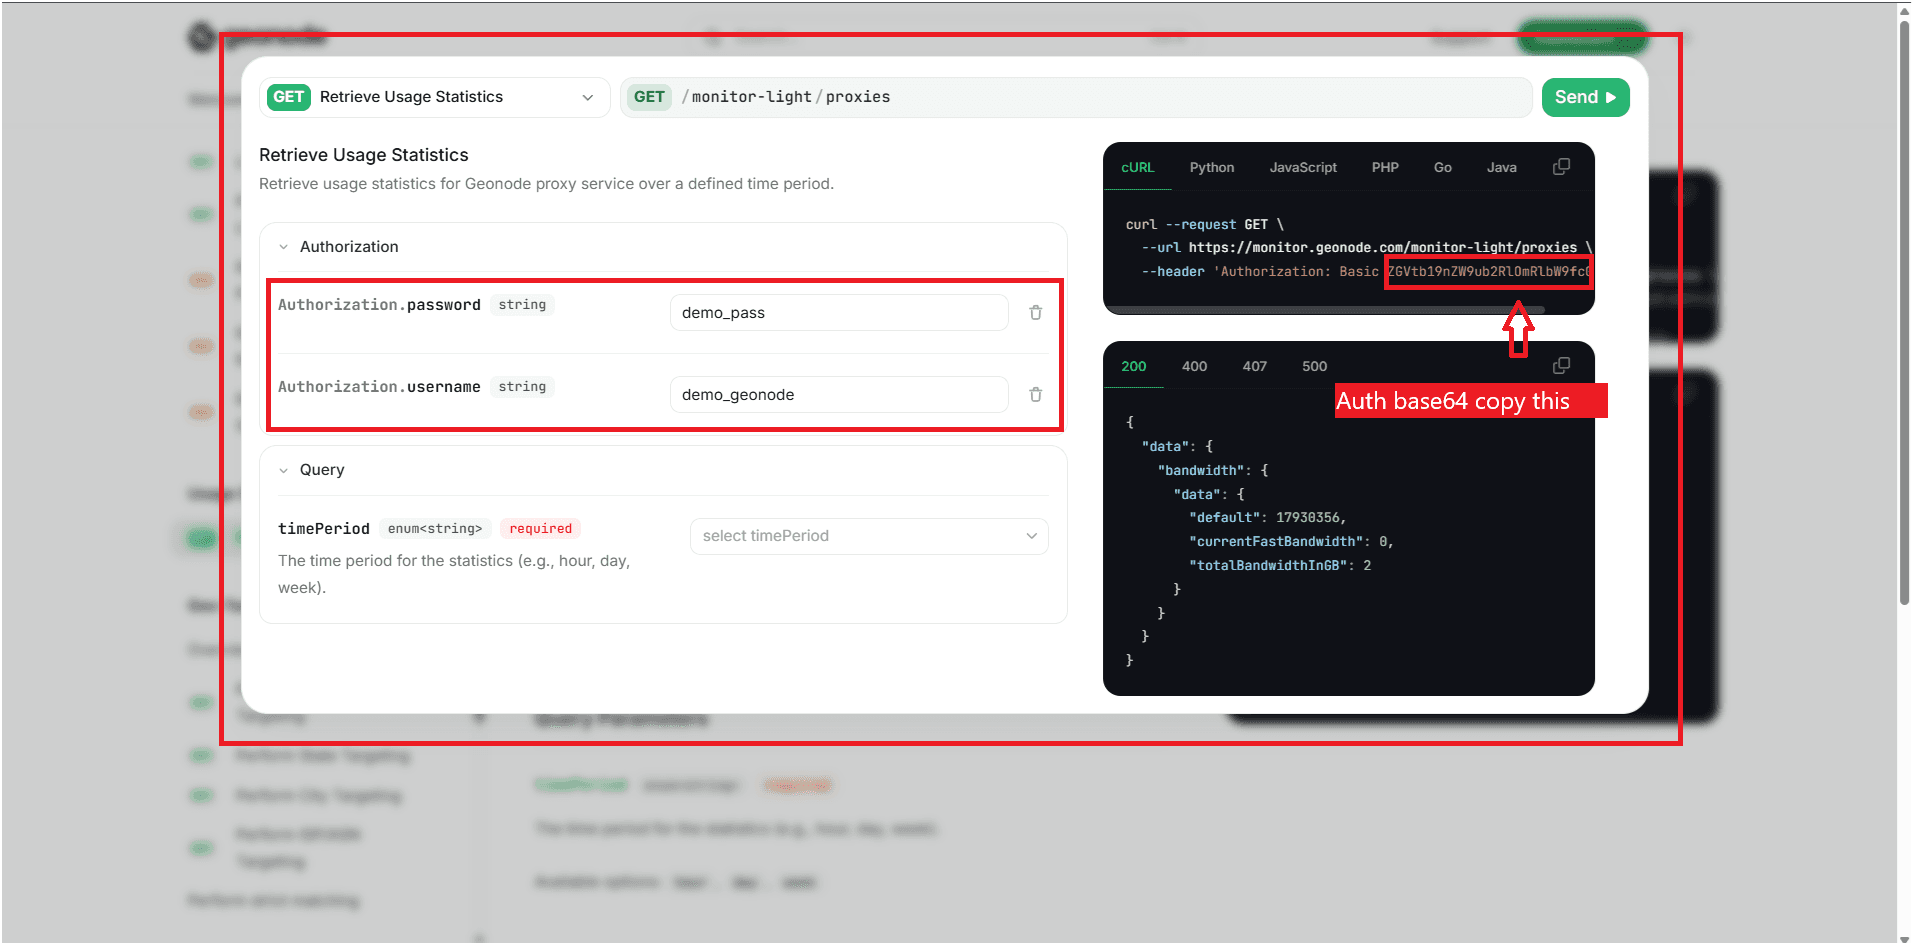
-
Copy the generated header or the encoded string.
You can use it directly in your API requests or store the Base64 value in your code securely.
Step 3 — Follow best practices
- Generate once, reuse: Create your token once and reuse it for multiple requests.
- Store securely: Keep it in a
.envfile or secret manager. - Avoid hardcoding: Never paste credentials directly into your source code.
- Always use HTTPS: This encrypts your traffic and protects sensitive data.
- Rotate regularly: Update your credentials periodically.
When you do, generate a new token.
Troubleshooting
- Check that your header is formatted correctly:
- Encode exactly
username:password— no extra spaces or characters. - Use HTTPS in all requests; avoid using insecure HTTP.
- Test your setup with tools like Postman or cURL to confirm it works.
- If your credentials are compromised, change your password, regenerate your API key, and update the token.
If you encounter any issues, refer to the troubleshooting section or Geonode support.