Browsers
Ghost Browser
This guide will help you configure a Geonode proxy in Ghost Browser.
Prerequisites: Get Proxy Credentials from Geonode
Before setting up a proxy, first, retrieve your proxy credentials from the Geonode dashboard.
Follow this guide: How to Obtain Proxy Server Information
Setting Up a Proxy in Ghost Browser
Install Ghost Browser
- Go to the Ghost Browser Download Page.
- Download the version for your operating system.
- Install the software.
Add a Proxy
-
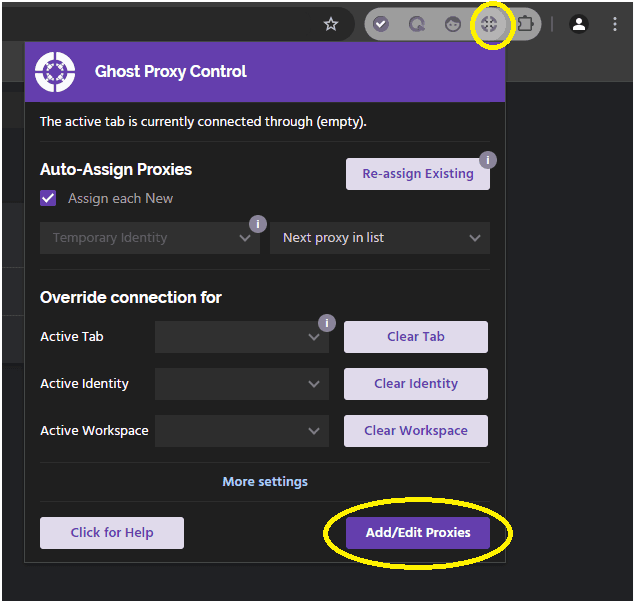
Open Proxy Control and click Add/Edit Proxies.
-
In the new window, select Add a Single Proxy.
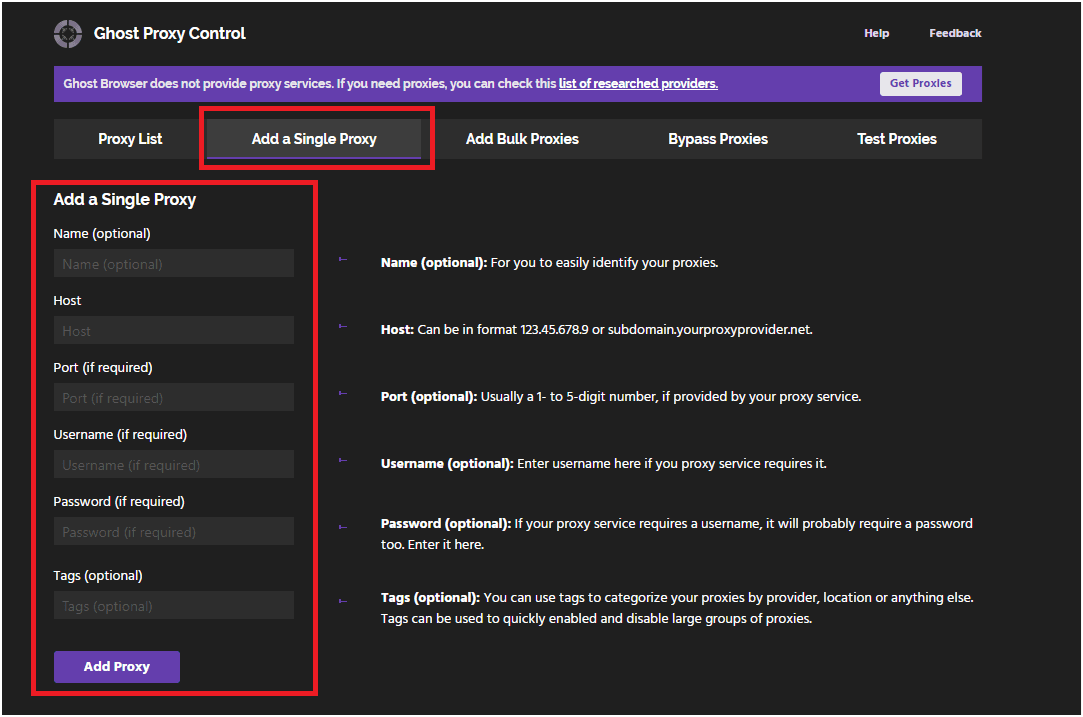
-
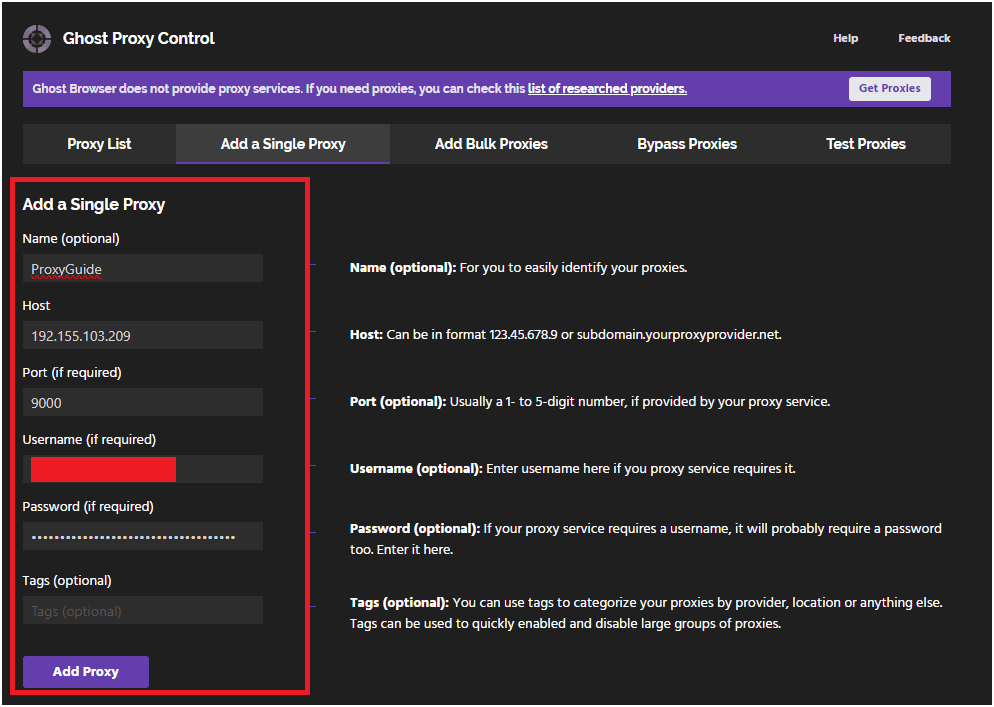
Enter your proxy details:
- Proxy (IP:Port)
- Username
- Password
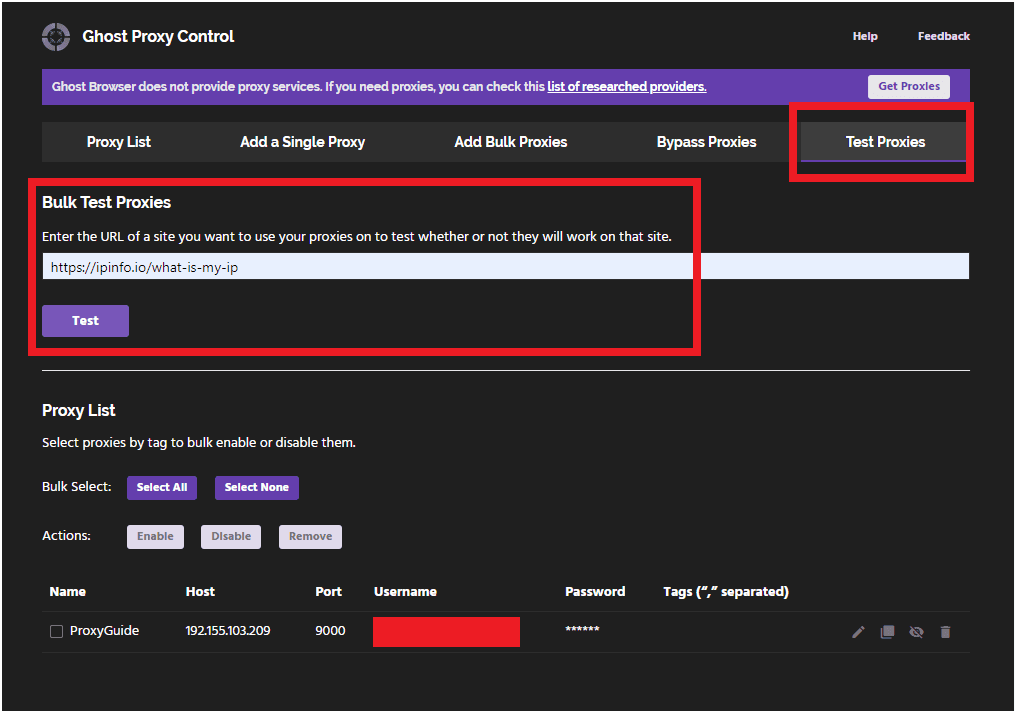
Test the Proxy Connection
-
Confirm that your proxy appears in the Proxy Management Table.
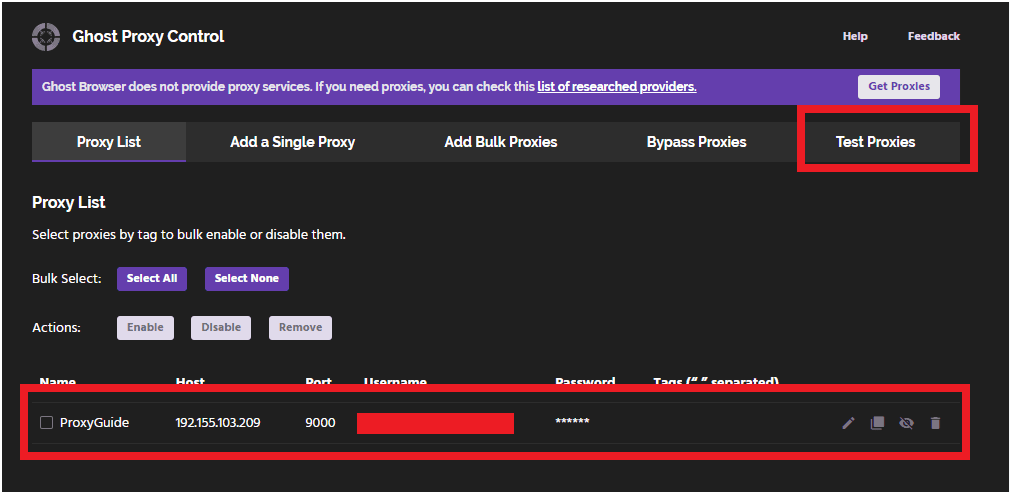
-
Click the Test Proxy tab.
-
Enter a website to verify your connection.
-
If successful, a confirmation popup will appear.
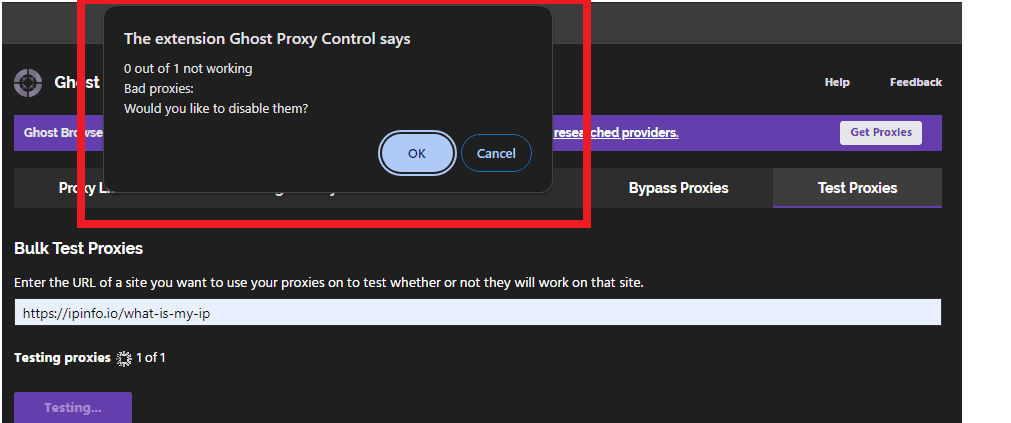
Your Geonode proxy is now successfully configured in Ghost Browser.
If you encounter any issues, refer to the troubleshooting section or Geonode support.