Chrome
This guide will help you configure a Geonode proxy in Chrome using two methods:
- Using the Geonode Proxy Manager Extension (recommended)
- Manual setup through Chrome system settings
Prerequisites: Get Proxy Credentials from Geonode
Before setting up a proxy, first, retrieve your proxy credentials from the Geonode dashboard.
Follow this guide: How to Obtain Proxy Server Information
Method 1: Using the Geonode Proxy Manager Extension
The easiest and most flexible way to configure a proxy in Chrome is by using the Geonode Proxy Manager extension.
It lets you switch proxies quickly without changing system-wide settings.
Install and Configure the Extension
- Install Geonode Proxy Manager from the Chrome Web Store.
- Follow this guide to complete the setup:
How to Use the Geonode Chrome Extension for Proxy Management.
Once installed, Chrome will route all traffic through the selected proxy.
Method 2: Manual Proxy Setup in Chrome
If you prefer to configure the proxy manually, follow these steps:
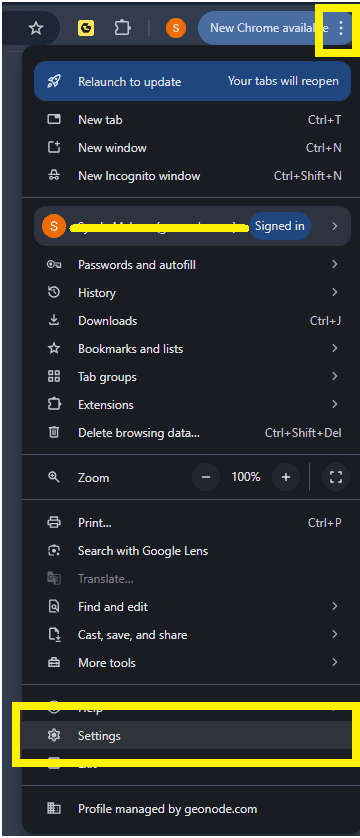
Open Chrome Settings
-
Click the three-dot menu in the top-right corner of Chrome.
-
Select Settings from the dropdown menu.
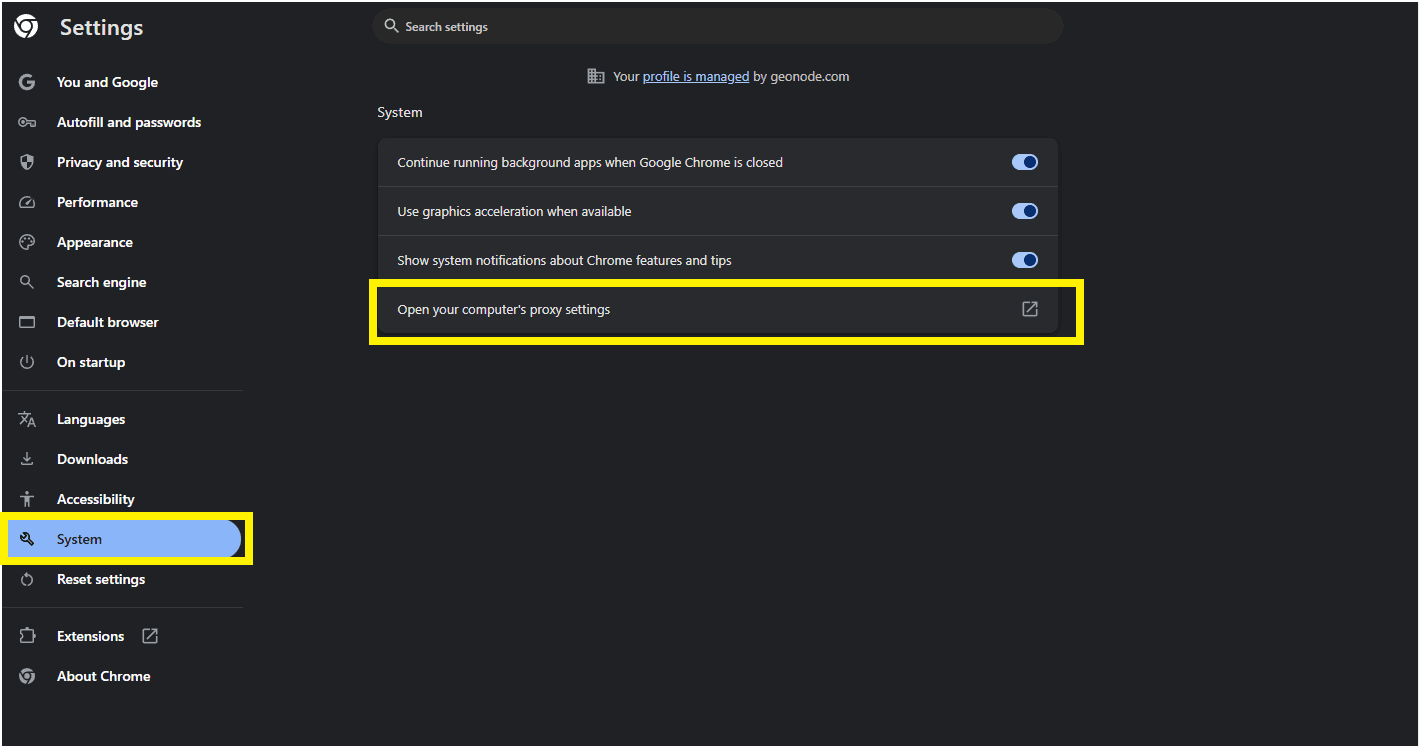
Access System Proxy Settings
-
In the left sidebar, click System.
-
Then click Open your computer’s proxy settings.
Configure the Proxy on Your Operating System
Chrome will now open your system proxy configuration window.
Follow the appropriate guide for your OS below:
Once configured, Chrome will automatically route its traffic through the assigned proxy.
Verify Proxy Connection
To ensure the proxy is working, check your IP address using an online tool or follow this guide:
If you encounter any issues, refer to the troubleshooting section or Geonode support.