Visual Studio Code
Web DataVisual Studio Code supports the Model Context Protocol (MCP), allowing GitHub Copilot Agent Mode to securely connect to external tools such as the Geonode Scraper API.
Once configured, GitHub Copilot can automatically extract web pages, crawl websites, process multiple URLs, and retrieve structured content directly from your editor.
Before You Begin
Make sure you've completed the Before You Start guide and have:
- A Geonode API key.
- The Geonode MCP endpoint.
- Visual Studio Code installed.
- GitHub Copilot installed and signed in.
- Agent Mode enabled.
Step 1 — Open the MCP Servers Panel
Open Visual Studio Code and open the GitHub Copilot Chat panel.
Click the Settings (⚙️) icon, then open Agent Customizations and select MCP Servers from the left navigation.
This page lets you add and manage MCP servers for your workspace.
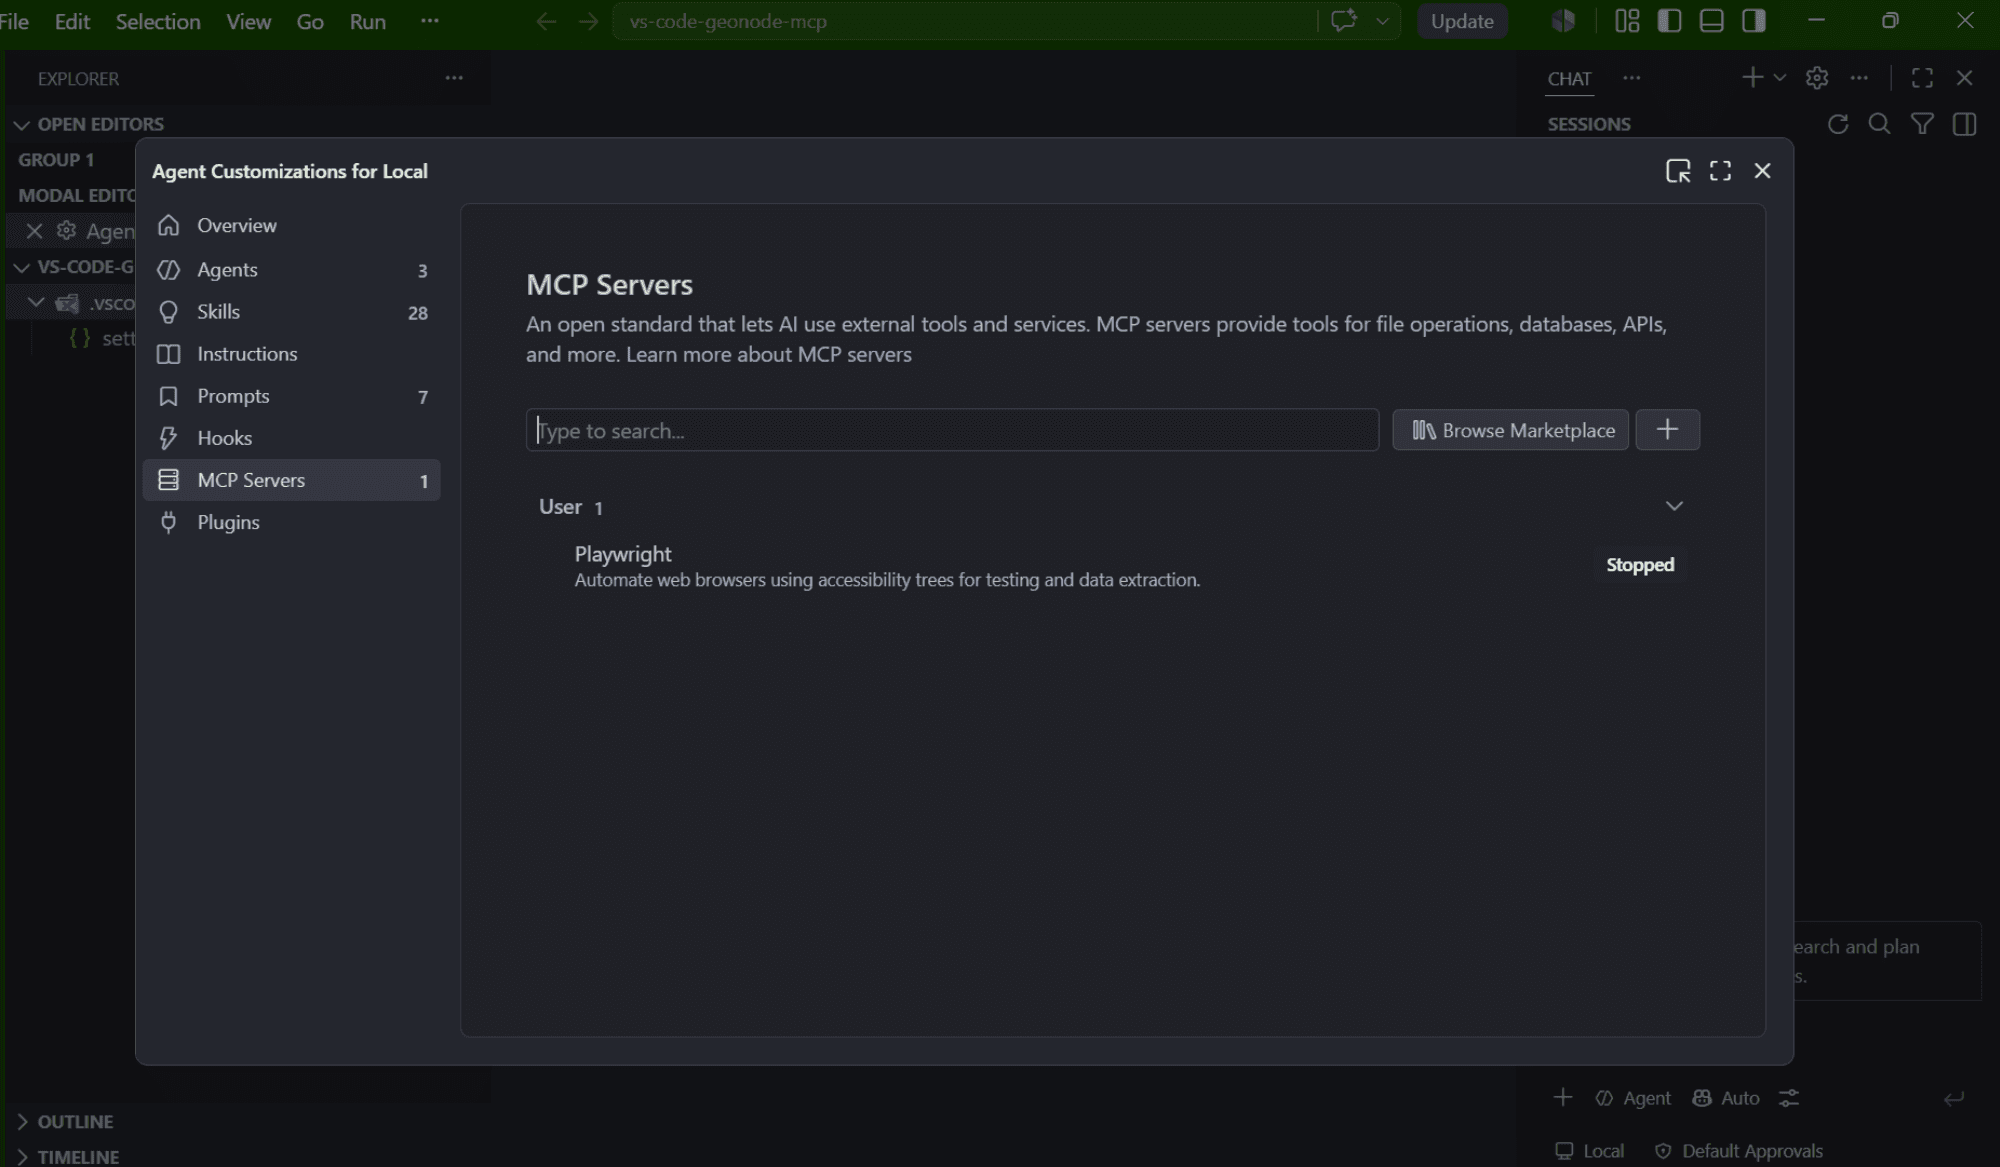
Step 2 — Add a New MCP Server
Click the + button in the upper-right corner of the MCP Servers page.
From the available options, select:
HTTP (HTTP or Server-Sent Events)This option allows Visual Studio Code to connect to a remote MCP server over HTTP.
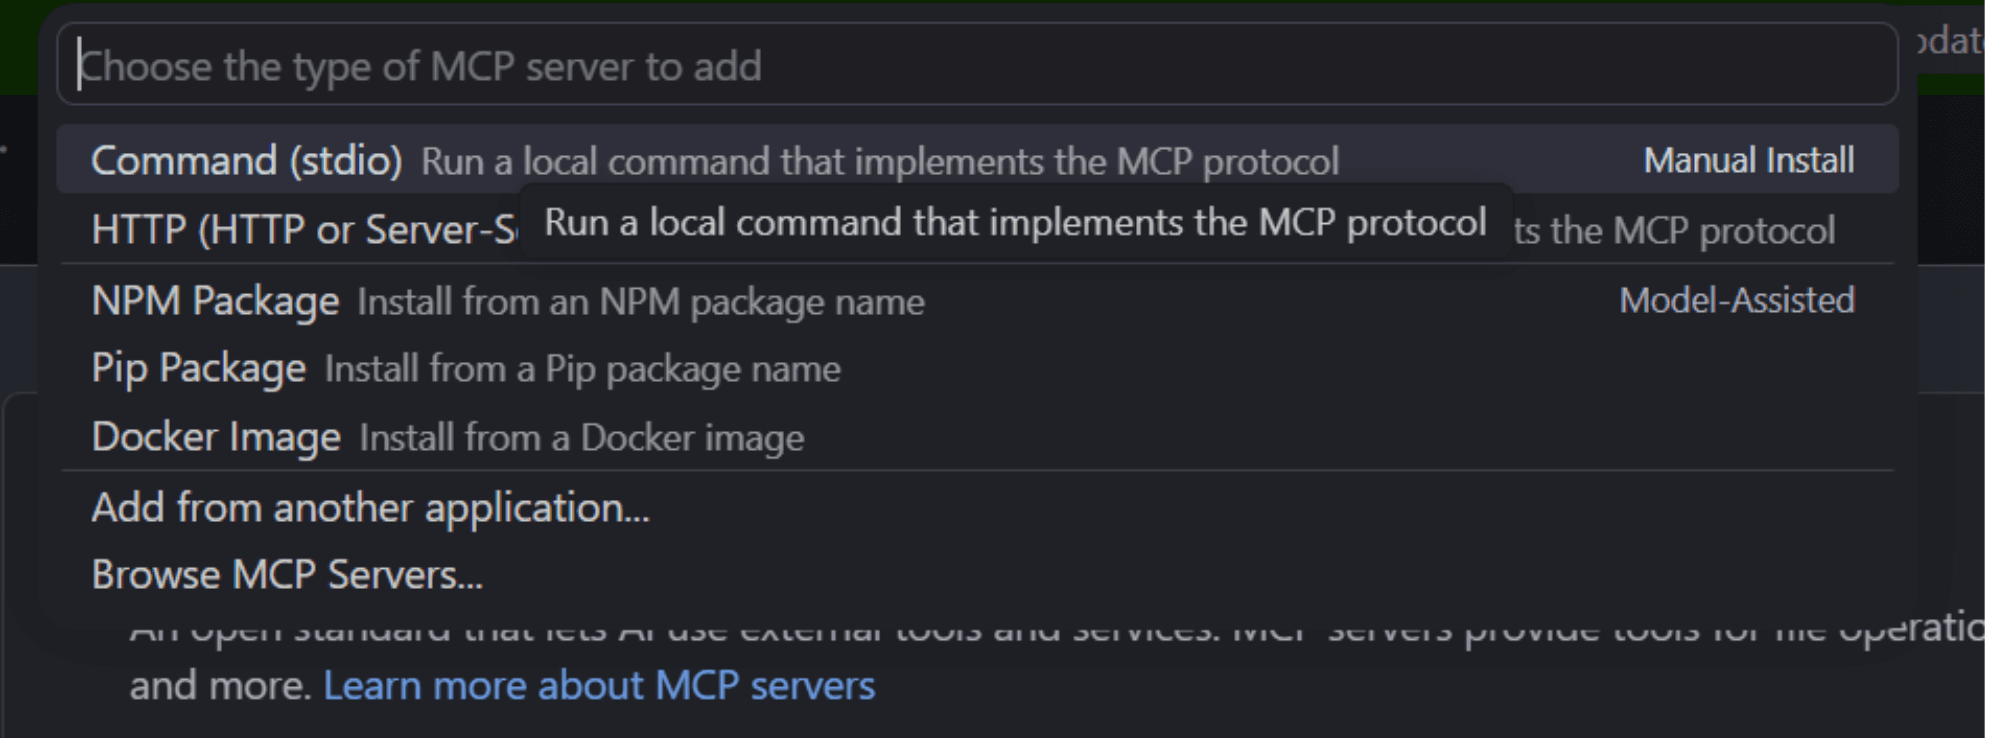
Step 3 — Enter the Geonode MCP Endpoint
When prompted, enter the Geonode MCP endpoint:
https://scraper.geonode.io/mcpPress Enter to save the server configuration.

Step 4 — Verify the Connection
After adding the endpoint, Visual Studio Code automatically attempts to connect to the MCP server.
If the connection is successful, the server appears under Workspace with a Running status.
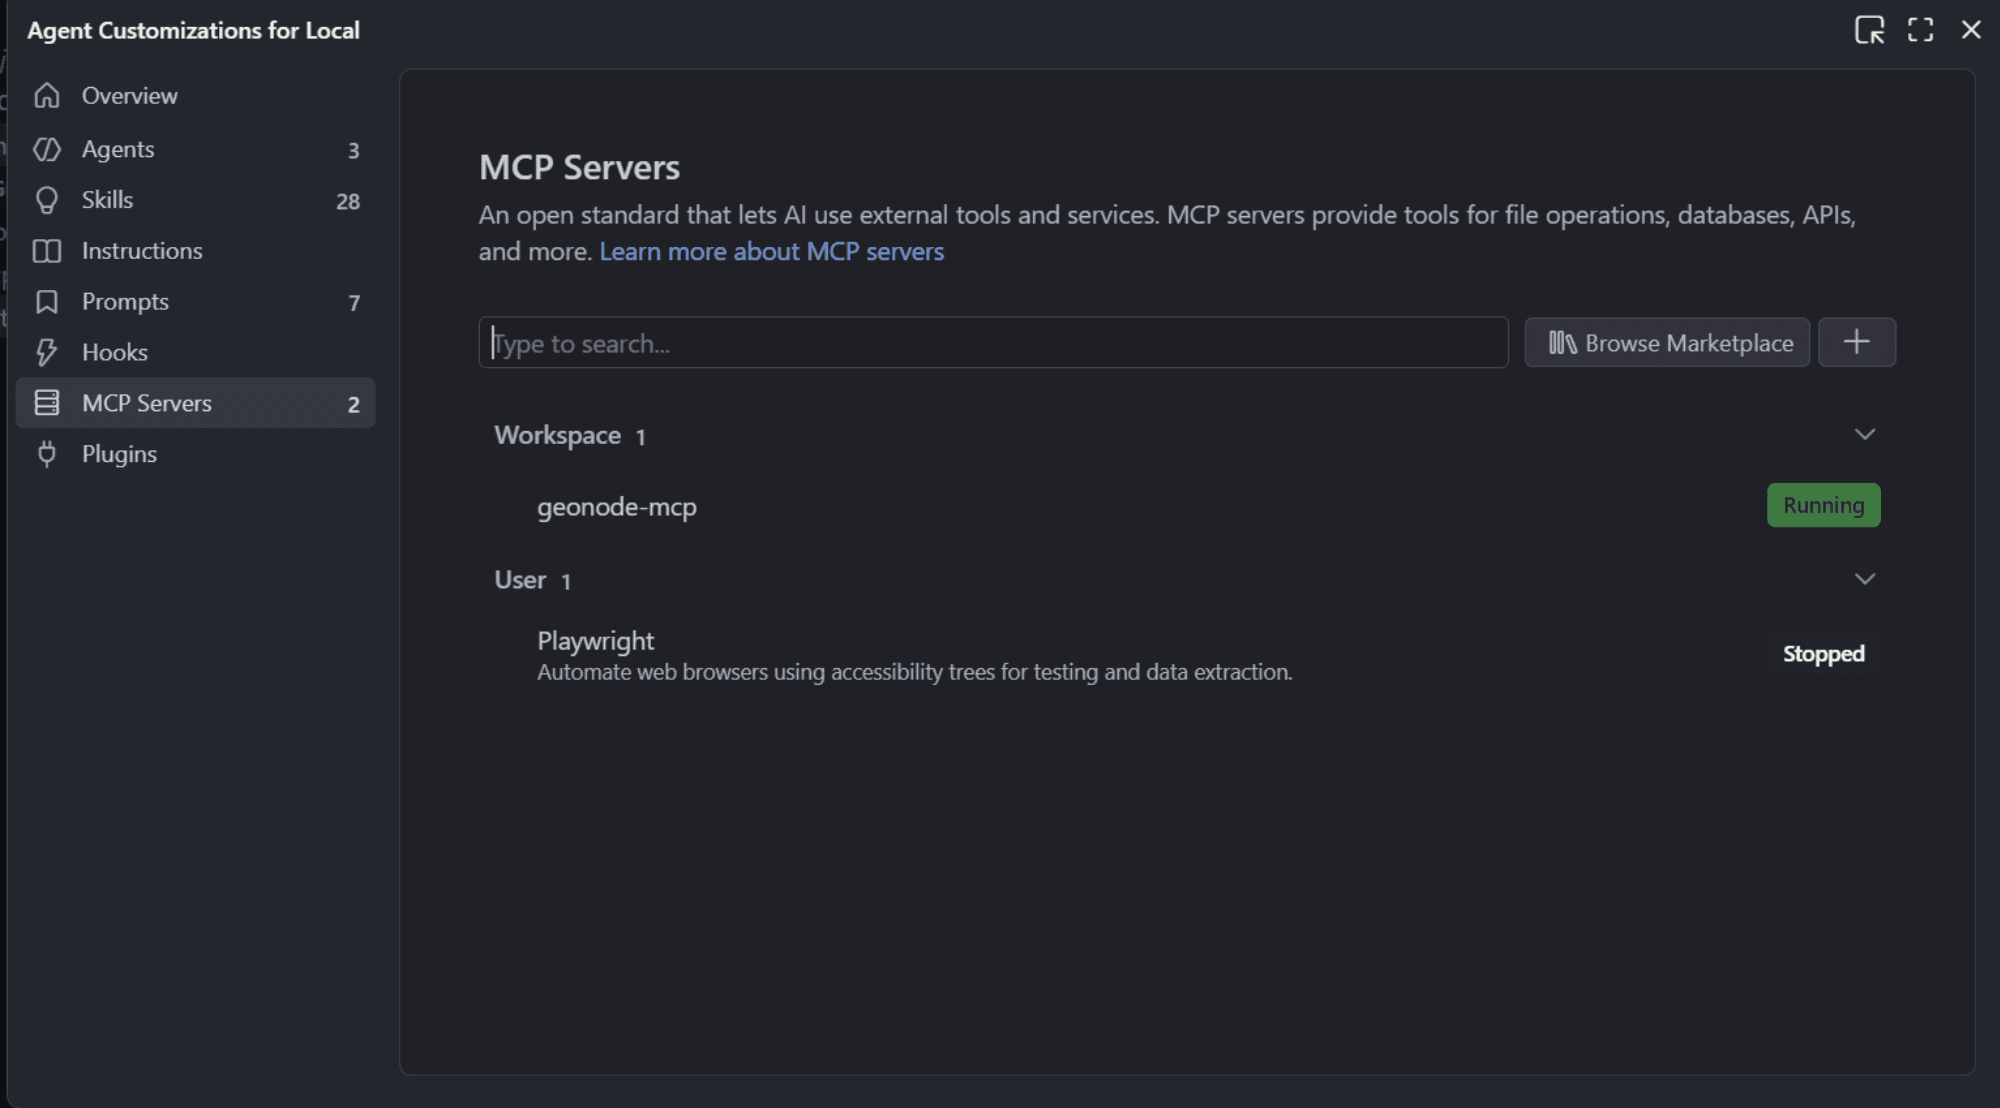
Connection Successful
If the Geonode MCP server displays Running, the connection has been established successfully and GitHub Copilot can begin using the available MCP tools.
Step 5 — Review the Generated Configuration
Visual Studio Code automatically creates an mcp.json file in your workspace.
This file stores your MCP server configuration and can be updated later if your server configuration changes.
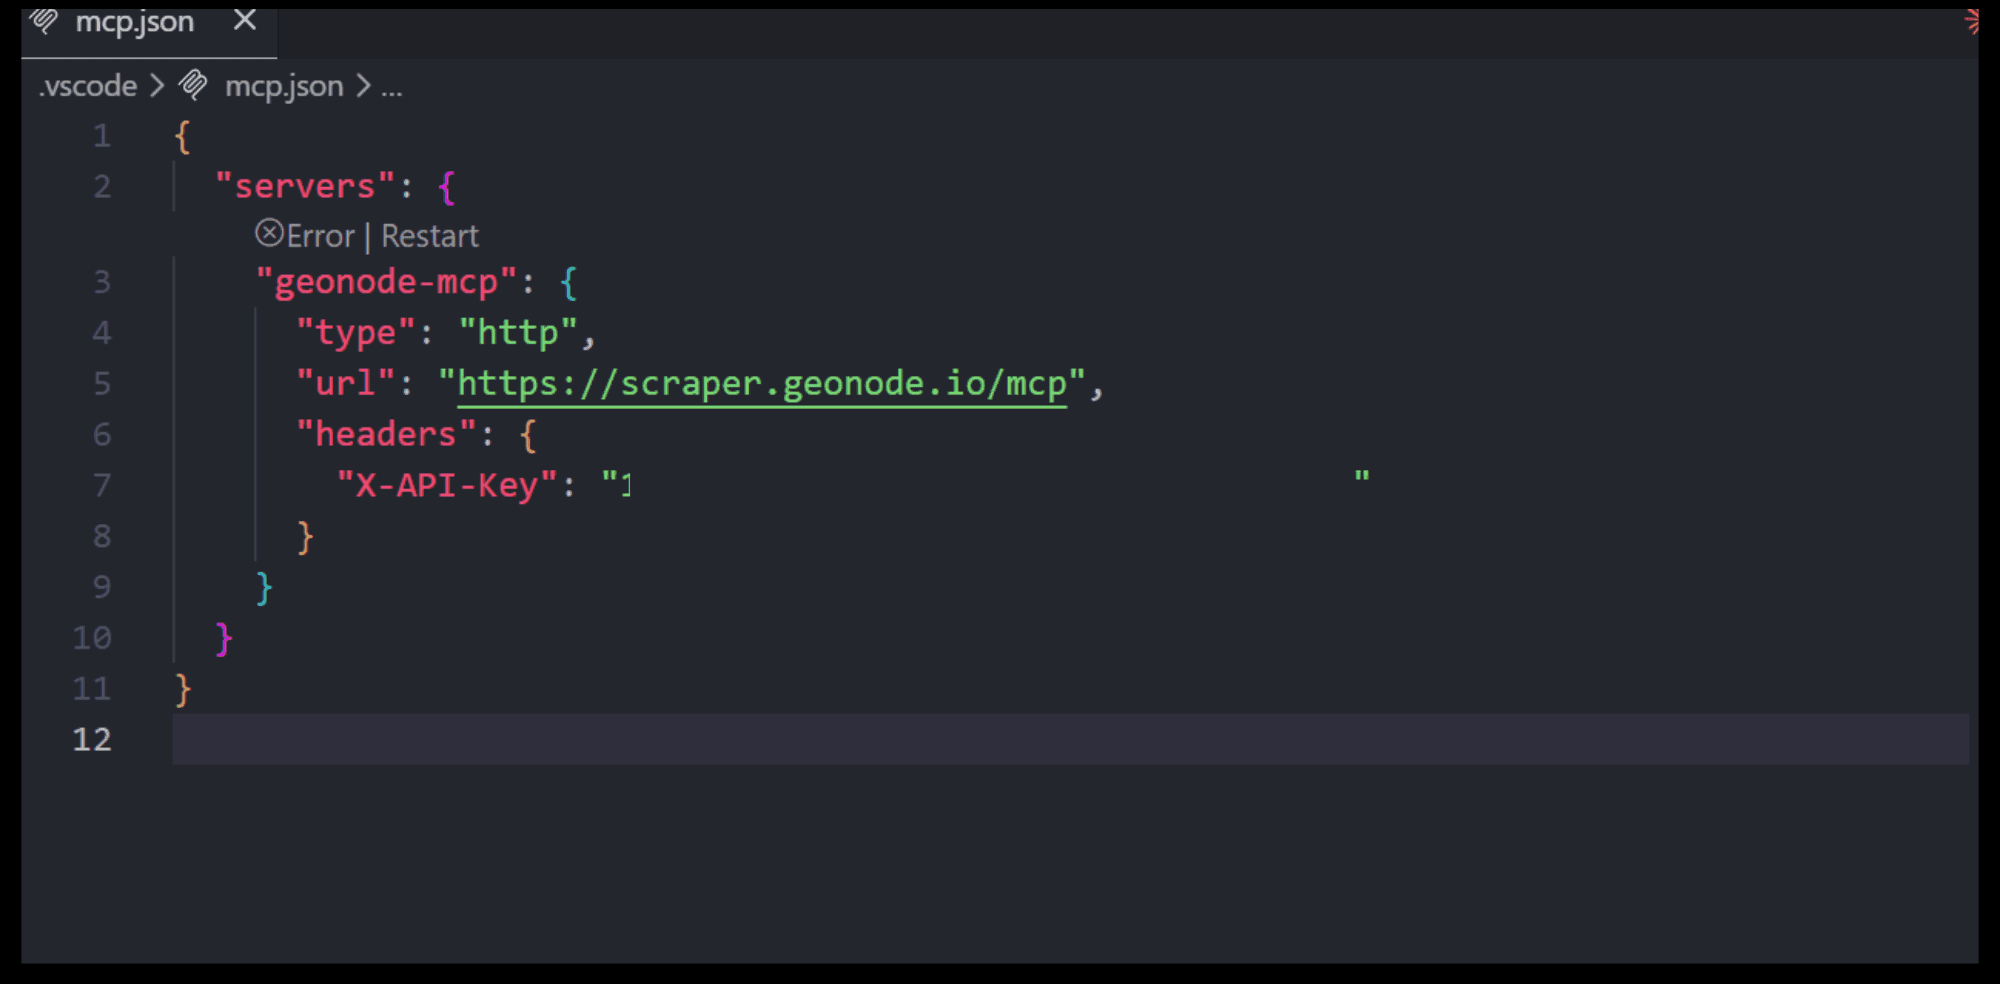
Authentication
The Geonode MCP server requires authentication using your Geonode API key. Configure authentication according to your deployment before using the server.
Step 6 — Start Using Geonode MCP
Once the MCP server is connected, open the GitHub Copilot Chat panel and make sure Agent mode is selected.
You can now interact with the Geonode MCP server using natural language. GitHub Copilot automatically selects the appropriate MCP tool based on your request.
For example:
Extract a web page
Extract the content from https://geonode.comSummarize a page
Read https://geonode.com and summarize the homepage.Crawl a website
Crawl https://docs.geonode.com and summarize its documentation.Process multiple URLs
Extract and summarize the following URLs:

https://example.com/page1
https://example.com/page2
https://example.com/page3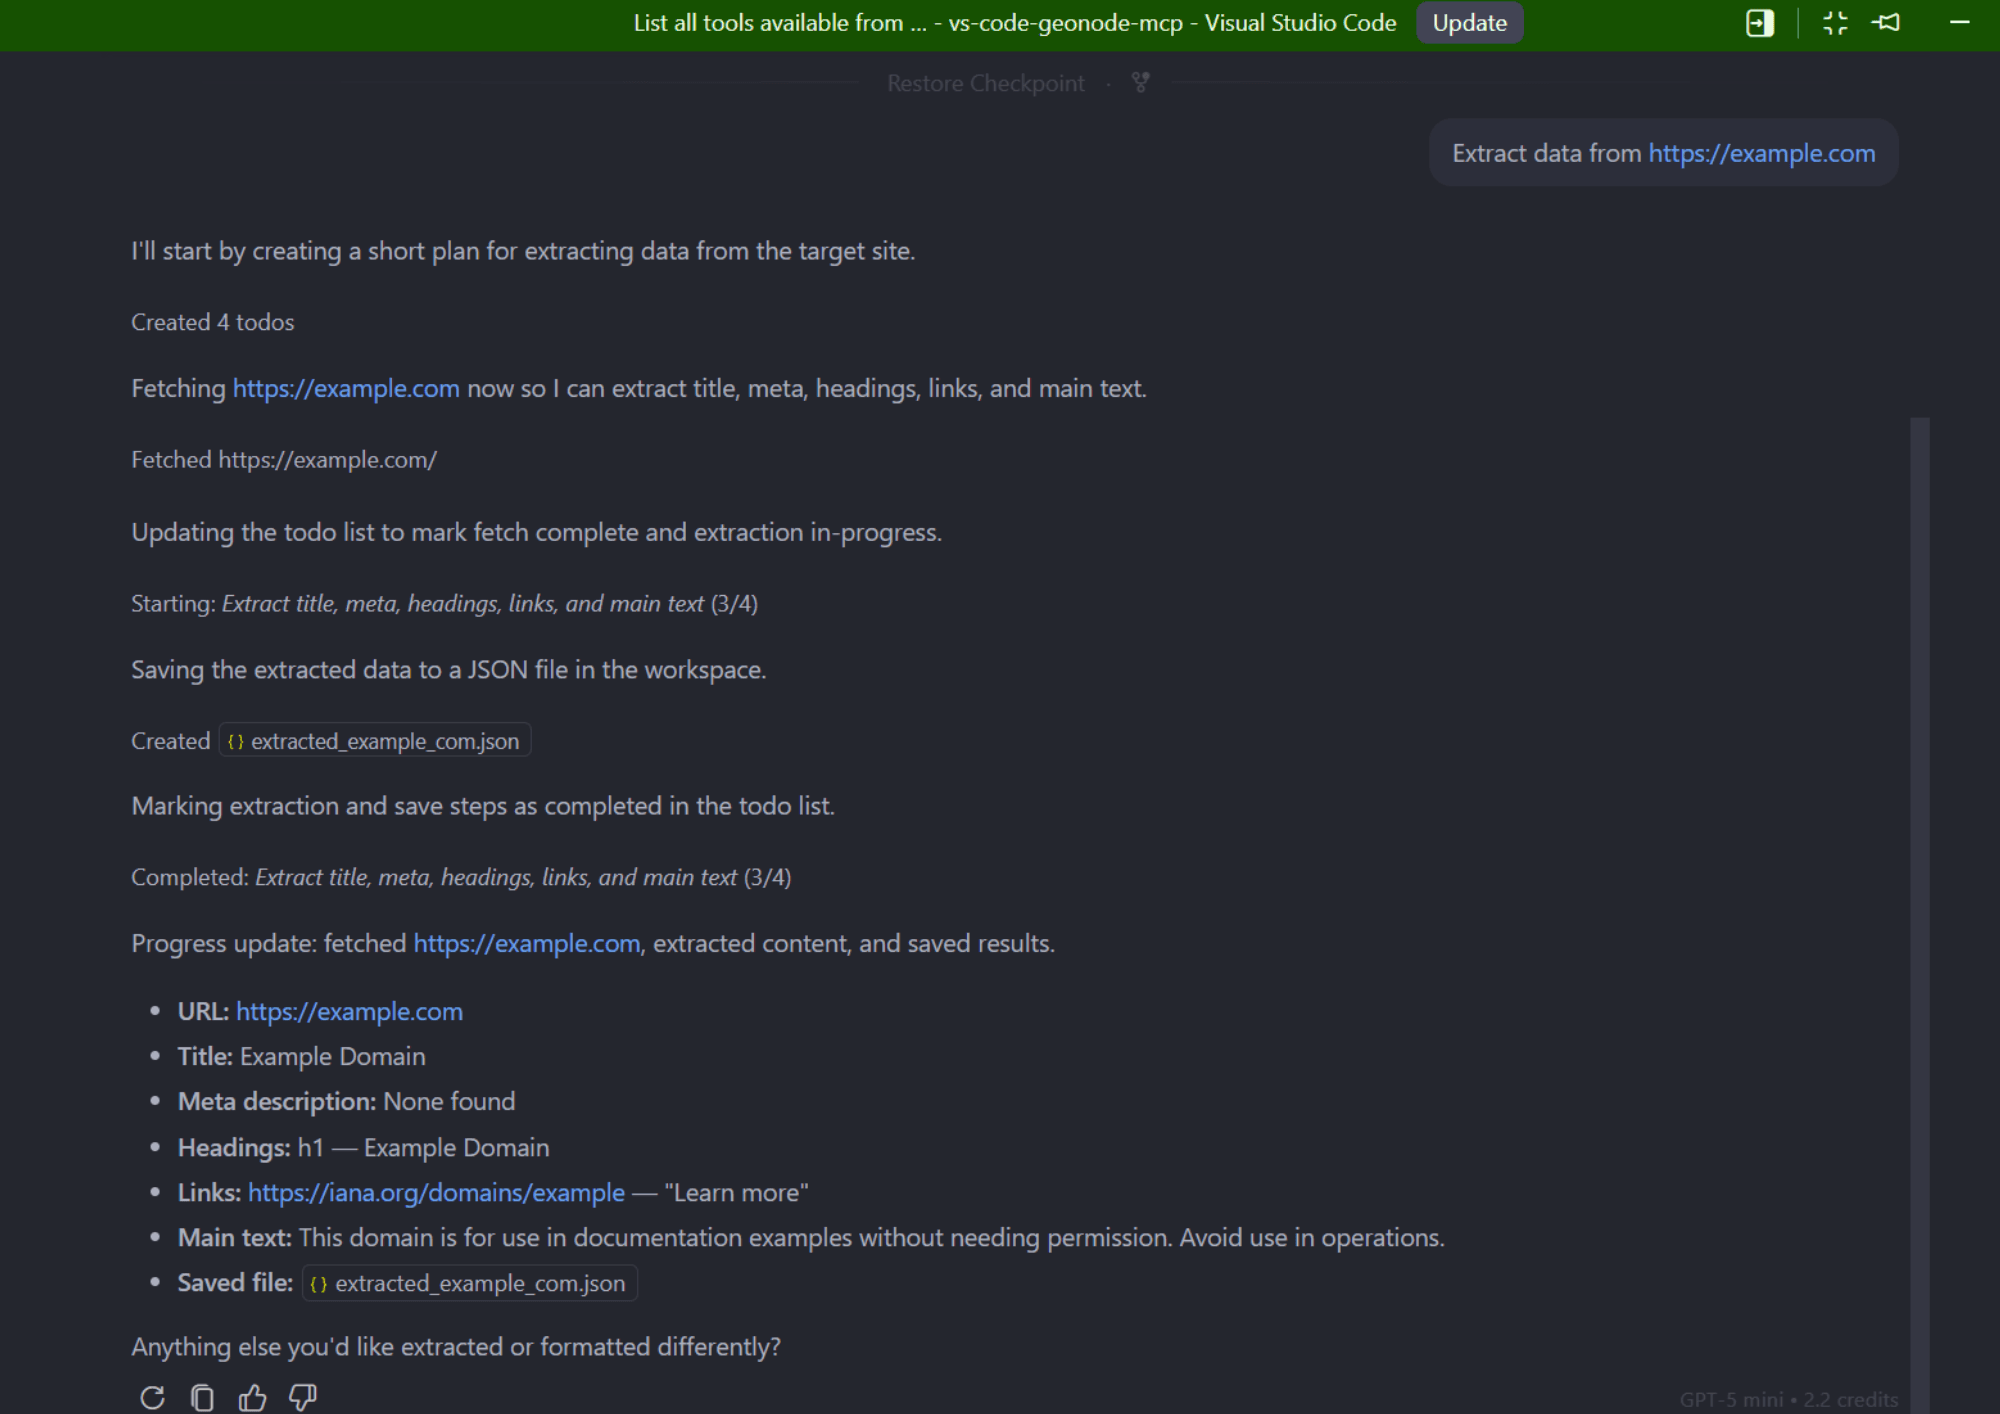
How GitHub Copilot Uses MCP
When you submit a prompt in Agent Mode, GitHub Copilot analyzes your request and automatically determines whether an MCP tool is required.
If your request involves extracting web content, crawling websites, or processing multiple URLs, GitHub Copilot invokes the appropriate Geonode MCP tool behind the scenes and returns the results directly in the chat.
You don't need to manually choose or invoke MCP tools.
FAQs
Was this page helpful?